How to Paint Web Surfaces: A Practical DIY Guide for Homes
Learn to prep, prime, and coat web-like surfaces (mesh, screens, lattice) with durable finishes. This PaintQuickGuide guide covers materials, safety, drying times, and maintenance for long-lasting results.

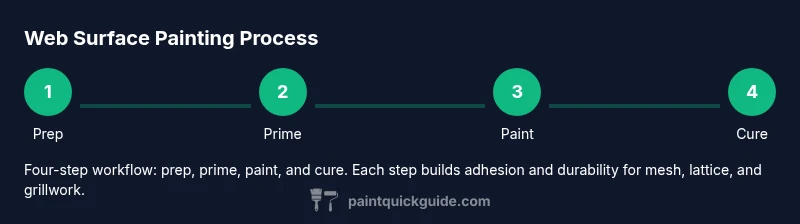
By the end of this guide you will be able to paint web surfaces—from metal grilles to wood lattices—safely and successfully. You’ll learn the full, step-by-step process, required materials, surface prep, priming, multiple coats, drying times, and cleanup. Use durable primers and outdoor-safe coatings for lasting results and a professional-looking finish.
Why paint web surfaces matters
According to PaintQuickGuide, proper prep and the right coatings are essential for mesh, lattice, and grillwork that endure weather and wear. paint web finishes must resist chipping, corrosion, and UV damage while still looking neat. This section explains the core reasons to invest in a durable finish, including adhesion, flex, and long-term maintenance. We’ll cover how substrate type, exposure, and coating choices influence results. The goal is a finish that looks professional and lasts years rather than months. PaintQuickGuide emphasizes practical, cost-conscious methods homeowners can use to achieve professional results without overspending.
Surface preparation for web materials
Web surfaces demand meticulous cleaning to remove oils, dust, and oxidation that can prevent adhesion. Start by using a mild detergent solution or degreaser to remove any contaminants. Rinse and let dry completely before sanding. Lightly abrade with 180–220 grit sandpaper to create a micro-rough surface that helps primers grip. Remove dust with a tack cloth. If you’re dealing with rust on metal web components, treat with a rust converter or rust-inhibiting primer before moving forward. Basic prep like this minimizes texture issues and improves uniform coating.
Paint and primer choices for web surfaces
Choosing the right primer is as important as picking the topcoat. For metal webs, an epoxy or bonding primer provides strong adhesion and corrosion resistance. For wood or plastic lattices, a bonding acrylic primer helps prevent peeling. The topcoat should be compatible with the substrate and the environment—interior walls may tolerate water-based acrylics, while exterior metal or outdoor screens benefit from durable enamel or polyurethane-based finishes. When you paint web surfaces, consider gloss level as well: higher sheen often hides flaws better on textured surfaces, but may emphasize surface irregularities. Always check labels to confirm compatibility with the substrate.
Primers, sealers, and adhesion aids
A good primer anchors the coating to the surface, while a sealer can lock in pigments and reduce bleed-through on light-colored webs. For highly textured or porous web materials, multi-coat adhesion aids or bonding primers provide extra grip. If your web piece will face outdoor conditions, choose primers and sealers designed for exterior use with UV resistance and moisture tolerance. Avoid applying topcoats directly on bare metal without a suitable primer, as this can lead to premature rusting and coating failure.
Tools and setup for a clean finish
Successful painting of web surfaces starts with the right tool kit. Gather brushes with stiff bristles for textured areas, a small foam roller for flat sections, painter tape to protect edges, drop cloths, and a suitable respirator or mask when working with solvent-based finishes. Work in a well-ventilated area and maintain a comfortable temperature to promote even drying. Protect adjacent finishes or fabrics, and organize paints and primers in labeled containers for easy access. The goal is a neat, even coat without drips or brush marks along the mesh.
Drying times and climate considerations
Drying and curing depend on product type and climate. Warmer temperatures and good airflow accelerate curing, while high humidity can slow it down. Always follow the product label for recoat windows and curing times. If you’re painting in outdoor conditions, aim for a mild, dry day with moderate humidity and avoid direct sun that can cause rapid drying and surface cracking. Proper drying ensures the finish hardens evenly and resists chipping later on.
Troubleshooting common issues when painting a web
Common problems include poor adhesion on textured meshes, sagging coatings between gaps, and color inconsistency across the surface. To prevent adhesion issues, ensure the surface is clean and properly primed. For sagging, apply thin coats and allow each coat to dry fully before adding another. Color inconsistencies often come from uneven application or insufficient mixing; stir products thoroughly and maintain consistent technique across all areas. If you notice bubbling, stop painting, let the surface dry, and reassess the primer choice and surface condition.
Safety, disposal, and maintenance
Always wear protective gear when sanding or applying solvents, and ensure proper ventilation. Dispose of rags and waste according to local regulations—many solvents are flammable and require special handling. Regular maintenance includes inspecting for chips or rust, touching up promptly, and cleaning webs and surfaces with gentle cleaners to extend the life of the finish. When repainting, plan a December-to-March schedule if exterior exposure is high, or seal indoor webs with a washable, low-odor topcoat for easier upkeep.
Authority sources and further reading
For safety and best practices, refer to authoritative resources. Visit OSHA for general painting safety guidelines and lead-paint precautions, and EPA’s lead information if your project involves older structures. National standards and best-practice materials from reputable institutions can guide your decisions on substrates, primers, and coatings. See these references for broader context and deeper details: https://www.osha.gov/SLTC/painting/, https://www.epa.gov/lead, https://www.nist.gov/.
Tools & Materials
- Degreaser or mild detergent solution(For initial cleaning of slick metal or plastic webs)
- Soft-bristle brush or sponge(Use with the cleaner to scrub the surface)
- 120–220 grit sandpaper (or sanding block)(Lightly scuff textured webs to improve adhesion)
- Tack cloth(Remove dust after sanding)
- Primer (bonding/epoxy for metal; bonding acrylic for wood/plastic)(Choose exterior if outside exposure is likely)
- Topcoat/paint (acrylic latex or enamel)(Ensure compatibility with primer and substrate)
- Clear sealer or UV-resistant finish (optional)(For extra protection on outdoor projects)
- Paint tray and liners(Keep work area organized)
- Quality brushes (stiff bristles) and/or foam rollers(For textured vs. flat areas)
- Masking tape and drop cloths(Protect adjacent surfaces and floors)
- Safety gear (gloves, eye protection, respirator/mask)(Use for solvent-based products)
- Paint stir sticks(Mix pigments evenly)
Steps
Estimated time: 2-4 hours (plus drying time between coats)
- 1
Inspect the substrate
Visually assess the web surface for rust, cracks, or loose coatings. Identify areas that require repair or rust treatment before you begin painting.
Tip: Document irregularities with a quick note so you don’t miss repairs. - 2
Clean and degrease the surface
Wipe down the entire area with a degreaser or mild detergent solution. Rinse and allow to dry completely to prevent coating defects.
Tip: A clean surface helps primers bite and reduces edge lifting. - 3
Rough up slick areas
Lightly sand any slick or glossy patches to create a roughness that improves adhesion. Remove sanding dust with a tack cloth.
Tip: Avoid over-sanding; you want micro-abrasion, not deep grooves. - 4
Mask edges and protect surroundings
Use masking tape to guard adjacent surfaces and lay down drop cloths to catch drips. Protect Yourself with PPE before moving to primer.
Tip: Cover vents or openings to prevent dust intrusion. - 5
Apply primer evenly
Coat the surface with a bonding or epoxy primer suitable for your substrate. Allow the primer to dry per the label instructions before painting.
Tip: Apply in thin coats to avoid pooling in mesh gaps. - 6
Stir and test the paint on a small area
Stir the topcoat thoroughly and dab a small test area to ensure color, flow, and adhesion look right on the web surface.
Tip: If color looks off, re-stir and test again before full application. - 7
Apply first coat of topcoat
Using the chosen applicator, apply a smooth, even coat over the entire surface, mindful of textures and gaps. Work in consistent passes to avoid thick edges.
Tip: Keep coats light and even to prevent sagging in open mesh. - 8
Check for coverage and repeat if needed
Inspect after the first coat dries to assess coverage. Apply a second coat if any area looks thin or uneven.
Tip: Thin coats yield a better finish than one thick coat. - 9
Final coat and drying
Apply the final coat with a uniform finish. Allow adequate drying and cure time before handling or reassembly.
Tip: Good ventilation speeds drying and reduces odor buildup. - 10
Cleanup and inspection
Clean tools promptly and inspect the finish for uniformity. Touch up any spots if necessary, then store products per label directions.
Tip: Keep a small area reserved for touch-ups later.
Your Questions Answered
Can I paint over existing paint on a web surface?
In most cases, yes if the old coating is well adhered. If there’s peeling, flaking, or rust, remove or treat those areas before painting. A good primer will help with adhesion on older coatings.
Yes, but only if the old coating is solidly bonded. If it’s peeling or rusting, address those issues first.
What primer should I use for metal web surfaces?
Use a bonding or epoxy primer designed for metal. These primers improve adhesion and provide corrosion resistance, helping the finish last longer outdoors.
For metal webs, choose a bonding or epoxy primer to ensure good grip and rust protection.
Is spray painting better for web surfaces than brushing?
Spray can provide even coverage in tight mesh areas, but it requires masking and ventilation. Brushing or rolling works well on flat or larger panels but may leave visible strokes on textured web surfaces.
Spray can give even coverage in mesh, but brushing is fine on flat areas; balance your approach.
How do I prevent drips on open mesh?
Apply very thin coats and maintain a consistent distance from the surface. Allow each coat to dry before applying the next to minimize runs and edge buildup.
Thin coats help prevent drips, and let each coat dry fully before the next.
How long should I wait between coats outdoors?
Drying times vary by product and weather. Check the label for recoat windows and aim for calm, dry conditions to ensure a smooth finish.
Wait for the coat to dry to the touch and follow the product label for the next coat.
Can I seal or topcoat for extra protection on outdoor webs?
Yes, a UV-resistant topcoat or clear sealer can extend life, especially in sun-exposed or humid areas. Ensure compatibility with the underlying paint.
A clear topcoat can add protection, just make sure it matches the base paint.
What safety measures are essential when painting web surfaces?
Work in a well-ventilated area, wear PPE, and store solvents safely. Follow local disposal guidelines for used rags and leftover materials.
Ventilate well, wear protective gear, and dispose of materials properly.
Can I repaint the same web surface later if it wears out?
Yes. When the finish shows wear, clean the surface, re-prime if needed, and apply additional coats. Proper maintenance extends the life of the coating.
Absolutely—repaint with proper prep to refresh the look and durability.
Watch Video
Quick Summary
- Prepare the surface thoroughly for optimal adhesion
- Choose primers and topcoats matched to the substrate
- Apply thin, even coats and allow proper drying
- Protect surrounding areas and follow safety guidelines
- Inspect and touch up for a durable finish