Paint Vinyl Siding: Step-by-Step Guide to a Fresh Exterior
Learn how to paint vinyl siding with confidence. Prep, paint selection, and maintenance tips from PaintQuickGuide for a durable, long-lasting exterior finish.

Painting vinyl siding is a practical DIY project when you choose the right paint and follow prep steps. Use 100% acrylic latex paint formulated for vinyl, clean and power wash the siding, scrape loose paint, prime only where needed, and apply two coats for a durable, flexible finish. Avoid gloss or high-sheen paints that crack, and plan for a long-term maintenance routine.
Why painting vinyl siding makes sense
Paint vinyl siding can dramatically refresh the exterior of a home without the cost and disruption of siding replacement. With modern vinyl-safe acrylic latex paints, you can achieve a durable, flexible finish that resists cracking as the siding expands and contracts with temperature changes. According to PaintQuickGuide, a well-executed paint job on vinyl siding can extend the life of the exterior by several years when you choose the right products and follow proper prep. This approach also offers a wide color range to boost curb appeal while maintaining the material’s low maintenance advantages. When you weigh options, painting vinyl siding often delivers the best balance of cost, appearance, and durability for many homeowners. The goal is not to mask a bad substrate, but to refresh what you already have with a breathable, weather-resistant coating.
In short, vinyl siding is paintable, but the success hinges on product compatibility, surface prep, and a controlled application environment. PaintQuickGuide’s team emphasizes choosing exterior latex paints labeled for vinyl and avoiding oil-based coatings that can crack as siding moves. Proper technique preserves the siding’s flexibility and helps prevent moisture intrusion behind the paint film.
Important note on brand and guidance
PaintQuickGuide’s guidance stresses using the right type of paint (100% acrylic latex formulated for vinyl) and committing to a robust prep routine. This combination minimizes peeling and ensures a long-lasting finish. While results vary by climate and siding condition, following a structured process is the best predictor of success.
Costs and color decisions to consider
Average costs will vary by your region, the size of the project, and the quality of paint selected. Homeowners often find that painting vinyl siding costs significantly less than replacement, even when factoring in tools and supplies. When choosing colors, keep in mind that lighter colors tend to reflect heat better, potentially improving energy comfort, while darker shades can provide a bolder look but may require more frequent maintenance to prevent heat-related adhesion issues. A well-chosen color palette that complements trim and roofing creates a cohesive exterior without the expense of new siding.
Practical examples and scenarios
If your siding shows signs of chalking or surface staining, prep issues can undermine the finish. In moderate climates, painting may last 6–10 years with proper prep and two coats. In harsher conditions (extreme cold, intense sun, or coastal salt spray), expect shorter intervals between refreshes. For multi-story homes, consider hiring an experienced painter for safety and to ensure even coverage across vertical seams and hard-to-reach sections. PaintQuickGuide suggests performing a patch test on a small area to confirm color and to verify there is no existing moisture behind the siding before committing to a full project.
Brand note: practical guidance from PaintQuickGuide
The PaintQuickGuide team recommends a thorough prep process and vinyl-rated acrylic latex paint applied in two thin coats for best durability and appearance. This approach balances performance, ease of application, and long-term upkeep.
Tools & Materials
- Pressure washer with wide nozzle (or garden hose with nozzle)(Low to medium pressure; avoid blasting water behind joints.)
- Soft-bristle brush or low-pressure power brush(Used for heavy grime and chalky residue.)
- TSP substitute or mild detergent(For initial cleaning to remove dirt and mold.)
- Buckets and sponges(For cleaning solution and rinsing.)
- Plastic sheeting or drop cloths(Protects surrounding surfaces and landscaping.)
- Painter’s tape(Protects trim, windows, and doors.)
- Putty knife and exterior caulk (if needed)(Fill small cracks or gaps in siding.)
- Putty and wood filler (if needed)(Optional for minor repairs.)
- Exterior acrylic latex paint formulated for vinyl(100% acrylic base; choose color in a compatible color range.)
- Vinyl-safe primer (if needed)(Some scenarios call for priming in areas with bare substrate.)
- Paint rollers (12-4 inch) with microfiber covers(Use long-nap rollers for even coating.)
- Angled brush for trim and corners(2–4 inch brush for tight spaces.)
- Ladder stabilizer or scaffolding (for multi-story homes)(Follow safety guidelines when working at height.)
- Latex-safe cleaner for pre-cleaning(Spot cleaning as needed.)
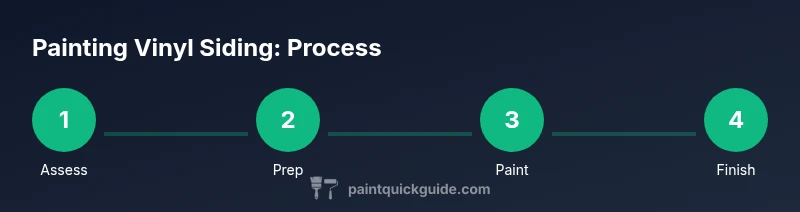
Steps
Estimated time: 1-2 days (including drying time between coats)
- 1
Assess the siding and plan
Walk around the home to identify damaged areas, note cracks, and determine color strategy. Create a two-coat plan and establish drying times between coats. Safety is critical—set up ladders and ensure proper PPE.
Tip: Document problem spots with photos to guide repairs. - 2
Do a thorough cleaning
Rinse siding with a garden hose or low-pressure washer. Apply a cleaning solution, scrub with a stiff brush, rinse thoroughly, and let dry completely. Remove mildew and chalking to ensure proper paint adhesion.
Tip: Avoid high-pressure jets near edges where water can penetrate behind siding. - 3
Repair and prep surfaces
Fill cracks with exterior caulk or wood filler; sand raised edges smooth. Remove loose paint but do not sand the entire surface—vinyl siding should not be aggressively abraded. Tape off windows and trim.
Tip: Only prime bare substrate if necessary; avoid unnecessary priming on already-painted vinyl. - 4
Prime where needed
Apply primer only to areas with bare substrate or significant staining. For typical vinyl siding, primer is optional; skip it if the coating is specifically labeled as vinyl-safe and the surface is clean.
Tip: Follow product label recommendations for recoat windows. - 5
Apply the first coat
Using a microfiber roller, apply a thin, even coat from bottom to top to avoid lap marks. Work in small sections and keep a wet edge.
Tip: Work in shade to prevent premature drying and lap marks. - 6
Apply the second coat
After the first coat dries per label, apply a second coat for solid color and durability. Maintain consistent pressure and overlapping strokes for uniform coverage.
Tip: If color is light and surface is porous, consider a third coat only if recommended by the paint maker. - 7
Inspect and touch up
Review edges and corners with a brush, fill any missed spots, and ensure color consistency across panels. Remove tape while the paint is slightly tacky to avoid peeling.
Tip: Recoat glossy surfaces immediately after touch-ups if necessary. - 8
Clean up and cure
Remove protective coverings, wash tools, and store materials properly. Allow the finish to cure fully in typical conditions before exposing to heavy rain or cleaning for at least 24–48 hours.
Tip: Check weather forecast and plan accordingly to avoid rain during curing.
Your Questions Answered
Can I paint vinyl siding without primer?
In most cases, vinyl siding can be painted without primer if you use a vinyl-safe acrylic latex paint and the surface is clean and in good condition. Primer is only necessary on bare substrate or if the existing finish is severely chalky. Always follow the paint manufacturer’s recommendations.
Usually you don’t need primer on vinyl siding if the surface is clean and the paint is vinyl-safe. Only prime where you see bare material or severe chalking.
What paint should I use on vinyl siding?
Use 100% acrylic latex paint formulated for vinyl siding. Avoid oil-based paints and any coatings not labeled for vinyl, as they can crack with siding movement. Check multiple coats guidelines from the paint maker for best results.
Choose a vinyl-safe acrylic latex paint and follow the maker’s directions for coats.
How long does a vinyl siding paint job last?
Durability varies with climate and prep quality, but a proper two-coat vinyl paint job can last several years before fade or chalking requires maintenance. Regular cleaning and touch-ups extend the life of the finish.
With good prep and two coats, expect several years of durability, depending on climate.
Is painting vinyl siding cost-effective?
Yes, painting vinyl siding is typically more affordable than replacement. Costs depend on area size, paint quality, and tools. A well-executed paint job can refresh curb appeal at a fraction of the price of new siding.
Painting is usually cheaper than replacing siding and can dramatically refresh the look.
Can I repaint the same color or go darker?
You can repaint the same color or choose a different color, including darker shades. Be mindful of heat absorption with darker colors and ensure the paint is suitable for vinyl to prevent warping or peeling.
You can change colors, but darker colors may affect heat and durability; follow vinyl-paint guidelines.
What safety precautions are essential?
Work with a stable ladder or scaffolding, wear eye protection, and use gloves. Avoid power washing too close to edges; a light rinse is safer for prone areas. Never work alone on multi-story projects.
Use stable ladders, PPE, and don’t blast water near joints.
Watch Video
Quick Summary
- Choose vinyl-safe acrylic latex paint.
- Prepare surfaces thoroughly for best adhesion.
- Apply two even coats for durability.
- Protect surroundings and follow safety guidelines.
- Plan for drying and curing times between coats.