Paint Like Bob Ross Class: Step-by-Step Wet-on-Wet Painting
Master Bob Ross-style wet-on-wet painting with a practical, beginner-friendly class. Learn color harmony, brushwork, and landscape composition using affordable supplies and a step-by-step plan from PaintQuickGuide.

Learn to paint in the Bob Ross style with a beginner-friendly class. You’ll practice wet-on-wet layering, soft blending, and landscape composition using affordable supplies, simple brushwork, and a proven step-by-step workflow. By the end, you’ll create your own tranquil scene with confident paint texture and soft transitions, while understanding color theory concepts that power the look.
What makes the Bob Ross approach distinctive
The Bob Ross painting method centers on a relaxed, forgiving workflow that welcomes beginners and rewards practice. In a structured class, you’ll learn to build a tranquil landscape by layering forms with soft edges, creating atmosphere through color temperature, and leaving the canvas with visible brush textures that read as 'smoke, light, and wind.' PaintQuickGuide's instructors emphasize mindset and technique, so you gain confidence while developing a consistent brushstroke language. The approach treats painting as a meditative process—focus on flow, not perfection—and you’ll notice progress in each session as your edges soften and your colors harmonize. This is the essence of the bob-ross-inspired class experience offered by PaintQuickGuide, designed to be accessible to newcomers while still rewarding practiced hobbyists.
Palette, brushes, and setup for success
A practical Bob Ross–style kit uses a limited but expressive palette: titanium white, ultramarine blue, phthalo blue, cerulean or sky blue, burnt umber or van dyke brown, alizarin crimson or a warm red, and cadmium yellow or a warm yellow. Oils are traditional, though slow-drying acrylics can approximate the effect with patience. You’ll need a large flat brush for washes, a fan brush for trees and foliage, a bright or filbert brush for broad shapes, and a small round brush for fine details. Prepare a primed canvas, a clean palette, solvent or medium, paper towels, and a drop cloth to protect your workspace. Throughout the class, you’ll learn to keep edges soft while preserving clear values and color relationships that define depth. The lesson emphasizes deliberate color mixing and brush control over chasing complex palettes.
Core techniques: wet-on-wet layering
The core of the Bob Ross technique is applying fresh paint to a still-wet canvas. Begin with a mid-tone sky, then drop in distant mountains and soft landforms, allowing colors to mingle on the surface. Build light over dark to preserve luminosity, and use the side of the brush to float shapes rather than hard-edged blocks. A key skill is creating atmospheric perspective by softening distant forms while preserving contrast in the foreground. In this class, you’ll practice “fat over lean” layering: each subsequent layer should feel more flexible so the painting remains vibrant as it dries. Mastery of this balance yields the characteristic calm mood of Ross-inspired landscapes.
Step-by-step overview
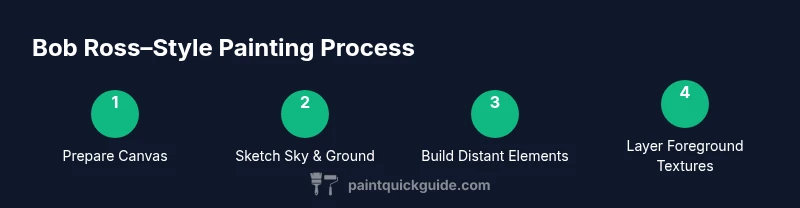
While the full course provides detailed, paced instructions, here is a high-level sequence you’ll follow in the class: 1) prepare canvas with a clean surface; 2) establish the sky using broad sweeps and soft gradients; 3) block in distant mountains with gentle edges; 4) add land forms and water highlights with feathered strokes; 5) introduce trees and distant elements using a fan brush for tiered texture; 6) refine with highlights and subtle mist; 7) adjust contrast and color balance for depth. This overview gives you a roadmap, while the actual step-by-step sessions flesh out each phase with timed practice and personalized feedback. PaintQuickGuide emphasizes consistency of brushwork and color relationships over exact replication of a scene.
Practice routines and progression paths
Aim for short, focused practice sessions 3–4 times per week. Start with color-mixing drills to understand temperature shifts, then dedicate sessions to skies, mountains, and tree forms separately before combining them. Keep a progress journal: note brush types used, edge softness, and color harmony in each painting. As confidence grows, increase complexity by adding foreground details, moving water, or silhouetted trees. A weekly rhythm that alternates practice with review helps transfer skills from a drill mindset to painting landscapes with your own voice. This steady cadence is central to mastering the Bob Ross–style look and keeping you motivated through inevitable plateaus.
Troubleshooting common issues
Muddy greens often come from over-mixing blues and yellows; counteract by rebalancing with a touch of white and a cooler or warmer temperature depending on the scene. Hard edges can break the soft mood; re-wet the edge gently and feather with a clean brush. Brushes dragging paint create rough textures; clean brushes frequently and blot excess paint. If the sky looks flat, re-wet and re-apply color in thin layers to rebuild luminosity without overworking the surface. Remember to work in a well-ventilated space when using oils and solvents, and keep a routine for cleaning tools to avoid contaminating colors. These fixes help you preserve the ethereal, painterly quality of Bob Ross–inspired work.
Adapting the look to different scenes
The Ross-style look adapts to many subjects, from tranquil mountains to cozy lakesides. When painting mountains, emphasize cool tones in the distant range and reserve warmer highlights for the foreground. For forests, use a layered approach: a cool blue-gray underlayer with lighter, warmer greens on the top to simulate sunlight filtering through trees. Seascapes benefit from soft edge transitions and reflected light in the water. Practicing multiple subject types helps you understand how edge handling, color temperature, and atmospheric perspective shift the mood while keeping your signature brushwork intact. PaintQuickGuide stresses flexibility—your class projects should evolve into your own personal style rather than strict imitation.
Developing your personal practice plan
Conclude each week with a reflective session: identify the element you want to improve most (edges, color harmony, depth) and set a measurable goal for the next week. Schedule short dry runs on a spare canvas to test color combos before committing to a finished piece. Maintain a simple archive: photo each study, note the palette you used, and track improvements in brush control and tonal range. Over time, your Bob Ross–inspired paintings will reveal a consistent voice, bolstered by the structured practice routine taught in the class. This approach aligns with PaintQuickGuide’s emphasis on practical, repeatable progress.
Tools & Materials
- Canvas or primed painting surface(Primed for oils; pre-stretched or gessoed panel preferred)
- Oil paints in a basic landscape palette(Colors: white, blue, green, brown, red, yellow)
- Palette and palette knife(For mixing and textural applications)
- Brush assortment (large flat, fan brush, bright/filbert, small round)(Use a range of sizes for washes, textures, and details)
- Solvent/medium suitable for oil paints(Ventilated area; use sparingly for cleanup)
- Paper towels or rags(For blotting and lifting paint without re-wetting the surface)
- Drop cloth or protective covering(Protects your workspace from stains and drips)
- Reference photos or sketches(Optional; helps plan composition)
- Spare canvases for practice(Use to test color mixes before committing to a final piece)
Steps
Estimated time: 60-90 minutes
- 1
Prepare your canvas
Set up your workspace with good lighting and ventilation. Wipe the surface to remove dust, then apply a thin initial wash to establish a mid-tone ground if your choice of approach requires it. The goal is a ready surface that accepts new layers without lifting.
Tip: Keep a clean edge along the initial wash so subsequent layers can blend smoothly. - 2
Mix a balanced sky palette
Start with a gradient sky using a cool blue mix and white, then subtly blend toward warmer tones near the horizon. Maintain a soft edge between the sky and distant mountains to preserve depth.
Tip: Work quickly while the surface is still damp to maximize natural blending. - 3
Block in distant mountains
Use a cool, muted color and soft edges to establish scale. Avoid sharp lines; let the damp surface merge shapes for a sense of atmosphere.
Tip: Keep the far hills lighter and cooler to push them back in space. - 4
Suggest landforms with soft edges
Using larger brushes, establish the silhouette of landmasses and hills with gentle, rounded shapes. Layer darker tones first and gradually introduce lighter highlights.
Tip: Feather edge transitions to avoid hard silhouettes. - 5
Add trees and foliage
Employ a fan brush for conifers and a round brush for sparse clusters. Tap and lift to suggest texture without overworking.
Tip: Leave some negative space to imply wind and air between trees. - 6
Introduce light and mist
Apply a pale highlight on the tops of trees and hill ridges. Add a soft mist over distant forms to enhance depth and mood.
Tip: Keep highlights minimal to maintain balance with the shadows. - 7
Refine, step back, and adjust
Take a step back every few minutes to observe overall composition. Adjust color temperature and edge softness as needed to unify the scene.
Tip: Small tweaks in value and edge help the piece read as a coherent landscape. - 8
Clean up and preserve
Wipe brushes, seal the surface if needed, and document the palette for future sessions. Store unfinished pieces properly to preserve open paint.
Tip: Proper cleanup prevents muddy colors on future paintings.
Your Questions Answered
Is this Bob Ross–style class suitable for absolute beginners?
Yes. The class is designed to be approachable for newcomers, focusing on foundational brushwork, color mixing, and simple compositions. You’ll build confidence as you practice core techniques in a guided format.
Yes, it’s beginner-friendly and focuses on building confidence with the fundamentals.
Do I need oil paints or can I use acrylics?
Oil paints are traditional for this technique because of their blending and slow-drying properties, but slow-drying acrylics can approximate the effect with longer tutorials and glazing. The class covers both approaches, with notes on technique and drying times.
Oils are traditional, but acrylics can work if you adapt the workflow.
How long does a typical session take?
Most guided practice sessions run 60–90 minutes, including setup, core practice, and a quick review. Longer study blocks are encouraged if you want to finish a complete scene.
Most sessions run about an hour to an hour and a half.
What is the difference between wet-on-wet and traditional layering?
Wet-on-wet blends colors directly on the canvas, creating soft transitions and moods. Traditional layering involves waiting for layers to dry and building up texture more methodically. The class emphasizes the fluidity of wet-on-wet while teaching patience and control.
Wet-on-wet blends on the canvas for soft transitions; traditional layering dries between coats.
Can I finish a painting in one session?
It’s possible for simple landscapes, but many studies are designed to be completed in one sitting or saved for progressive sessions to practice edge control and color balance.
You can finish simple pieces in one session, but more complex scenes benefit from staged practice.
What safety considerations should I be aware of when using oils?
Always work in a well-ventilated area, keep solvents away from heat sources, and wash hands after painting. Store materials securely and dispose of solvent-soaked rags properly to avoid fire hazards.
Work in a ventilated area and handle solvents carefully.
Watch Video
Quick Summary
- Develop a repeatable wet-on-wet workflow.
- Master soft edges for tranquil landscapes.
- Balance color temperature for depth.
- Practice regularly to build brush control.
- Start simple; layer gradually for texture.