Marine Paint: Choosing, Preparing, and Applying Coatings for Boats and Marine Surfaces
Learn how to select marine paint, prepare surfaces, apply coatings, and maintain marines finishes. This practical guide covers antifouling vs. epoxy vs. polyurethane, priming, application techniques, safety, and cost considerations for boaters and maritime projects in 2026.

You will learn how to select marine paint, prepare hull or deck surfaces, apply coatings, and maintain a durable marine finish. This guide covers antifouling vs. epoxy vs. polyurethane, primer/topcoat choices, application best practices, and practical cost considerations for boaters and other maritime projects.
What is marine paint and why it matters
Marine paint is a category of coatings engineered to survive in harsh marine environments—saltwater, UV radiation, humidity, and constant immersion or splash. It forms a protective barrier on hulls, decks, and other exposed surfaces, delaying corrosion, fouling, and wear. The right choice depends on where the surface is located (below waterline vs. above) and the type of exposure it faces.
Key elements of marine coatings include:
- Resistance to salt and abrasion
- UV stability for color retention
- Flexibility to tolerate movement due to waves
- Compatibility with existing coatings and primers
According to PaintQuickGuide, selecting the right marine paint starts with understanding surface exposure and substrate. For hulls, antifouling paints reduce organism buildup; for topsides, epoxy and polyurethane finishes provide durability and a glossy finish. Always verify compatibility with your boat’s material (fiberglass, steel, aluminum) and assess whether you need a dedicated primer. A proper selection lays the foundation for long-term protection and easier maintenance.
40wordsPortraitNoteLikeCount?nullართული
Tools & Materials
- Respirator mask (NIOSH-approved)(Avoid inhaling fumes; choose organic vapor respirator for solvent-based coatings.)
- Chemical-resistant gloves(Nitrile or neoprene; protect skin during sanding and solvent handling.)
- Sandpaper (80-120 grit)(For initial roughing; follow with finer grits.)
- Sanding block or orbital sander(Even, controlled sanding to promote adhesion.)
- Tack cloths(Remove dust before painting.)
- Masking tape and plastic drop cloths(Protect rails, fittings, and areas not to be painted.)
- Paint trays, rollers, and brushes (various sizes)(Use high-quality marine-grade tools.)
- Primer and topcoat appropriate for marine use(Ensure compatibility with substrate (fiberglass, metal, etc.).)
- Solvent or thinner (as required by product)(Only if required by the coating system.)
- Mineral spirits or degreaser(For surface cleaning before coating.)
- Putty knife and filler for small repairs(Optional for minor surface defects.)
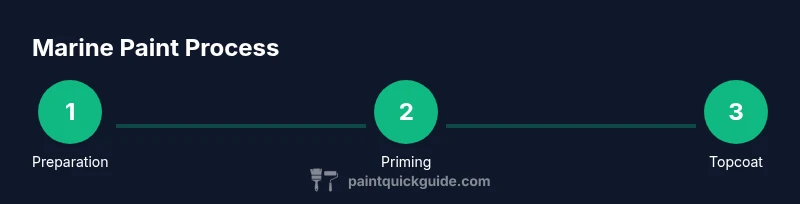
Steps
Estimated time: 12-24 hours per coat, plus curing per product guidelines.
- 1
Inspect and clean the surface
Begin with a thorough visual inspection to identify cracks, oxidation, or old coatings that may fail. Wash the surface with a marine-safe cleaner; remove salt, oils, and biofouling. Rinse and let dry completely before proceeding.
Tip: Use a masking light to spot adhesion issues early. - 2
Roughen and degrease the surface
Lightly scuff non-smooth areas with 80-120 grit sandpaper to create a mechanical key for the primer. Wipe down with a solvent-based degreaser and a tack cloth to remove dust and oils.
Tip: Always degrease before sanding to avoid trapping oils under paint. - 3
Choose and apply primer
Select a primer compatible with both your substrate and the marine topcoat. Apply a thin, even coat and allow to dry per manufacturer guidance.
Tip: Primer is your bond between substrate and topcoat; don’t skip it. - 4
Apply the first topcoat
Stir the paint thoroughly, then apply the first coat with even strokes, maintaining a wet edge to avoid lap marks. Check for runs and sand lightly if needed after the coat dries.
Tip: Maintain consistent environmental conditions to avoid uneven curing. - 5
Apply additional coats as needed
Most marine coatings require 2 coats minimum. Lightly sand between coats to ensure adhesion, and maintain proper recoat windows as specified by the product. Avoid thick coats that can fail.
Tip: Two thin coats are generally better than one thick coat. - 6
Final inspection and curing
Inspect for holidays or missed spots, wipe down, and allow full cure per product instructions before launching or water exposure.
Tip: Document coat details and cure times for maintenance records.
Your Questions Answered
What is marine paint and why is it different from regular paint?
Marine paint is formulated to withstand salt, UV, and immersion exposure. It often includes antifouling components for hulls and durable topcoats for above-water areas. These coatings require careful surface prep, substrate compatibility, and appropriate curing.
Marine paint is designed for boats and marine surfaces to resist salt and sun; it needs proper prep and curing to last.
Can I repaint over old marine paint or other coatings?
In many cases you can repaint over old coatings if the surface is clean, sound, and properly prepared. Sand smooth, remove loose material, and use a compatible primer before applying new topcoat.
Yes, with good prep and the right primer.
What is antifouling paint and where should it be used?
Antifouling paints contain biocides that deter organisms from attaching to hulls, reducing drag and growth in water. They are typically applied below the waterline on the hull.
Antifouling coatings keep hulls clean in water.
How long does curing take for marine coatings?
Curing times vary by product and environmental conditions. Plan for a complete cure window recommended by the manufacturer before launching or exposing the surface to water.
Cure times depend on product and weather.
What safety precautions should I follow when painting near water?
Wear PPE, ensure proper ventilation, and manage solvent fumes. Keep cleaners and solvents away from children and water sources.
Wear PPE and work in a ventilated area, away from water.
How much does marine painting typically cost?
Costs vary by surface area, product type, and labor. Expect to invest in coatings, primers, and supplies, plus potential surface prep or sanding. Obtain multiple quotes and consider long-term durability.
Costs vary; get quotes and consider long-term durability.
Watch Video
Quick Summary
- Choose marine paint based on location (below vs above waterline).
- Prepare surfaces thoroughly for lasting adhesion.
- Follow product-specific cure times and recoat windows.
- Use proper PPE and ventilation when applying coatings.
- Maintain coatings with regular inspections and timely reapplication.