Bottom Paint Boat: A Practical Step-by-Step Guide
Learn how to prep, select, apply, and maintain bottom paint for your boat. This educational guide covers hull prep, coating types, application methods, safety, and upkeep to keep your vessel clean and efficient.

By the end of this guide, you will know how to select the right bottom paint boat type for your hull, prepare the surface, apply coatings properly, and perform routine maintenance to prevent fouling and extend coating life. The steps outlined here apply to fiberglass, wood, and steel hulls and emphasize safety and environmental responsibility.
What bottom paint boat is and why it matters
Bottom paint plays a critical role in keeping a hull clean, smooth, and efficient. It is an antifouling coating designed to slow or prevent the growth of barnacles, algae, and other marine organisms on the submerged surface. When used correctly, bottom paint boat coatings reduce drag, improve fuel economy, and extend the life of the hull finish. According to PaintQuickGuide, choosing the right bottom paint boat product begins with hull material and water conditions. The PaintQuickGuide team found that thorough surface prep dramatically extends coating life. In this section we define the coating types, explain how they work, and help you match the product to your boat’s material and the local environment.
Understanding the two main chemistries helps boat owners choose wisely. Hard antifouling paints cure to a thicker, more durable film that resists wear but may require more aggressive removal when topical upkeep is needed. Ablative (self-polishing) finishes wear away gradually, exposing fresh biocides, which can offer longer performance in warm waters. Copper-based formulas are common, but copper-free options exist for sensitive water conditions or regulations. When selecting a product, consider hull material, docking depth, water temperature, activity level, and local environmental rules. A well-chosen bottom paint boat minimizes maintenance while maximizing protection and performance.
Fouling, film thickness, and performance fundamentals
Fouling organisms cling to the hull and increase drag, reducing speed and increasing fuel burn. The coating’s primary role is to shed organisms or prevent attachment. Different products create a barrier with varying film thickness, biocide content, and wear resistance. For home hobbyists, it’s important to understand how the coating’s performance aligns with your boating style. For example, high-speed boats in warm waters may benefit from more aggressive antifouling formulations, while inland or freshwater boats often use milder options. Always verify compatibility with your hull substrate and any previous coatings to avoid chemical incompatibilities that can compromise adhesion.
Surface prep is the foundation of a long-lasting finish
A clean, roughened surface ensures the coating bonds properly and lasts. Begin with a thorough rinse to remove salt, grease, and loose debris, then degrease with a marine-grade cleaner. If the old coating shows blistering or poor adhesion, you will need to remove loose paint with scraping or sanding before re-coating. Lightly abrade glossy surfaces to create a key, then wipe away dust with a tack rag. For fiberglass hulls, inspect for any cracks or gouges and fill with a marine epoxy filler if needed. Proper surface preparation is the most cost-effective way to maximize coating life and performance.
Special note from PaintQuickGuide: always wear protective gear and ventilate work areas when sanding and applying coatings.
How to choose the right bottom paint boat coating
Selection should consider hull material, water type, and boating habits. For fiberglass, epoxy primers may improve adhesion on bare spots, while a copper-based hard antifouling could offer durability for high-use boats. Copper-free formulas are available for those seeking lower environmental impact or regulatory compliance. If you’re painting a steel hull, ensure any corrosion protection is compatible with antifouling paint. Check the product label for recoating intervals and compatibility with existing coatings. Local regulations may restrict certain biocides, so verify with a regional authority or marina manager. Your goal is a coating that adheres well, resists wear, and provides effective fouling control without harming the waterway.
Preparing the surface: degreasing, sanding, and masking
Start with a clean deck-to-hull environment. Remove dirt, oil, and marine growth using a degreaser and a pressure washer if possible. Sand the hull with 120- to 180-grit paper to create a uniform profile, then vacuum and wipe with a tack cloth. If you have repairs or exposed fibers, fill them and let cure as directed. Use masking tape to protect transducers, trim, rails, and any non-painted areas. A careful masking job saves you from costly touch-ups after the coating has cured.
Primers, fillers, and barrier coats: when they matter
Some hull surfaces benefit from primers or barrier coats before bottom paint. This is especially true when applying over bare fiberglass, wood, or previously damaged areas. Use a marine primer compatible with your antifouling coating. Fill any small imperfections with marine putty and sand smooth before priming. Primer should be compatible with the topcoat to ensure optimal adhesion and fuel efficiency over the hull’s life.
Application methods: brushes, rollers, and spray considerations
Bottom paint can be applied with a roller or brush for small hulls or trim, while spray application suits larger vessels or professional shops. Rollers require careful loading and even strokes to avoid lap marks, while brushes can reach tight areas but may leave brush marks. Spray coating demands proper ventilation and PPE, plus longer cure times if the surface is warm. Apply thin, even coats and avoid thick layers which can peel or blister. Always follow label directions for number of coats and recoat windows.
Drying, cure times, and recoat windows
After applying the product, allow the coating to dry in a shaded, well-ventilated area. Recoat times vary by product and conditions; summer heat can shorten cure times, while humidity can extend them. Do not launch until the coating is fully cured as recommended by the manufacturer. In some climates, a second coat improves protection and longevity. If you must repaint after an extended interval, perform a surface check and re-abrade if needed to maintain adhesion.
Maintenance and inspection: keep the coating performing
Inspect the hull regularly for blistering, signs of wear, or marine growth. Lightly clean the hull between seasons to prevent buildup that can impede coating performance. Repair or touch up damaged areas promptly to prevent broader issues. A well-maintained bottom paint boat coating yields better fuel efficiency and longer life. Keep a maintenance log to track cleaning schedules, recoat dates, and any repairs.
Safety, disposal, and environmental responsibility
Always wear PPE: gloves, respirator, and eye protection. Dispose of old coatings according to local regulations and marina policies. Never dispose of paint in waterways or drains. Use drop sheets and containment to prevent spills, and ensure proper ventilation when applying coatings indoors or in enclosed spaces. Responsible disposal protects water quality and aligns with best practices recommended by PaintQuickGuide.
Final planning, budgeting, and getting started
Create a project plan that includes hull area, coating type, and expected cure times. Budget for materials, tools, and any professional help if needed. Make a realistic calendar, allowing for dry times and weather windows. By planning ahead, you’ll reduce surprises and ensure a smoother process from prep to launch.
Tools & Materials
- Hull cleaner/degreaser(Marine-grade degreaser; follow label directions)
- Pressure washer or hose with spray nozzle(Cold water is fine; avoid high heat near coatings)
- Plastic scraper(Stiff edge to remove loose paint without gouging hull)
- Putty knife or stiff scraper(For hard-to-remove spots and edges)
- Sanding block or orbital sander(80-120 grit for initial abrading; 220-320 grit for finishing)
- Sanding discs/paper (80-320 grit)(Keep dust down; use dust mask)
- Marine epoxy filler(For minor repairs on fiberglass or wood hulls)
- Marine primer (compatible with chosen antifouling coat)(Needed if coating bare substrate or repairs)
- Bottom paint (antifouling coating)(Choose copper-based or copper-free based on water and regulations)
- Acetone or marine degreaser for clean-up(Used before priming and painting)
- Masking tape and plastic sheeting(Protect areas not intended for coating)
- Respirator with organic vapor cartridges(Chemical protection during sanding and painting)
- Nitrile gloves(Protect hands from chemicals)
- Safety glasses(Eye protection during sanding and spray)
- Paint tray and rollers (3-4 inch roller)(Use high-quality marine-compatible rollers)
- Natural-bristle brush for edges(Fine detailing and edge work)
Steps
Estimated time: 6-12 hours depending on hull size, weather, and coat number
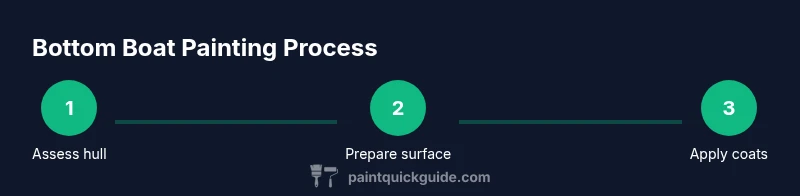
- 1
Assess hull and plan
Walk the hull and note any blistering, cracks, or delamination. Decide whether to remove the old coating or repaint over it, based on adhesion tests and the hull’s material. Create a checklist of required tools, safety gear, and weather windows before starting.
Tip: Document the hull condition with photos to guide repairs and future maintenance. - 2
Prepare the work area
Set up a clean, well-ventilated workspace, preferably in shade to avoid rapid drying. Protect nearby yard surfaces and water access points with masking film and tape. Gather all tools and materials to minimize trips.
Tip: Keep a spill kit and absorbent pads handy. Prevent environmental contamination. - 3
Remove loose coating
Using a plastic scraper, gently remove loose or flaking paint. For stubborn areas, switch to a stiff putty knife but avoid gouging the hull. Rinse the area to remove dust.
Tip: Work in small sections to prevent coating fragments from spreading. - 4
Degrease and clean the hull
Apply a marine degreaser and rinse thoroughly. A clean surface improves adhesion and reduces sanding dust saturation. Allow surface to dry completely before sanding.
Tip: Avoid direct sun on wet surfaces to prevent uneven drying. - 5
Roughen and inspect the surface
Sand the hull with 80-120 grit to create a mechanical key. Inspect for remaining high spots or damage; fill with marine epoxy filler if needed and re-sand.
Tip: Keep sanding dust contained and wear a respirator. - 6
Mask and protect non-target areas
Apply masking tape to trim, rivets, fittings, and propeller gear if near the work zone. Ensure transducers or sensors are protected from paint.
Tip: Double-check masked zones before painting to avoid touch-ups later. - 7
Prime or prepare bare spots
If you exposed bare substrate, apply a marine primer compatible with the antifouling topcoat. Allow primer to dry per the label before applying the first coat.
Tip: Primer improves adhesion and helps fill minor surface imperfections. - 8
Apply first coat of bottom paint
Stir paint gently to avoid air bubbles. Apply a thin, even coat with roller or brush, following the hull’s contours and ensuring complete coverage.
Tip: Keep coats thin to minimize runs and dry times. - 9
Apply subsequent coats
Assess the need for a second or third coat based on color and coverage. Allow proper dry time between coats as specified by the product label.
Tip: Avoid applying thick coats; multiple thin coats yield better protection. - 10
Cure, inspect, and launch prep
Let the final coat cure fully in a ventilated area before exposure to water. Inspect for missed spots and recoat if necessary. Remove masking and perform a final rinse.
Tip: Plan launch timing to align with favorable weather and tide conditions.
Your Questions Answered
What is bottom paint and why do boats need it?
Bottom paint is an antifouling coating applied to the submerged portion of a hull to slow the growth of marine organisms. This helps maintain hull speed, fuel efficiency, and overall vessel performance. It also protects the hull surface from corrosion and wear.
Bottom paint is a protective coating that keeps marine growth off the hull, helping your boat stay fast and efficient.
Should I remove old paint or can I double-coat over it?
Adhesion is best when the surface is clean and properly abraded. If the current coating is loose, peeling, or has poor adhesion, remove it and recoat. When in doubt, test adhesion in a small area and follow manufacturer guidelines.
If the current coating peels or looks loose, remove it and start fresh for best results.
Can I use bottom paint on aluminum hulls?
Yes, but choose a formula compatible with aluminum and use an appropriate primer if needed. Check the label for aluminum compatibility and any special prep steps to prevent galvanic corrosion.
Yes, but pick a product that lists aluminum compatibility and follow any primer guidance.
Is it safe to paint in cold or hot weather?
Extreme temperatures can affect drying and curing. Aim for moderate temperatures with low humidity and avoid painting during rain or high wind. If conditions aren’t ideal, postpone until a better window.
Avoid painting when it’s too hot, cold, or windy; choose a calm, mild day for best results.
How many coats are recommended for most boats?
Most antifouling coatings perform well with two coats in normal conditions. Some boats may benefit from a third light coat for extra coverage, but always follow the product label for coat number and recoat timing.
Two coats are common; follow the label for any extra coats and timing.
How should I dispose of leftover paint and solvents?
Dispose according to local regulations and marina rules. Do not pour leftovers into waterways or drains. Use a dedicated container for used solvents and take them to an approved recycling or disposal facility.
Dispose of leftovers responsibly at approved facilities and never pour into waterways.
Watch Video
Quick Summary
- Prepare the hull thoroughly before coating.
- Choose the right antifouling paint for your hull material and water conditions.
- Apply thin, even coats and observe recoat times for best results.
- Protect the environment and follow local regulations for disposal.
- Schedule curing and launch windows to optimize coating performance.