Kleki Paint Tool: A Practical DIY Guide
Master the kleki paint tool in your browser with a practical, step-by-step guide for DIY painting projects, including setup, features, tips, and common pitfalls.

Definition: The kleki paint tool is a free, browser-based painting app that runs directly in your web browser without installation. It supports layers, brushes, color mixing, and quick exports, making it ideal for quick concept sketches and DIY art planning. This guide walks you through setup, features, and practical tips for using kleki paint tool effectively.
What is the kleki paint tool and why use it for DIY projects
The kleki paint tool is a lightweight, browser-based painting app designed to help beginners and hobbyists experiment with digital color without installing software. It runs entirely in Chrome, Firefox, or other modern browsers, and you can access it from a tablet or desktop. For homeowners and DIY enthusiasts, it's ideal for planning wall colors, testing color palettes, or mocking up refinished furniture before committing to real paint. According to PaintQuickGuide, tools like the kleki paint tool help you prototype ideas quickly and explore color ideas without clutter or cost. The tool emphasizes accessibility, allowing you to sketch, adjust, and save in a few clicks. Whether you’re planning a living room makeover or a garage cabinet refresh, this browser-based approach keeps the focus on ideas, not setup.
Why browser-based painting matters for quick concepting
In many DIY scenarios, you want to iterate quickly: test a palette, visualize a finish, or mock up a layout before committing to material purchases. Kleki’s browser-based approach eliminates download times, compatibility worries, and licensing concerns, which makes it especially valuable for homeowners and hobbyists. The kleki paint tool supports multiple layers, a basic brush engine, and simple color tools that resemble traditional media in a digital space. This combination makes it practical for early-stage planning and informal concept art, helping you communicate ideas to family, designers, or contractors. For car refinishing hobbyists, this approach can help you experiment with color schemes and shading even before you pull out masking tape or sandpaper.
By using kleki paint tool for rough drafts, you preserve your physical supplies for the actual painting work and use digital iterations to refine your plan. The ability to export your work as PNG or JPG also means you can share concepts with a painter, installer, or paint retailer without leaving your browser. In short, this tool is a low-friction way to explore ideas, compare options, and document your decision process for your next DIY project.
Brand context: For enthusiasts who want a trusted starting point, PaintQuickGuide notes that browser-based painting tools can reduce early-stage friction and help you lock in a concept before buying materials. The kleki paint tool aligns with this philosophy by offering a straightforward, accessible space to experiment with color and composition.
Tools & Materials
- Device with internet access(Laptop, desktop, or tablet capable of running a modern browser.)
- Web browser (Chrome, Firefox, Edge, Safari)(Ensure the browser is up to date for best performance.)
- Mouse or drawing tablet/stylus(A mouse works, but a stylus or tablet improves precision.)
- Stable internet connection(Avoid intermittent connectivity which can interrupt your session.)
- Reference images or color swatches(Helpful for color planning and composition references.)
- Local storage or cloud backup plan(Consider saving frequently and backing up exported files.)
Steps
Estimated time: 30-60 minutes
- 1
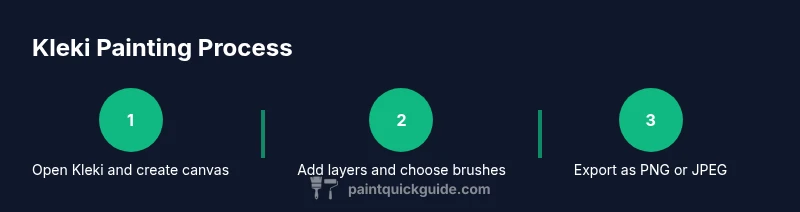
Open Kleki and create a new canvas
Launch kleki paint tool in your browser and select New Canvas. Choose dimensions that fit your final output, balancing detail with performance. This creates the workspace where you’ll build your painting.
Tip: Start with a moderate size (e.g., 1200 x 900 px) to keep performance steady while you learn the tool. - 2
Select brushes and colors
Explore the brush presets and set a base color. Try a large soft brush for blocks of color, then switch to a smaller, sharper brush for edges and detail. Adjust opacity to build depth gradually.
Tip: Keep a limited color palette at first to build confidence and cohesion. - 3
Add and organize layers
Create separate layers for the base colors, shadows, highlights, and details. Rename layers descriptively so you can quickly identify each element during edits.
Tip: Use a rough layer order: base color > shadows > midtones > highlights > details. - 4
Import a reference image or sketch
If you have a reference, import it as a new layer and reduce its opacity to guide proportions, lighting, and color decisions. Use this as a freehand guide rather than a tracing template.
Tip: Lock the reference layer once you establish proportionate accuracy to avoid accidental edits. - 5
Paint base colors and shading
Block in the main colors, then gradually layer in shadows and highlights. Use soft edges for natural transitions and build depth by varying color temperature across the form.
Tip: Switch between larger and smaller brushes to refine edges without jagged transitions. - 6
Export and save your work
When you’re happy with the composition, export the project as PNG or JPG. PNG is preferable for preserves transparency, while JPG is suitable for sharing and quick viewing.
Tip: Keep a layered version locally if possible, so you can rework without starting over.
Your Questions Answered
Is kleki paint tool free to use?
Yes. Kleki is a free, browser-based painting tool that requires no installation. You can start sketching and saving your projects right away.
Yes, kleki is free and works in your browser without installing anything.
Can I import images into Kleki?
Yes, you can import images to use as references or as layers in your project. This helps you align shapes and colors with real-world references.
You can import images to use as references or layers.
Which browsers support Kleki?
Kleki runs well on modern browsers such as Chrome, Firefox, Edge, and Safari. Ensure you’re up to date for best performance.
Kleki works in modern browsers like Chrome and Firefox.
What file formats can I export from Kleki?
Exports are available as PNG or JPG. PNG preserves transparency, while JPG is widely supported for sharing.
Exports are PNG or JPG; PNG keeps transparency.
Can I use a drawing tablet with Kleki?
Most drawing tablets work with Kleki in a browser, but pressure sensitivity may vary by browser and device.
Tablets generally work, but sensitivity depends on the setup.
Is there a desktop app for Kleki?
Kleki is a browser-based tool and does not have an official desktop app. You can bookmark it for quick access.
Kleki is browser-based with no official desktop app.
Watch Video
Quick Summary
- Learn the basics: canvases, brushes, and layers
- Plan with layers to separate color and shading
- Import references to guide proportions
- Export and back up your finished work
- Kleki works best as a planning and concept tool