How to Use Watercolor Paint: A Practical Beginner Guide
Master how to use watercolor paint with a beginner-friendly workflow: essential materials, paper choices, layering techniques, color mixing, and simple practice projects to build confidence.

According to PaintQuickGuide, you can start with a basic setup and a simple wash to learn watercolor fundamentals. This quick answer outlines essential steps, the minimal supplies, and a small practice project to get you painting confidently. You’ll learn to control water and pigment, layer washes, and avoid common beginner mistakes.
How to use watercolor paint: basics and fundamentals
Watercolor painting uses pigment suspended in a water-based binder that dries as a transparent film on paper. How to use watercolor paint effectively begins with understanding the balance between water and pigment, the role of the paper, and how glazes build depth. To learn how to use watercolor paint effectively, you must master water control, paper choice, and pigment loading. Watercolors rely on transparency and luminous color. A thin wash lets light pass through the pigment, creating a glow that is hard to reproduce with opaque paints. Practice shows that the amount of water in your brush changes every stroke, so getting a feel for balance is essential. In this section you’ll develop a vocabulary for describing washes, edges, and value, which will help you plan your composition before you start applying pigment.
Essential materials and setup
Before you touch a brush, gather a compact, reliable kit. The core setup includes:
- Watercolor paper (cold-press, 140 lb / 300 gsm) for good absorbency and forgiving texture
- A small starter palette (6–12 colors) with primary colors and a few earth tones
- A set of brushes (at least one round size 6, one round size 10, and a small flat brush)
- A mixing palette or ceramic tile
- Two jars of clean water (one for rinsing, one for clean water)
- Masking tape and a soft cloth or paper towels
- A pencil and eraser for light sketching
Optional but helpful: masking fluid to protect white areas, a spray bottle to keep paper damp, and a blotting sponge for lifting pigment.
Tip: keep your workspace clean and well-lit to judge values accurately. For beginners, a limited palette reduces mixing complexity while you learn.
Paper: weight, texture, and sizing
Paper matters more in watercolor than with other media. Weight, texture, and sizing determine how pigment pools, how much water the surface can hold, and how the paper behaves as you work. For beginners, cold-press paper offers a good balance of tooth (texture) and smoothness. It handles washes well and shows brushwork clearly. If you see excessive cockling (warping) after a layer dries, tape the edges carefully and allow more time to dry flat.
Sizing is the chemical treatment that controls how the paper interacts with water. Well-sized paper resists pooling and keeps edges neat when you lift color. If your paper is under-sized, colors may feather or bleed unpredictably. Experiment with a sample sheet to learn how your chosen paper responds to washes and multiple layers.
Color theory and palette planning for watercolor
Color choice shapes mood and realism. Watercolors shine when you embrace transparent layers, so plan a limited palette that mixes clean primary hues with a few earth tones. A common beginner setup includes: warm and cool versions of yellow, red, and blue, plus a neutral earth tone. With a small set you’ll learn how to create a wide range of hues by adjusting value and temperature.
Tip: practice color-mixing exercises on a separate sheet. Label your swatches so you remember which mixture yields what hue. Always test a new color on scrap paper before applying it to your painting to avoid surprises.
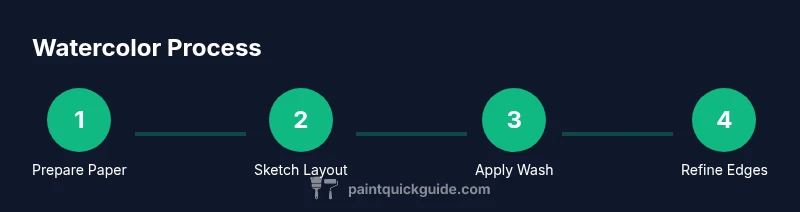
Step-by-step painting workflow
A typical watercolor session follows a repeatable workflow that minimizes surprises. Start with a light pencil sketch to establish composition. Then apply a light wash to define large shapes, keeping the initial layer pale so you can glaze on top later. Allow the wash to dry before adding color to avoid muddy edges. Build depth gradually by layering washes, increasing pigment intensity only after the paper is dry.
Throughout the process, monitor water usage: too much water floods pigment and can cause backruns; too little water makes colors look chalky. Keep a damp brush handy for soft edges, and reserve bright accents for the final touches. The goal is to create harmony through controlled layering, not accidental splashes.
Wet-on-wet and wet-on-dry techniques in detail
Wet-on-wet means applying pigment to wet paper or a wet painted area. It yields soft edges, gradients, and unpredictable blooms that can be beautiful when planned. Use it for skies, soft foliage, or subtle transitions. Wet-on-dry involves painting onto dry paper, producing crisp edges and precise shapes, ideal for details and controlled lines.
Combination approaches are common: start with a broad wash (wet-on-wet), then sharpen edges or define forms with wet-on-dry. Remember to keep colors separated initially to avoid muddy mixtures; you can rinse between colors or use a clean brush for transitions.
Common mistakes and fixes
- Over-wetting paper causes warping; fix by weighting paper under heavy books while drying or using a heavier paper.
- Colors look muddy when you over-mix or overwork. Fix by letting layers dry and re-evaluating color choices.
- Edges bleed when you go over wet paint with new color. Fix by waiting for the surface to dry or using a dry brush to lift excess pigment.
- White areas require planning: resist painting over them, or use masking fluid to protect them.
Pro tip: keep a small brush for lifting mistakes and use a clean, damp brush to blend edges softly.
Practice projects and next steps
Begin with small, achievable projects before tackling complex scenes. Suggested projects:
- A simple gradient wash sunset or sky, focusing on even tonality.
- A still life of fruit with soft shadows to practice color mixing.
- A daily quick-study: 15–20 minutes of value studies to build observation and control.
As you practice, gradually expand your palette and paper size. Review your work with a critical eye, noting what to adjust next time. The goal is steady improvement through repeatable, enjoyable practice.
Quick-start practice prompt
If you’re short on time, try a 15-minute warm-up: make three swatches (yellow, red, blue), then create a soft gradient from yellow to blue on a scrap sheet. This fast exercise reinforces water-pigment balance and helps you observe how colors shift with moisture.
Tools & Materials
- Watercolor paints (pan or tube)(Begin with a basic set of 6–12 colors; include primary hues and a couple earth tones)
- Watercolor paper (cold-press, 140 lb / 300 gsm)(Good absorption and tooth for washes)
- Mixing palette or ceramic tile(Non-absorbent surface for color mixing)
- Brushes (round sizes 6, 8, 10; one flat)(Synthetic or natural hair; keep at least 3 brushes handy)
- Water jars (2) for rinse and clean water(Label to avoid cross-contamination)
- Masking tape(2-3 cm wide works well for securing paper)
- Pencil and eraser(Light graphite for initial sketch)
- Paper towels or soft cloth(For blotting and lifting)
- Spray bottle (optional)(Keeps paper damp during long sessions)
- Masking fluid or gum Arabic (optional)(Protects white areas on complex pieces)
Steps
Estimated time: 60-90 minutes
- 1
Prepare workspace and materials
Clear the area, lay out paints, brushes, paper, and water. Check lighting and ventilation. This setup minimizes interruptions and helps you focus on water-pigment behavior as you begin.
Tip: Arrange items within easy reach to maintain a smooth workflow. - 2
Tape the paper and sketch lightly
Secure your sheet to a board with masking tape to prevent warping. Lightly sketch your composition with a pencil to map values and shapes before color.
Tip: Keep pencil lines faint so they don’t show through translucent washes. - 3
Mix a limited palette
Prepare a small set of color mixes on your palette. Start with warm and cool variants of each primary color and a neutral earth tone to broaden your range.
Tip: Label swatches for quick reference and consistency. - 4
Apply a light initial wash
Dip a large brush into clean water, load with pigment, and apply a pale wash over large areas. Aim for generous but controlled moisture to keep edges soft.
Tip: Work quickly while the paint is fluid to maintain smooth gradients. - 5
Build layers slowly
Let each layer dry completely, then glaze with more concentrated color to create depth. Avoid piling pigment in one pass to prevent muddy results.
Tip: Test color intensity on a scrap sheet before applying to the painting. - 6
Add details and refine edges
Switch to smaller brushes to add defining lines, textures, and small highlights after the paper dries. Maintain soft transitions where needed.
Tip: Keep most of your highlights white by planning ahead or using masking fluid. - 7
Finish, assess, and protect
Evaluate the piece as it dries. If needed, lift residual pigment with a damp brush or let the surface dry and rework subtle areas. Remove tape carefully.
Tip: Let the painting rest flat to fully cure; resist touching until completely dry.
Your Questions Answered
What is the best paper for starting with watercolor?
For beginners, cold-press watercolor paper in 140 lb (300 gsm) or heavier is ideal. It balances absorption and texture, handles washes, and resists excessive buckling when taped down. As you gain experience, you can experiment with hot-press for smoother results or rough paper for more texture.
Beginners usually start with cold-press watercolor paper, around 140 pounds, because it handles washes well and is forgiving.
Should I start with a limited palette?
Yes. A limited palette helps you learn color relationships and value without getting overwhelmed. Start with three primaries (red, blue, yellow) plus two earth tones or neutrals. As you grow comfortable, expand gradually.
Starting with a small set of colors helps you learn color mixing without confusion.
What is the difference between wet-on-wet and wet-on-dry?
Wet-on-wet applies color to a wet surface, creating soft edges and blooms. Wet-on-dry uses a dry surface for crisp edges and precise details. Both are useful; start with wet-on-wet for skies and washes, then switch to wet-on-dry for structure.
Wet-on-wet gives soft edges; wet-on-dry gives sharp lines.
How long does watercolor take to dry?
Drying time depends on paper weight, environmental humidity, and pigment load. A light wash may dry in minutes, while thicker layers can take longer. Plan your steps to allow adequate drying between applications.
Drying times vary; expect minutes to hours depending on layers and climate.
Can I fix mistakes in watercolor?
Yes, to some extent. While watercolor is not easily erased, you can lift pigment with a damp brush, blot with tissue, or glaze over mistakes once the area is dry. For big errors, you can repaint over the section after it dries.
You can lift pigment with a damp brush or glaze over to fix mistakes after drying.
How should I store and care for my watercolor paints?
Keep paints in a cool, dry place away from direct sunlight. Seal tubes or pans to prevent drying, and label colors for quick identification. Proper storage helps maintain pigment integrity and color accuracy over time.
Store paints in a cool, dry place and seal containers after use.
Watch Video
Quick Summary
- Choose the right paper and palette to start confidently
- Control water to maintain transparency and prevent warping
- Layer gradually to build depth without muddiness
- Practice color mixing with a limited set of colors
- Let layers dry before adding more details