Easy to Paint Watercolor: A Beginner's Guide
A practical, step-by-step guide to mastering easy watercolor painting with beginner-friendly techniques, essential supplies, quick projects, and tips to stay motivated in 2026.

This guide helps you master easy to paint watercolor using a simple, beginner-friendly workflow. You’ll learn a 6-step process to create a small landscape or still life with minimal supplies. By the end, you’ll be able to produce clean washes, soft gradients, and confident color mixing in under an hour.
Why easy to paint watercolor is approachable
Watercolor is often described as forgiving and flexible, which makes it ideal for beginners who want fast, visible results. The phrase easy to paint watercolor captures the idea that you can produce pleasing pieces with minimal supplies and a straightforward plan. In practice, a few simple choices—padded paper, a light touch with pigment, and an emphasis on main shapes—let you learn composition, color mixing, and technique without getting overwhelmed. This guide will show you how to set up a tiny, satisfying project that builds confidence while keeping materials affordable. Along the way, you’ll discover that the medium rewards practice, not perfection, and that even imperfect washes can become charming, expressive art. As you begin, remember that water and pigment can behave unexpectedly; this is not a failure but a clue to adjust your approach. For many homeowners and DIY enthusiasts, watercolor offers a quick path to personal artwork, greeting cards, or decorative studies that you can complete in a single session. With the right mindset and a few fundamental tricks, anyone can enjoy creating an image with fresh color, soft edges, and a light, airy feel.
According to PaintQuickGuide, embracing simplicity is the first step to making easy to paint watercolor feel accessible, especially when you’re balancing other home projects. The goal is to celebrate small wins: a soft wash, a clean edge, and color harmony. As you practice, you’ll notice your confidence grows alongside your palette mastery, turning a weekend hobby into a dependable skill that you can use for cards, gifts, and home decor.
Essential supplies for beginners
To start with easy to paint watercolor, you don’t need a huge kit. The simplest setup includes a small range of basic pigments, sturdy paper, and a few brushes. Begin with a 6- or 8-well palette of a few essential colors (blue, red, yellow, and a neutral), a sheet of cold-press watercolor paper (140 lb is a reliable standard), and a couple of round brushes (sizes 4 and 8). A clean mixing tray helps keep colors true, while masking tape can create crisp edges for your first exercises. Keep a pencil, eraser, and a soft cloth handy for light sketching and lifting mistakes. Water containers, a spray bottle for moisture control, and paper towels complete the core setup. Optional extras like masking fluid or a larger flat wash brush can expand techniques later, but they’re not required for beginners.
With these basics, you’ll be able to practice soft washes, color mixing, and controlled edges, which are the foundation of more advanced watercolor projects. Remember, the aim is steady improvement, not a perfect painting on day one. Your supplies should feel reliable and approachable, not intimidating.
Basic techniques for soft washes and gradients
Mastering soft washes and gentle gradients is the heart of easy to paint watercolor. Start with a wet-on-wet technique: lightly moisten the paper where your wash will occur, then deposit color so it blooms into a fluid gradient. Layer color gradually from light to dark, allowing each layer to dry before adding the next. Practice a simple three-color gradient (yellow to red to blue) to see how colors mingle on damp paper. Lifting technique, using a clean damp brush or a paper towel, helps preserve white highlights or corrects stray marks.
Consistency in water-to-paint ratio matters: too much water dilutes color, too little can create harsh edges. A good rule is to begin with light washes and small, controlled increments of pigment. If edges feel harsh, gently soften them by re-wetting the border or lifting pigment with a clean brush. As you gain experience, you’ll recognize when to let the water do the work and when to guide the color with careful brushwork.
Quick-start project: a simple apple study
A small still life is an excellent entry point for easy to paint watercolor. Begin with a light pencil outline of an apple or a simple bowl of fruit on your cold-press paper. Apply a pale wash to establish the light areas, then build color gradually, starting with yellows and light greens for the fruit, and a touch of red for shading. Add a gentle blue or gray shadow beneath to ground the object. Keep edges soft and blend colors where they meet to avoid hard lines. Finish with a subtle highlight and a few texture dots to imply highlights on the fruit’s curved surface.
This exercise helps you practice layering, color harmony, and moisture control. It’s a compact project that yields a satisfying result while reinforcing the core techniques you’ll rely on for more complex subjects. Remember to let each layer dry to maintain clean edges and prevent muddy colors.
Common mistakes and how to fix them
Beginners often encounter muddy colors, warped paper, or hard edges. Mud can happen when multiple pigments are mixed directly on the paper without sufficient drying time. Fix this by allowing layers to dry completely and lifting pigment with a damp brush or clean cloth. Warping is common when paper absorbs too much water; flatten by placing the painting under a stack of books or a board with gentle pressure once the paper is fully dry. Harsh edges occur when color is laid while the paper is still soaking; resolve by re-wetting the area and softening the boundary with a clean brush. Finally, avoid pushing color too far toward the edge of the paper; plan lighter edges first and reserve bold color for the center.
Finishing touches and preserving your work
When your painting is dry, analyze whether you want crisper edges or softer transitions. If edges look too sharp, a light mist from a spray bottle can reactivate color and help blend. Framing watercolor under UV-protective glass is highly recommended to preserve vibrancy and surface integrity. If you plan to export the artwork, scan or photograph it with even lighting and a neutral background, then save a high-resolution digital copy. Store originals flat and away from direct sunlight; consider archival mats and acid-free backing for longevity. With careful handling, your easy to paint watercolor pieces can become lasting keepsakes or thoughtful gifts.
Practice plan to stay motivated
Consistency beats intensity. Start with a weekly 20-minute practice session focused on one technique: washes, gradients, or lifting. Build a small portfolio of 4–6 studies that cover simple subjects like fruit, leaves, or simple landscapes. Review each piece, noting what worked and what to adjust next time. Schedule a monthly mini-project that pushes you to try a new color or composition. Celebrate progress, not perfection, and gradually expand your palette and paper size as confidence grows.
Tools & Materials
- Watercolor paints (pan or tube)(Choose a small, balanced set with primary colors plus a few earth tones.)
- Watercolor paper (cold-press, 140 lb)(Avoid very thin paper to prevent buckling; 9x12 inches is a great starting size.)
- Mixing palette(Prefer white ceramic or plastic; keep colors separate to avoid muddy mixtures.)
- Round brushes (sizes 4 and 8)(Synthetic or sable; start with a small and medium brush for versatility.)
- Masking tape(Useful for clean edges and protecting margins.)
- Pencil (HB) and kneaded eraser(Light sketches; erase softly to avoid tearing the paper.)
- Spray bottle for water(Helpful for maintaining even moisture on the paper.)
- Water containers (2)(One for clean water, one for rinsing brushes.)
- Paper towels or cloth(Dab excess moisture and lift color when needed.)
- Masking fluid (optional)(Use for preserving white areas on more complex pieces.)
- Painting board or clipboard(Keeps paper flat and portable.)
Steps
Estimated time: 45-60 minutes
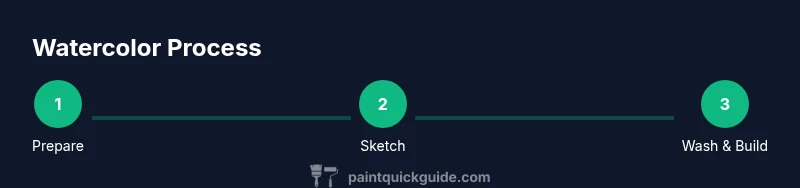
- 1
Prepare your workspace
Clear a small, well-lit area and layout your supplies. Secure your paper to a board to prevent warping, and set up water containers and towels within easy reach.
Tip: Organize colors so you can reach them without crossing your composition. - 2
Sketch a light plan
Lightly draw the basic shapes with a graphite pencil. Keep lines faint so they won’t show through the paint. This step guides composition without constraining your paint choices.
Tip: Use an eraser to adjust proportions early. - 3
Moisten the paper for a soft wash
Mist the area you’ll wash, then test a pale wash on a scrap patch. The damp surface helps pigments spread into gentle gradients.
Tip: Start with more water than pigment for transparent layers. - 4
Apply a light wash
Load a brush with a pale color and apply evenly, letting the water carry the pigment. Move in broad, deliberate strokes and let the color set before adding more.
Tip: Work from top to bottom to avoid unintended drips. - 5
Build color in layers
Add subsequent layers once the previous one dries. Increase saturation gradually, preserving white highlights with lifting or masks if needed.
Tip: Always go light to dark; you can deepen tones later. - 6
Finish and dry
Complete your details after the wash has dried. Dry time varies with paper and environment; keep a steady setup and allow the piece to dry flat to prevent warping.
Tip: If edges feel too harsh, soften them with a clean, damp brush.
Your Questions Answered
What is the best paper for beginners in watercolor?
For beginners, choose 140 lb cold-press watercolor paper. It handles washes without heavy buckling and shows texture that helps learning edge control. 100% cotton options tend to perform better, but affordable blends work well to start.
Beginners should start with 140-pound cold-press paper. It handles washes nicely and provides texture that helps with learning edges.
Do I need expensive supplies to start?
No. Start with a small, balanced color set, decent paper, and a couple of brushes. Quality matters more than quantity, but you don’t need the priciest brands to build solid skills.
You don’t need expensive supplies to begin; a small set, good paper, and a couple brushes are enough to learn.
How long does a watercolor painting take to dry?
Drying time depends on paper weight, humidity, and pigment amount. A light wash dries in minutes, while multiple layers may take longer. Always allow ample time between layers to prevent muddy colors.
Drying time varies, but light washes dry in minutes; wait between layers to avoid mud.
Can I lift mistakes or fix color?
Yes. A clean damp brush or a tissue can lift color when the area is still damp. For dry areas, gently re-wet and lift with care. Lifting works best early in the process rather than after finishing details.
You can lift color with a damp brush when the area is still damp. It’s easier to fix early.
What surfaces work best for watercolor?
Watercolor works well on cold-press paper, mixed-media paper, or watercolor blocks. Avoid very rough or glossy surfaces that resist absorption. A flat, clean surface helps consistent results.
Good surfaces include cold-press or mixed-media paper; avoid overly rough or glossy surfaces.
How should I store finished paintings?
Store finished works flat or upright with protective barriers to prevent pressure marks. Frame under UV-protective glass when displaying, and keep away from direct sunlight to preserve color.
Store flat, frame under UV glass when displaying, and keep away from direct sun.
Watch Video
Quick Summary
- Practice with small projects to build confidence
- Layer colors from light to dark for depth
- Keep edges soft and edges intentional
- Frame watercolor to preserve color and texture