How to Paint Without Streaks: A Step-by-Step Guide
Master a streak-free finish with expert prep, the right tools, and proven painting techniques. This 2026 guide covers surface prep, priming, cutting-in, rolling, drying, and troubleshooting to help homeowners and DIY enthusiasts achieve a smooth, professional look on walls, ceilings, and trim.

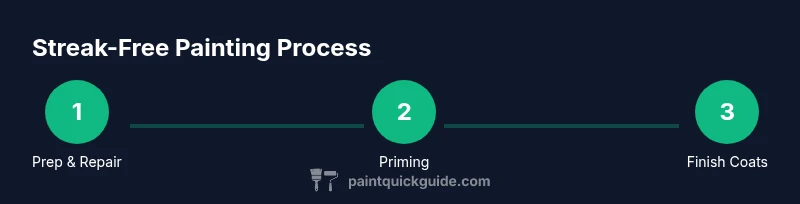
This guide shows you how to paint without streaks by preparing the surface, selecting the right paints, and using consistent rolling or brushing techniques. You'll learn surface prep, tool choice, paint loading, application patterns, and drying considerations to achieve a smooth, even finish on walls and trim. Follow these steps with patience and you’ll reduce lap marks, brush marks, and roller stipple.
Why streaks happen and how to avoid them
Streaks are a sign of uneven coverage and edge mismanagement. Even a high-quality paint can show lap marks, brush marks, or roller stipple if loaded unevenly or applied in inconsistent strokes. According to PaintQuickGuide, the most common causes are inadequate surface prep, insufficient primer, improper load on tools, and starting or stopping in mid-stroke. The good news is you can prevent most streaks by following a disciplined workflow, choosing the right finish, and maintaining a wet edge. In practice, this means prepping the surface thoroughly, selecting the proper tools for the job, and using consistent motion that overlaps slightly with each pass. By controlling the entire painting process—from prep to first coat to final touch-ups—you'll achieve a smoother, more durable finish that lasts for years. This article guides you through proven steps and techniques to eliminate streaks for walls, ceilings, and trim.
Prep work that sets up a streak-free finish
Begin with a clean workspace. Remove or cover furniture, protect floors with drop cloths, and tape off trim and edges. Wipe down walls to remove dust and oils, rinse if needed, and let everything dry completely. Inspect for cracks, holes, or nail pops; repair with lightweight spackle, then sand smooth once dry. A well-prepped surface accepts paint evenly and minimizes suction differences that cause streaks. If you’re painting over glossy paint, lightly scuff or sand to promote adhesion. Finally, choose the primer and finish you’ll use; primer helps seal the surface and create uniform color undercoats, reducing the likelihood of streaks appearing after the first coat.
Tools and paints that reduce streaking
Invest in quality tools and paints designed for smooth finishes. Use a latex or acrylic interior paint with a satin or eggshell sheen for walls; matte finishes can highlight surface texture and imperfections. Select a compatible primer and a roller with an appropriate nap length for your wall texture (smooth walls typically need 1/4–3/8 inch nap). Keep a steel-tone tray, liners, and stir sticks handy. For trimming and cutting-in, choose an angled sash brush with synthetic bristles. Always strain or sift pigments if your paint has been sitting for a while to avoid lumps that create streaks in application. These choices set the stage for consistent coverage across sections.
Cutting in: edges and corners without visible lines
Cut-in areas along the ceiling, baseboards, and around doors first, using a steady hand and the right brush. Work in small sections (about 2–3 feet) and maintain a damp edge so the new paint blends with the rolled area. Avoid pressing too hard; apply light, even coats to prevent brush marks from showing through the final layer. Clean your brush frequently during cutting-in to prevent dried bristles from leaving stray lines in the paint. A narrow, steady technique is essential for a clean transition between wall and edge areas.
Rolling technique: maintaining a wet edge
Load your roller evenly and roll onto the wall in light, even passes with a W or M pattern to distribute paint. Roll off excess paint on the tray’s slope, then fill in the gaps with overlapping strokes, keeping a consistent pressure. Maintain a slightly open wrist and long, smooth strokes to promote uniform coverage. Avoid heavy coats, which cause drips and visible roller texture. Re-load as needed and re-check your wet edge after each pass to ensure continuous blending rather than abrupt color changes.
Prime, paint, and coats: when to layer
If you’re covering a bold color or large areas, a primer coat improves color uniformity and reduces the number of topcoats needed. Allow adequate drying between coats per the paint’s instructions—latex paints typically dry faster than oils. Apply a thin, even second coat to lock in color and eliminate any remaining streaks from the first application. If you notice blotchy spots after the first coat, assess whether you need another primer layer or a lighter intermediate coat to achieve an even finish. Patience here pays off with a flawless outcome.
Drying, curing, and second coat timing
Ventilate the room well and maintain a stable temperature to avoid rapid drying that can reveal roller texture. Lightly re-wet dry areas with a very small amount of paint before applying subsequent coats to equalize drying rates. Plan for a total dry time of several hours between coats, depending on humidity and air flow. Don’t rush the process; brushing or rolling while the surface is still tacky can create drag marks and uneven sheen. When in doubt, test a small patch first to fine-tune your timing.
Troubleshooting common streaks and fixes
Common streaks include lap marks, brush marks, and roller stipple. Lap marks often come from rolling over dry edges—work quickly from one edge to the center and keep a wet edge. Brush marks can be minimized by consistent brush pressure and avoiding back-and-forth scrubbing. Roller stipple is reduced by matching roller texture to wall smoothness and avoiding overloading. If streaks appear, lightly sand with fine grit, wipe clean, and touch up with a thin coat of paint using long, even strokes. Remember, small quick fixes are easier and produce better results than heavy coats to conceal flaws.
Authority sources and further reading
For safety and best practices, consult authoritative sources during your project:
- https://www.epa.gov/lead
- https://www.osha.gov
- https://www.nist.gov
Tools & Materials
- Quality latex or acrylic interior paint(Choose the finish you want (eggshell or satin) and ensure color consistency.)
- Primer (stain-blocking if needed)(Use a compatible primer for the surface and color you’re applying.)
- Paint tray and liners(Have extra liners on hand for easy cleanup.)
- Paint roller set (9–12 inch) with nap 3/8 inch to 1/2 inch(Select nap length based on wall texture.)
- Angled sash brush (2–4 inches)(For precise cutting-in along ceilings and trim.)
- Paint roller covers (set of 2)(Choose nap based on texture; use one cover per finish to avoid cross-contamination.)
- Drop cloths and plastic sheeting(Cover furniture and floors completely.)
- Painter's tape(Mask edges you don’t want painted.)
- Putty knife and spackle(Repair holes and cracks before painting.)
- Safety gear (mask/respirator, gloves)(Protect lungs and skin from fumes and dust.)
- Stir sticks and mixing container(Ensure color is evenly mixed before loading tools.)
- Ladder or step stool(Access high areas safely.)
Steps
Estimated time: Estimated total time: 5-7 hours (active work) plus drying time between coats.
- 1
Prepare space and surface
Clear the room, cover furniture, and remove or mask trim. Clean walls to remove dust and oils; let dry completely. Inspect for cracks and holes, patch with spackle, then sand smooth once dry.
Tip: A clean, dry surface prevents uneven paint adhesion and streaking. - 2
Repair and smooth imperfections
Fill holes and cracks with spackle; allow to dry fully. Sand flush with the wall to minimize raised edges that show through paint.
Tip: Use a fine-grit sanding block for a seamless finish. - 3
Protect floors and edges
Lay down drop cloths and tape off edges with painter’s tape. Remove outlets and switch plates if possible to avoid splatter.
Tip: Tuck cloths into baseboards to catch drips early. - 4
Prime when needed
If covering dark colors or new drywall, apply primer to ensure uniform color and to reduce the number of coats. Let primer dry completely before painting.
Tip: Primer creates a uniform base that minimizes streaks in final coats. - 5
Cut in along edges
Using a sash brush, cut in a 2–3 foot band around ceilings, corners, and trim. Keep a steady hand and avoid overloading the brush.
Tip: Maintain a damp edge to blend with rolled sections smoothly. - 6
Roll with even, overlapping passes
Load the roller evenly, apply in a W or M pattern, then fill in with long, light strokes. Roll from one section to the next, keeping a consistent pressure to avoid lap marks.
Tip: Don’t press too hard; heavy pressure causes thick coats and streaks.
Your Questions Answered
What causes streaks when painting?
Streaks usually come from uneven paint loading, poor edge control, insufficient surface prep, or applying coats that are too thick. Temperature and humidity can also affect how smoothly paint lays down.
Streaks happen when the paint goes on unevenly or dries inconsistently, often due to loading or technique.
Do I need to prime before painting to avoid streaks?
Priming helps create a uniform base, especially on newly patched walls or when changing colors. It reduces color variability and improves adhesion, which minimizes streaks.
Yes, primer helps even out the surface so your final coat goes on smooth.
Can I fix streaks after painting?
If streaks appear, you can lightly sand the affected area once dry, wipe clean, and apply a thin touch-up coat. Sometimes you need a whole new coat to blend properly.
Yes, small touch-ups can fix streaks, but a thin coat is key to blending.
What finish is best to prevent streaks?
Satin or eggshell finishes tend to hide minor texture and brush marks better than flat or glossy finishes, while still looking smooth. The best choice depends on your room’s lighting and texture.
A satin or eggshell finish usually hides minor streaks well.
How long should coats dry before applying the next coat?
Follow the paint manufacturer's guidance; typically latex paints require 2–4 hours between coats under standard room conditions. Drying times vary with humidity and temperature.
Usually about 2 to 4 hours between coats, but check the can for your product.
Is it better to roll or brush for streak-free results?
For large areas, rolling with a proper nap tends to yield smoother results, while brushing is essential for edges. Use both in combination and maintain a wet edge to blend them together.
Use a roller for the field and a brush for edges to avoid streaks.
How can lighting affect perceived streaks?
Strong directional lighting can exaggerate texture and streaks. Painting under even, diffused light helps you see coverage more accurately and avoids missed spots.
Even lighting helps you spot streaks before they dry.
Should I sand between coats?
Light sanding between coats can smooth out minor texture and help color absorption, but be gentle to avoid removing fresh paint. Clean off the dust before applying the next coat.
If you see texture after drying, a light sand can help before the next coat.
Watch Video
Quick Summary
- Prep thoroughly to prevent streaks
- Choose the right tools and finishes for your surface
- Maintain a wet edge and consistent technique
- Drying times and coat planning prevent finish flaws