How to Paint on Glass with Acrylic Paint: A Practical Guide
Step-by-step guide to painting glass with acrylics, covering surface prep, priming, layering, curing, sealing, and finishing for durable, vibrant results.

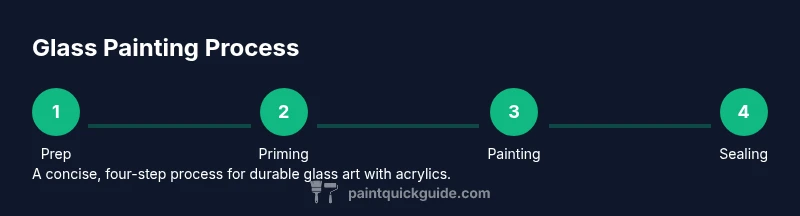
You can paint on glass with acrylic paints by properly preparing the surface, using a glass-friendly primer, applying thin, even coats, and sealing with a UV-resistant varnish. The key steps are: clean the glass, lightly sand, prime, paint in several thin layers, cure as directed, and apply a final protective finish. With patience, you’ll achieve durable, vibrant results.
Surface Preparation and Glass Compatibility
Glass is non-porous, so paint adhesion relies on surface preparation rather than absorption. If you're asking how to paint on glass with acrylic paint, you start by cleaning and deglazing the surface, then applying a primer designed for glass. This creates a tooth for the paint, reduces smudges, and minimizes chipping over time. Work in a well-ventilated space, and keep the surface free of oils from fingerprints. Lightly scuffing the surface with a tiny piece of ultra-fine sandpaper can improve grip, but avoid deep scratches that show through the color.
Understanding the material helps you choose the right products: pick a primer made for glass, then select artist-grade acrylics or craft acrylics known for adhesion on non-porous surfaces. Before committing to a full design, practice on a scrap piece of glass to gauge how the paint behaves when dry and how colors look when light passes through. This approach is especially useful for decorative pieces or stained-glass-inspired effects.
For those wondering how to paint on glass with acrylic paint, the prep phase is the make-or-break step that determines durability and clarity. The more thorough your cleaning, dust removal, and surface skim, the crisper your final lines will be. Keep your workspace free of dust and ensure the glass is fully dry before moving to primer.
If you’re aiming for long-lasting results, plan a two-step paint strategy: a light base layer to create color depth, followed by a second layer to sharpen edges. This technique reduces visible brush strokes and helps your color settle evenly over the glass surface.
Tools & Materials
- Glass cleaner(Lint-free cloth or paper towels; avoid streaks.)
- Isopropyl alcohol (70% or higher)(Use to remove oily fingerprints and residues.)
- Lint-free cloths(For cleaning and drying without fibers.)
- Glass-friendly primer/bonding agent(Follow product instructions for drying times.)
- Acrylic paints (assorted colors)(Choose high-quality paints formulated for craft use.)
- Fine detail brushes and a flat brush set(Varied bristle densities for lines and fills.)
- Palette or mixing tray(Non-absorbent surface for color control.)
- Masking tape(For clean edges and stencils.)
- Clear varnish or sealer (UV-resistant)(Choose water-based or solvent-based as appropriate.)
- Gloves and ventilation(Disposable gloves and good airflow when using sealants.)
- Optional: paint extender or medium(Helps with flow and leveling for smoother coats.)
Steps
Estimated time: 60-90 minutes active; up to 24 hours cure for final seal.
- 1
Prepare the glass surface
Begin by removing dust with a clean, dry microfiber cloth. Clean with glass cleaner, then wipe with isopropyl alcohol to strip oils. Allow the surface to air-dry completely before proceeding. This step ensures the primer adheres evenly and prevents fogging under the paint.
Tip: Test a small area for adhesion before committing to the full design. - 2
Set up workspace and protect surroundings
Lay down a clean, flat work surface and cover nearby items. Use painter's tape to mask edges if needed and keep the glass stable to prevent slips. Good lighting helps you see true color density and brush marks during application.
Tip: Keep a spray bottle handy to mist brushes between coats and reduce drying speed. - 3
Apply a glass-friendly primer
Apply a thin, even coat of primer and let it dry per the manufacturer’s instructions. A second light coat can be applied if the first appears uneven. The primer provides a gripping layer for acrylics on glass and helps prevent chipping.
Tip: Avoid thick primer layers; they slow drying and may cause cracking. - 4
Paint in thin, controlled layers
Begin with light washes to establish color blocks. Allow each layer to dry before adding the next to avoid running or smearing. Build color gradually with 2–4 thin coats rather than a single thick coat for even coverage.
Tip: Work with a wet edge to prevent visible seams between layers. - 5
Let the paint cure and seal
After the final coat dries, follow the paint’s and primer’s curing recommendations. Apply a UV-resistant clear varnish to protect the artwork and improve wash durability. Fully cure the piece before handling or cleaning.
Tip: Avoid contact with water until the sealant fully cures (often 24 hours or longer). - 6
Final checks and cleanup
Inspect edges for smoothing and any drips needing light sanding. Clean up brushes promptly to extend their life. Store the finished piece away from direct sunlight and high humidity to preserve color vibrancy.
Tip: Label the piece with date and materials if you plan multiple glass projects.
Your Questions Answered
Do I need to prime glass before painting with acrylics?
Yes. A glass-specific primer creates a gripping layer for acrylics and improves durability. Without primer, paint may chip or peel over time especially on smooth, non-porous surfaces.
Yes. Always prime glass before painting to improve adhesion and longevity.
Can I bake the acrylic paint to speed curing?
Only if the manufacturer explicitly allows bake-cure for the specific acrylic and primer you used. Most craft acrylics cure at room temperature with sealing times following the product directions.
Only bake if your materials specifically say it’s safe to do so.
Will acrylic paint resist moisture on glass after sealing?
A proper sealant designed for glass will improve moisture resistance, but avoid harsh handling or dishwasher-like cleaning. Gentle cleaning with a soft cloth is best.
Yes, with a proper seal and cure, acrylic on glass resists moisture better, but treat it gently when cleaning.
Can I wash the finished glass piece?
Yes, but hand wash gently with mild soap and water. Do not scrub or soak long-term, which can wear away the seal.
You can clean it by hand; avoid harsh scrubbing that could damage the finish.
What glass surfaces work best for acrylic painting?
Smooth, clean glass yields the best results. Frosted or patterned glass may require more primer or a different technique.
Smooth, clean glass is easiest to work with; frosted surfaces may need extra prep.
How long does the sealant last on glass?
Durability depends on environmental factors like sunlight and handling. Reapply sealant as needed to maintain protection.
Sealants last for varying times; re-seal if you notice wear from sun exposure or frequent handling.
Watch Video
Quick Summary
- Prep the glass thoroughly for adhesion.
- Apply paint in thin, even layers for durability.
- Allow full cure before sealing and handling.
- Seal with UV-resistant varnish to protect color.