How to Make Paint Look Textured: A Practical Guide
Learn proven techniques to create textured paint finishes on walls, furniture, and cars. Step-by-step methods, tool choices, drying times, and safety tips from PaintQuickGuide.

Here's how to make paint look textured: start with a base color, choose texture tools, and apply in multiple passes using stippling, brush dragging, or combing. Begin with primer and a durable finish (semi-gloss or satin). Practice on scrap material, then test a small wall area before committing to the whole project. This approach keeps textures controllable while letting you experiment with depth.
What textured paint is and why it works
Texture in paint introduces physical depth to a surface by varying the topography—raised peaks, gentle ridges, or subtle stipple. The visual effect can make walls feel warmer, furniture more tactile, and automotive panels more dynamic. Texturing works best when the base coat and the additive or tool are compatible with the surface you’re painting. If you’re wondering how to make paint look textured, remember that texture is as much about planning as it is about application: the more you plan the pattern, the more controlled the result will be. In practice, start with a clean, dry surface, choose a compatible primer, and select tools that will imprint the texture in predictable patterns. This approach comes from a blend of traditional faux-finish techniques and modern texture additives, and it’s accessible to dedicated DIYers and hobbyists alike. PaintQuickGuide’s guidance emphasizes prep, tool choice, and layering to achieve consistent texture across large areas or focal accents.
Core texture methods: stippling, dragging, combing, sponging
Texture can be created through several core methods, each producing a distinct look. Stippling uses a stiff brush or sponge to dab paint in small, irregular dots that read as granularity or pebble-like texture. Dragging involves pulling a loaded brush or comb across the surface to leave linear ridges or feathered lines. Combing creates parallel rows by dragging a comb or ribbed roller through wet paint, producing architectural grooves or tactile stripes. Sponging adds randomness by dabbing with a natural or synthetic sponge to create organic, cloud-like texture. When you’re learning how to make paint look textured, practice each method on a scrap board or drywall patch to compare light reflection and depth. Layering these techniques in the same panel adds complexity and realism, especially when you vary pressure, angle, and tool type to mimic natural textures.
Surface prep and priming for textured finishes
Successful texture starts with a sound foundation. Begin by cleaning the surface to remove dust, oils, and chalky residues. Lightly sand glossy areas to improve adhesion, then wipe again to remove dust. Apply a stain-blocking or sealing primer if you’re working on raw wood, metal, or high-porosity surfaces; this helps uniform the surface and reduces absorbency. If you’re texture layering over existing paint, scuff-sand to create a mechanical key and use a bonding primer to improve adhesion. For walls in living spaces, a high-quality interior primer compatible with the base coat is essential; this reduces color bleeding and ensures the texture shows true. If you’re texture painting a vehicle panel or automotive project, follow the body shop primer guidelines and ensure compatibility with your topcoat.
Tools and textures: choosing tools for patterns
Choosing the right texture tools is a critical step in achieving a believable textured finish. Start with a basic set: a stiff bristle brush for stippling, a sea sponge for organic textures, a ribbed or comb roller for linear patterns, and a soft brush for feathering edges. A foam roller can create soft, stippled effects, while a specialized texture tool or stamp can produce repeating patterns. In some cases, a handheld airbrush with a compressor can introduce micro textures and micro-shadows when used in layers, though this adds equipment and safety considerations. Always test on a scrap surface to gauge how the tool interacts with your base coat, the speed of your stroke, and the distance from the surface.
Layering textures: pattern planning and sequence
Texture depth comes from layering patterns. Start with a base texture that covers the entire surface, then add a secondary texture in targeted areas to create depth and interest. Plan your pattern sequence on graph paper or a digital mockup, noting where light will hit and where you want shadows. For example, you might stipple a light base layer, then drag lines through the wet surface, and finally dab highlights with a sponge. Keep paint conditions in mind: textures must be applied while the base is still workable but not so wet that patterns smear. If you’re aiming for a “how to make paint look textured” effect, you’ll find that strategy matters almost as much as technique.
Texture on walls, furniture, and car surfaces
Texture application varies by substrate. Walls typically tolerate moderate texture using primers and latex or acrylic paints with texture additives. Furniture may benefit from heavier textures with brush dragging and stippling to emphasize the grain or carve lines. Automotive panels require refinishes that resist heat, UV, and abrasion; texture is usually achieved via specialized acrylic texture coats or additive concepts compatible with automotive clears. Regardless of surface, keep edges crisp by using painter’s tape to define borders and by feathering transitions where textures meet flat areas. A well-planned approach makes the texture feel intentional rather than accidental.
Finishes, sheen, and color interaction
Sheen dramatically impacts how texture reads in light. Flat or matte finishes emphasize texture shadows and provide a more subtle look, while satin or semi-gloss finishes reveal more dimension and highlight the raised areas. When selecting color, consider how the shade shifts in different light due to the texture. Two coats of color can enhance depth when paired with a corresponding texture layer. If you’re curious about how to make paint look textured, experiment with a light and dark color pair on a sample board to see how light responds to pattern and depth.
Drying, curing, and re-coating guidelines
Texture layers extend the drying time, especially with heavier applications and cool or damp environments. Always follow manufacturer guidelines for recoat windows; applying a second texture pass too soon can cause the layers to pull or smear. Ensure plenty of ventilation to speed drying, and use a fan to circulate air away from your still-wet texture areas. Humidity, temperature, and air flow dramatically impact texture consistency. Where practical, work in daylight hours with stable temperatures to minimize patchy or uneven texture.
Troubleshooting common texture issues
Texture projects often present problems like blown-out highlights, uneven texture, or accidentally smeared areas. If texture looks too heavy, you can dry brush a lighter layer to blend; if it’s too sparse, add a supplemental pass with a compatible tool or a texture additive. Always test changes on a scrap patch before committing to the entire surface. Sanding between coats can smooth rough patches, but avoid over-sanding, which reduces depth. Finally, remember that texture is a craft: patience and small adjustments yield the most natural results.
Color strategies: tinting and color layering
Color adds another dimension to textured finishes. Tint base coats with a color that complements the texture pattern, or apply a lighter tint in the recessed areas to enhance depth. For walls, a gradually darker shade on raised textures can create a three-dimensional effect when viewed at different angles. When tinting texture-approved paints, always perform a small color test to confirm how the hue shifts after drying and under the room’s lighting. If you’re exploring how to make paint look textured with color, this is where subtlety and restraint pay off.
Maintenance and cleaning textured surfaces
Textured surfaces require gentle maintenance to preserve depth. Use a soft broom or microfiber duster for dry cleaning, and wipe spills promptly with a damp microfiber cloth. Avoid abrasive scrubbers that can dull or remove texture. For painted wall textures, lay low-abrasive cleaning solutions and spot-clean stained areas to prevent discoloration in the textured recesses. Recoating every few years keeps the texture looking fresh and prevents color mismatches between layers.
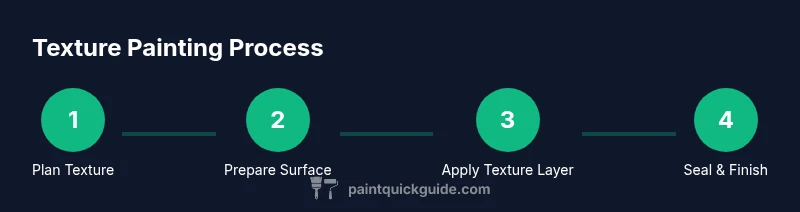
Quick-start project blueprint: 5-step plan to textured paint
If you’re short on time but eager to test a texture project, this 5-step blueprint gives a practical starting point. Step 1: choose a surface and gather tools. Step 2: prep and prime the surface. Step 3: lay the base texture with stippling or sponging. Step 4: add a secondary texture for depth. Step 5: seal with a protective topcoat and test in different lighting. This approach makes it feasible to learn texture techniques without committing to a full-room project right away.
Tools & Materials
- Base paint (color of choice)(Latex or acrylic, compatible with your primer)
- Primer(Bonding primer for better adhesion on rough textures)
- Texture tools set(Stiff brush, sponge, comb roller, and assorted stamps)
- Painter's tape(For clean edges and to protect adjacent surfaces)
- Drop cloths(Protect floors and furniture during application)
- Mixing tray(For combining paint with texture additives if used)
- Respirator or mask(Ventilation is essential in small spaces)
- Gloves(Hand protection if desired)
Steps
Estimated time: 4-6 hours active work; allow up to 24 hours total including drying between coats
- 1
Prepare surface
Clear the area and protect surrounding surfaces with drop cloths. Clean the surface to remove dust and oils, then lightly sand glossy areas to create a mechanical key. Wipe away dust and let dry completely before priming.
Tip: A clean, dry surface prevents texture patterns from slipping or smearing during application. - 2
Prime the surface
Apply a bonding primer suited to the surface, ensuring even coverage. Allow primer to dry fully; this improves adhesion for texture layers and helps color consistency across your texture pattern.
Tip: Use a tinted primer if you plan a color shift; this can help texture pop later. - 3
Mix base texture layer
Load a textured tool with base color or an additive mixed into the paint. Begin with a light, even pass to establish a base texture pattern over the entire area.
Tip: Keep tool at a consistent angle and pressure to avoid heavy or patchy spots. - 4
Apply secondary texture layer
Add depth by applying a second texture using a different tool or pattern. Target areas near edges or focal points to create visual interest and avoid uniformity.
Tip: Overlap edges slightly to create a natural transition rather than sharp borders. - 5
Feather and blend
Use a light touch to blend transitions between textured and flat areas. Feather edges by sweeping a clean brush or sponge along the boundary.
Tip: Work while the surface remains tacky but not wet to prevent smearing. - 6
Check lighting and adjust
Review texture under different lighting angles. Add minor touches where shadows are too flat or too pronounced to balance depth.
Tip: Move lighting around to identify high and low spots you may have missed. - 7
Let texture dry
Allow the texture layer to dry according to paint manufacturer guidelines before applying a topcoat. Drying times vary with temperature, humidity, and thickness.
Tip: Do not rush adding the topcoat; moisture can distort texture. - 8
Seal and test
Apply a compatible clear topcoat to protect texture. Test a small patch first to ensure the finish reads as intended under lighting.
Tip: If topcoat alters the texture too much, adjust with a light re-application of texture layer before sealing.
Your Questions Answered
What is the quickest way to achieve texture in paint?
A practical quick route is to base with a light base coat, then dab with a sponge or stipple brush while the paint is wet. Layer additional patterns if time allows for more depth.
For a quick textured look, start with a base and dab with sponges or stipple brushes while the paint is wet.
Can I texture paint over existing wallpaper or glossy surfaces?
Texture isn’t always ideal over glossy or slick surfaces. Scrape, sand, and prime to improve adhesion, or remove wallpaper before applying texture.
You can texture over some surfaces, but prep is key: sand glossy areas and prime.
What tools create the most natural textures?
A mix of stipple brushes, natural sponges, and ribbed rollers creates the most natural textures when layered with varied pressures.
Use a mix of stipple brushes, sponges, and combs for natural textures.
Is textured paint durable for high-traffic areas?
Durability depends on the base paint and topcoat. A proper topcoat and correct drying will improve wear resistance.
Choose a durable base and finish, then seal with a topcoat.
How long does textured paint take to dry between layers?
Dry times vary; follow the manufacturer’s guidance for recoat windows and avoid applying coats too soon.
Allow ample drying time between coats.
Can I tint textured paint or use color additives?
Yes, tint the base or add color into texture additives; always test color on a small area before committing.
Tints can be added, but test first.
Watch Video
Quick Summary
- Plan texture patterns before painting
- Use multiple textures for depth
- Test on scrap surfaces first
- Ventilate and follow drying times
- Seal textures to protect finish