How to Fit Paint: A Practical Step-by-Step Guide
Learn how to fit paint on walls, furniture, and vehicles with a practical, step-by-step approach covering prep, priming, color matching, and finishing for durable, even results.

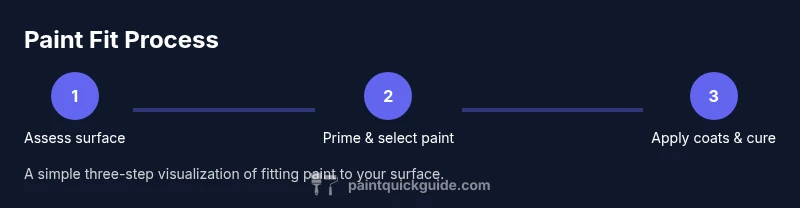
This guide shows you how to fit paint on any surface—from walls to cars—by focusing on surface assessment, primer selection, color matching, and proper application. You’ll prepare thoroughly, mix paints correctly, and apply multiple coats with controlled drying times to achieve a durable, even finish.
Why Properly Fitting Paint Matters
Fitting paint to the surface means choosing products that bond well, provide the right level of durability, and produce a clean, long-lasting finish. When you select compatible primers, finishes, and binders, you reduce issues like peeling, flashing, gloss mismatch, or uneven color. According to PaintQuickGuide, the right fit minimizes wasted materials, speeds up the project, and yields a professional-looking result even for beginners. The goal is a uniform appearance that lasts, with predictable drying times and minimal touch-ups after cure.
In addition to surface chemistry, fit also depends on environment. Interior walls benefit from low-odor, low-VOC formulas, while exterior surfaces require weather resistance and UV stability. Auto refinishing demands even higher levels of abrasion resistance and chemical tolerance. By recognizing the surface type, you set expectations for prep, priming, and application. This early decision reduces rework and helps you plan your supplies, time, and budget more accurately.
Materials and Surface Assessment
Begin by identifying the surface you’re painting: plaster, drywall, wood, metal, or automotive panels. Each substrate has unique bonding needs, porosity, and prep requirements. For walls, check for patches, cracks, and moisture; for cars, inspect clear coats, corrosion, and previous finishes. You’ll also evaluate the environmental conditions—temperature, humidity, and ventilation influence drying and cure times. Compile a quick inventory of existing finishes and plan primers and topcoats accordingly. If you’re unsure about lead paint or old finishes, plan testing and safety steps before aggressive prep.
Before you buy, estimate the scope: measure area (length × height) to calculate square footage. Convert to gallons or liters using the can’s coverage data, then add 10–15% extra for mistakes, edges, and wasted waste. Finally, confirm the color family and sheen that best fits the room’s lighting and use case. Accurate assessment sets the stage for a fit that looks right and wears well over time.
Preparing the Surface for Paint
Surface preparation is the majority of the work and determines the final look. Start by removing loose material, dust, and grease with a mild detergent or degreaser. Rinse and allow to dry completely to avoid trapping moisture under the finish. Sand glossy surfaces to create a micro-roughness that the primer can grip; for porous substrates, dust-off and vacuum after sanding to avoid pigment inclusions in the topcoat. Patching holes and cracks with filler ensures a smooth base, minimizing visible imperfections after painting. Guard up: always follow safety guidelines when sanding, especially on older homes where lead paint may exist.
After repairs, wipe down surfaces to remove dust. Dried stain or tannin bleed may require a sealer or stain-blocking primer to prevent discoloration. Finally, cover floors and furniture with drop cloths and tape off edges to protect trim. The cleaner the surface, the better the final adhesion and color appearance.
Primers, Undercoats, and Bonding Agents
Primers are the bridge between surface and topcoat. For glossy finishes, use a bonding primer to improve adhesion. Porous surfaces benefit from stain-blocking primers to prevent bleed-through. In automotive refinishing, sandable primers create a solid base for even color distribution and scratch resistance. Select the primer to match the topcoat chemistry (water-based vs. solvent-based) and the surface material. If color matching is essential, use a tinted primer to reduce the number of thin coats required and to improve final shade accuracy. Remember that some surfaces, like raw metal or certain plastics, demand specialty primers designed for that substrate.
Undercoats sometimes act as color shifters, so test a small area to confirm the hue under the chosen light. Bonding agents can also improve adhesion on challenging substrates like glossy laminates or PVC. In all cases, allow primers to dry completely per the product label before applying the topcoat. This avoids lifting and ensures a crisp, even finish.
Choosing and Mixing Paint for a Great Fit
Pick a paint type and sheen appropriate for the room and the surface. Latex (water-based) paints are common for walls and ceilings, offering easy cleanup and low odor, while enamel or acrylic enamels suit high-traffic areas and metal surfaces. When color matching, test swatches under the room’s lighting and compare at eye level on the wall. If you’re unsure about color shifts, consider using a base-coat and a precise topcoat to reduce color drift. Avoid mixing brands haphazardly; compatibility matters for adhesion and finish uniformity. When mixing, stir gently rather than shaking to minimize air bubbles, and never thin with incorrect solvents.
Prepare a small test patch on an inconspicuous area. Review the patch after drying in the actual light, then adjust shade with a controlled amount of additional pigment. Label test batches clearly to prevent cross-contamination. If color accuracy is critical, consult sample cards or fan decks and compare in a consistent lighting setup.
Application Techniques for Different Surfaces
Application methods vary with surface type and desired finish. For flat walls, use long, even strokes with a roller to avoid lap marks; cut in edges with a steady brush for clean corners. Textured walls may require rolling with more pressure and a nap-length appropriate to the surface. Wood trim demands careful edge work and lighter coats to prevent runs. Metal or plastic surfaces benefit from a primer and a light wet-sanding between coats to reduce micro-scratches. In automotive refinishing, masking and color uniformity are paramount; practice panel by panel and observe safety standards for ventilation and PPE. Practice on a cardboard sheet or spare panel before committing to the main job.
Always apply coats in the same direction and maintain a consistent working area to avoid uneven shade and texture. Keep your tools clean to prevent dried pigment from causing streaks. If your first coat appears streaky or thin, adjust your technique rather than applying several heavy coats, which can cause runs or solvent evaporation issues.
Drying Times, Curing, and Clean-Up
Drying time depends on temperature, humidity, film thickness, and the paint type. Most interior latex paints touch-dry within 1–2 hours and cure to full hardness in a few days, while oil-based finishes take longer. Open windows or use fans to promote air circulation, but avoid strong heat that can cause cracking or skin formation on the surface. After finishing, clean tools with water for latex or appropriate solvent for oil-based finishes and store them upright to prevent warping. Remove painter’s tape before fully dry to avoid peeling when the paint is still pliable. Dispose of used rags and materials according to local regulations, particularly if solvents are involved. Finally, inspect the entire surface under different lighting and touch up any edges or spots while the paint remains workable.
Final Checks and Color Consistency
With coats dry, inspect for uniform color and texture. Look for thin spots, lap marks, dust nibs, or brush marks and address them with light sanding or spot touch-up passes. Ensure the color remains consistent across different lighting: daylight, lamp light, and ceiling shadows can reveal shade differences. A clear topcoat or protective finish may be appropriate for high-traffic areas, as it enhances durability and ease of cleaning. Document the products used and the dates of application for future touch-ups or repaint cycles.
Tools & Materials
- Drop cloths or plastic sheeting(Protect floors and furniture)
- Painter's tape(Mask edges; use low-tack tape)
- Quality brushes and rollers(Synthetic for latex, natural for oil-based)
- Paint tray and liner(Catch drips; liners simplify cleanup)
- Sandpaper (120-220 grit)(Smooth rough patches and satinize gloss)
- Putty or filler(Repair small dents or cracks)
- Primer/undercoat(Choose bonding or stain-blocking as needed)
- Respirator or mask(Protect lungs from fumes)
- Gloves(Keep hands clean and protected)
- Mix stick or drill with paddle(Stir thoroughly for consistent pigment)
- Buckets or empty containers(Mix and store small batches)
- Paint thinner/cleaner(Water for latex; solvent for oil-based)
Steps
Estimated time: 3-6 hours
- 1
Assess surface and fit
Measure the area and inspect the substrate for repairs, moisture, gloss, or previous finishes. Decide on primers and topcoats that will provide the best adhesion and durability. Document findings so you can plan coats and drying times accurately.
Tip: Test a small patch to confirm color and finish before committing to the full area. - 2
Protect the workspace
Lay down drop cloths, seal edges with painter’s tape, and remove or cover furniture. Ensure proper ventilation and airflow to manage fumes and drying times. Safety first: wear a mask, especially when sanding or using solvent-based products.
Tip: Keep a dedicated cleanup corner to avoid cross-contamination with other tools. - 3
Clean and repair surfaces
Wipe down walls or surfaces with a mild detergent to remove grease and dust. Patch holes or cracks with filler, allow drying, and sand smooth for a uniform base. A clean, smooth surface improves primer bite and topcoat appearance.
Tip: Dry patches thoroughly before priming to prevent peeling. - 4
Choose primers and topcoats
Select primers compatible with the topcoat and substrate. For glossy or stained surfaces, use bonding primers; for porous areas, choose a stain-blocking or sealing primer. Check the product’s recommended substrate and environmental suitability.
Tip: If color is critical, consider tinted primer to reduce the number of coats. - 5
Prepare paints and color match
Stir paints thoroughly to achieve uniform pigment. If color matching, test swatches on poster boards under the room’s lighting before committing. Avoid mixing brands to minimize compatibility issues; keep to a single brand and line when possible.
Tip: Label test patches with date and color code for reference. - 6
Prime where necessary
Apply primer as a single, even coat. For repairs or drastic color changes, additional primer coats may be needed. Let primer dry fully according to the label before applying topcoats.
Tip: Lightly sand primer between coats to improve adhesion for the final layer. - 7
Apply first coat
Load the brush and roller with an even amount of paint. Use long, smooth strokes to avoid lap marks, and maintain a wet edge to prevent dry patches. Work in sections and keep a consistent technique across walls or panels.
Tip: Aim for a ‘wet edge’ so colors blend seamlessly. - 8
Apply final coats and inspect
Inspect for consistency after each coat dries. Apply a second (and third if needed) coat following the same technique. Check lighting to detect any color or texture inconsistencies.
Tip: Don’t rush drying times; additional coats ensure durability and even color. - 9
Clean up and finalize
Clean tools promptly, remove masking tape while the surface is still slightly tacky to avoid peeling. Do a final light wipe-down to remove dust. Record the paint products and finish for future touch-ups or re-paints.
Tip: Store leftover paint for touch-ups with a labeled container.
Your Questions Answered
Do I always need to prime before painting?
Priming is recommended on glossy, stained, or porous surfaces to improve adhesion and hide imperfections. Some new, porous surfaces may not need primer when the topcoat is high-quality and designed for direct application.
Priming is often needed on glossy or porous surfaces to help the paint stick and look even.
How long should I wait between coats?
Drying times depend on product and conditions. Interior latex often dries to the touch in 1–2 hours and can accept a second coat after 4 hours; oil-based finishes take longer. Always follow the product label.
Wait the recommended dry time on the can, usually a few hours, before applying the next coat.
Can I mix paints from different brands?
Best practice is to avoid mixing brands or lines. Different binders and pigments can cause adhesion or color issues. If you must mix, test on a patch first and consult the manufacturer guidelines.
It's safer to stick to the same brand and line for best results.
How do I estimate how much paint I need?
Calculate by area: multiply length by height for walls, and include windows and doors. Use the can’s coverage figure and add 10–15% for mistakes, waste, and touch-ups.
Measure the area and check the can coverage; add extra for mistakes.
Is it necessary to sand between coats?
Lightly sand between coats to remove imperfections and improve adhesion for the next layer. Wipe away dust before applying the next coat.
Light sanding between coats helps adhesion and a smoother final look.
What about safety with lead paint in older homes?
In homes built before a certain year, test for lead paint and follow local regulations for containment and cleanup. Use appropriate PPE and consider professional testing if unsure.
Test for lead and follow safety guidelines before sanding or disturbing old paint.
Watch Video
Quick Summary
- Prepare surfaces thoroughly for best adhesion.
- Choose primers that match substrate and topcoat chemistry.
- Apply coats with proper timing to avoid defects.
- Test colors under real lighting before large areas.
- Clean tools promptly to extend their life.