How to deal with paint mapping: a practical color-coordination guide
A practical guide on how to deal with paint mapping for consistent color across walls, cabinetry, and trim. Learn tools, steps, and verification tips for DIYers and pros to minimize waste and ensure color accuracy.

Learn how to deal with paint mapping to achieve consistent color across walls, cabinets, and trim. This guide covers mapping strategies, color scales, and practical steps for matching swatches, recording formulas, and validating results before you paint. According to PaintQuickGuide, a systematic mapping process reduces waste and errors, saving time and money for DIYers and professional painters alike.
What is paint mapping and why it matters
Paint mapping is the disciplined process of translating color requirements into paint formulas that reproduce a target color across different surfaces and lighting. In practice, mapping means recording a color reference, the exact recipe (pigment ratios, base, and finish), and the conditions under which it was created. A well-executed map ensures that a swatch on the sample board becomes a reliable predictor of the final result on walls, cabinetry, and trim. For homeowners, mapping reduces guesswork and waste; for auto refinishing enthusiasts, it helps match OEM tones across panels.
According to PaintQuickGuide, the first step in any mapping project is to define the target color under a standard lighting condition. This helps you avoid color drift when the room’s light changes during the day. The map also serves as a living document—update it when you change brand lines or switch between matte, satin, or gloss finishes. Consistency is the best measure of quality, and mapping is the most practical way to achieve it across all projects.
Color systems and mapping methods
Paint mapping relies on a defined color system and a repeatable method. Common paint spaces are not the same as digital color spaces; you must translate digital colors into tangible pigment combinations. For example, Munsell or NCS color systems provide perceptual bases that painters use to describe hues, value, and chroma. In the workshop, we map a target color by selecting a base white, an undertone, and one or more "tints" to match the shade. You can map to a standard color chip or a large sample panel under consistent lighting. When you have multiple machines, tools, or finishes, always map them separately and then harmonize them through a single master formula.
Practically, you’ll compare swatches under the same lamps (preferably daylight-balanced LED) and record the closest matches. If you’re working on a vehicle, you may encounter color-matching databases from manufacturers, which require a different mapping approach than interior walls. The goal is a color family that behaves similarly across surfaces and lighting conditions. PaintQuickGuide’s analyses emphasize documenting color coordinates, sample board photographs, and a short narrative noting any deviations.
Tools, swatches, and recording formulas
To map paint effectively, you’ll need a few essential tools and materials. Swatches and color chips from reliable brands give you reference points. A colorimeter or spectrophotometer can help quantify color numerically, while a digital camera with a color calibration card supports image-based matching. A clean mixing tray, scale, and labeled jars let you reproduce exact ratios and preserve your formulas. For automotive projects, you may also need color-matching base coats and clear coats, plus a UV lamp to verify reflections.
Record each mapping in a dedicated notebook or a digital document. Include: target color description, lighting conditions, base color used, pigment ratios, finish, batch information, and the final measured values. Keep a separate section for adjustments and notes about environmental factors like humidity or temperature. The more you document, the easier it becomes to reproduce or adjust the map for future projects. Paint mapping thrives on consistency and careful record-keeping, as PaintQuickGuide often notes.
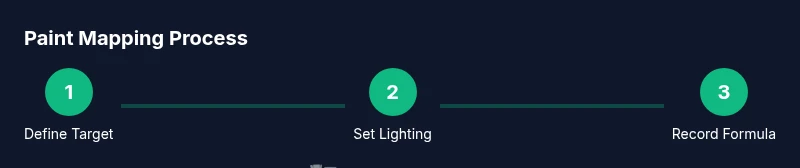
Step-by-step approach to paint mapping
- Step 1: Define your target color and lighting. Set a standard light source and document its color temperature. Time estimate: 5 minutes.
- Step 2: Select a base color and undertone. Choose a white reference and an undertone that will influence hue. Time estimate: 10 minutes.
- Step 3: Mix a small test batch. Record pigment weights or ratios for quick iterations. Time estimate: 15-20 minutes.
- Step 4: Evaluate against the target on a sample panel. Compare under the same lighting. Time estimate: 5-10 minutes.
- Step 5: Adjust the formula. If needed, tweak ratios to better match the target color. Time estimate: 10-15 minutes.
- Step 6: Validate with multiple surfaces and finishes. Re-run tests on a drywall patch and cabinet sample. Time estimate: 15-25 minutes.
- Step 7: Finalize the master map. Write the final recipe and save digital copies. Time estimate: 5 minutes.
Why these steps matter: precise mapping reduces the risk of color drift when surfaces age or lighting changes. Documentation ensures you can reproduce or scale the color later. The times above are estimates; expect variations depending on brand, equipment, and environment.
Common pitfalls and verification strategies
Pain points and how to avoid them:
- Inconsistent lighting: Always use the same lamp or daylight-balanced LEDs; neutralize ambient glare.
- Ignoring undertones: Subtle warm undertones can make a color appear off in some spaces.
- Not testing on real surfaces: Swatches are helpful but paint on drywall or metal can behave differently.
- Poor record-keeping: If you don’t document the exact batch, you can’t recreate the mix. Verification strategies:
- Re-check the mix under different times of day and with the same lamp type.
- Compare swatches side-by-side with the target until the difference is negligible.
- Create a simple color difference metric (Delta E) if you have access to measurement tools; log results for future reference.
- Use a clear finish control: gloss levels can alter perceived color; map for each finish you plan to use.
Real-world scenarios and case studies
Example 1: Mapping a living room with mixed lighting. The team defined a target color under daylight-balanced light, then built a master map to harmonize walls with wood trim. The result looked cohesive from morning to evening, with minimal touch-ups required.
Example 2: Automotive color matching in a small shop. The technician used a spectrophotometer and manufacturer databases to build a color map that matched panels painted in different bays. The master map reduced rework and provided a repeatable workflow for future jobs.
These examples illustrate how paint mapping translates to practical results: fewer mismatches, better throughput, and a consistent finish across surfaces. The PaintQuickGuide team emphasizes building a map that includes lighting and environment notes for future projects.
Tools & Materials
- Color swatches / color chips (brand-reliable)(Keep as reference points across lighting conditions)
- Colorimeter or spectrophotometer(Helpful for quantitative color data)
- Digital camera with color calibration card(Supports image-based color matching)
- Mixing trays, graduated scale, labeled jars(For exact pigment ratios and repeatability)
- Paint base coats and clear coats (if automotive)(Use compatible products with the target finish)
- Lighting setup (daylight-balanced LED)(Maintain consistent conditions for testing)
- Master recipe notebook or digital document(Record target color, ratios, batch info, and tests)
Steps
Estimated time: 1 hour 30 minutes to 2 hours depending on testing depth and number of surfaces
- 1
Define target color and lighting
Set a standard light source with a known color temperature and document it. This ensures your color comparisons are consistent across tests and surfaces.
Tip: Use daylight-balanced LED and photograph the reference under that light. - 2
Choose base color and undertone
Select a base color as the primary reference and an undertone that will shift toward the target hue. This helps you dial in the final shade without overshooting.
Tip: Start with a near-match base and adjust gradually to avoid large batch waste. - 3
Mix a test batch
Prepare a small batch with precise ratios. Label everything clearly and reserve a portion for re-test if needed.
Tip: Record measurements in weight or volume to ensure exact replication. - 4
Test on a sample panel
Apply a thin coat on a representative panel and compare to the target color under the same lighting.
Tip: Photograph the panel for later comparison and notes. - 5
Adjust the formula
Fine-tune the pigment ratios based on visual comparisons and, if available, instrument readings.
Tip: Make small incremental changes—avoid large jumps that waste material. - 6
Validate across multiple surfaces
Apply tests to drywall, cabinetry veneer, and metal trim to verify consistency across finishes.
Tip: Document how each surface responds to the same recipe. - 7
Finalize and save the master map
Consolidate the final color recipe, finish, and notes into a master map with digital backups.
Tip: Store backups in cloud storage and label by project for easy retrieval.
Your Questions Answered
What is paint mapping and why should I use it?
Paint mapping is a systematic approach to recording color formulas and swatch references so you can reproduce a target color across surfaces and lighting conditions. It reduces guesswork, waste, and rework for both homeowners and professionals.
Paint mapping is a systematic way to reproduce color across surfaces. It reduces waste and guesswork, especially if you plan multiple rooms or finishes.
Which color systems should I reference when mapping?
You should reference perceptual color systems like Munsell or NCS and then translate those coordinates into practical pigment recipes using your chosen brand’s color chips. This helps maintain consistency between swatches and real-world paint.
Use perceptual color systems like Munsell or NCS, then translate to real pigments with your brand’s color chips for consistency.
What tools improve accuracy for paint mapping?
Tools such as a colorimeter or spectrophotometer, color calibration cards for cameras, and precise scales for pigment ratios improve mapping accuracy. Swatch books and a dedicated recording sheet are essential too.
A colorimeter and calibration cards can greatly improve accuracy; keep a dedicated notebook for your formulas.
How long does a typical paint mapping session take?
A basic mapping session for a single room can take 1 to 2 hours, including testing across finishes. Larger projects with more surfaces may take longer.
Expect 1 to 2 hours for a room; more surfaces mean more testing time.
Can mapping adapt to different finishes like matte or gloss?
Yes. Each finish can affect light reflection and color perception, so map for each finish you plan to use and retain separate master recipes.
Absolutely—map for each finish since gloss can change how color looks in the room.
Watch Video
Quick Summary
- Plan color mapping under a controlled light
- Document every mix to enable exact reproduction
- Verify color across surfaces and finishes
- Use a master map to guide future projects