How to Use Paint Sticks: A Practical Guide
Learn how to use paint sticks for fast touch-ups on walls, furniture, and automotive panels. This guide covers selecting sticks, prepping surfaces, applying in thin layers, blending edges, and safe cleanup with expert tips.

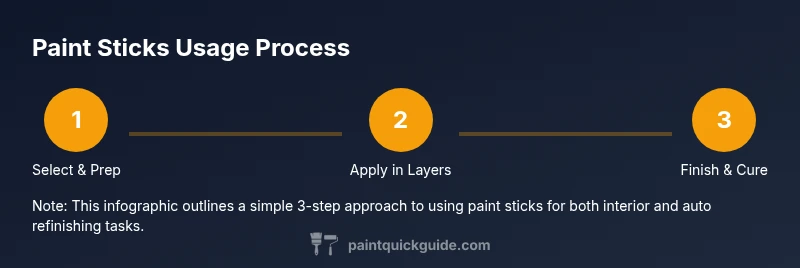
Paint sticks provide a fast, clean touch-up method for small areas on walls, furniture, and vehicles. Start by selecting the right stick (oil or water-based), prep the surface, apply in thin layers, feather edges, and finish with the recommended sealant or finish. Always follow the manufacturer's cure times and cleanup instructions.
What are paint sticks and when to use them
According to PaintQuickGuide, paint sticks are solid blocks of color that you rub onto small areas to cover chips, scratches, and scuffs. They work well for quick, localized repairs on walls, decorative furniture, and auto panels where a full repaint would be excessive. This approach minimizes mess and allows you to blend the color more precisely than a bulk brush. When used correctly, paint sticks can provide a durable, even finish with far less drying time than liquid paints. Consider them a targeted touch-up tool for rapid DIY results. How do you use paint sticks? In practice, this guide shows you a reliable method that homeowners can follow without specialized equipment.
How to choose the right paint sticks for your project
Not all paint sticks are created equal. Start by matching the type of stick to your surface: oil-based sticks for metals and auto parts, water-based sticks for walls and wood, and specialty sticks for furniture finishes. Check the pigment load and color-matching options, then test a small amount on an inconspicuous area. Storage conditions matter; keep sticks capped and away from heat to preserve consistency. For DIY homeowners and auto refinishing hobbyists, choosing a versatile product with clear instructions reduces guesswork and improves outcomes. PaintQuickGuide recommends reading the label for drying time and cleanup requirements.
Surface preparation and color matching basics
Preparation dramatically affects results. Wipe surfaces clean to remove dust, grease, and wax; lightly sand glossy areas to create a better bite for the stick. After prep, wipe again with a tack cloth and allow the surface to dry completely. Temperature and humidity influence drying; work in a well-ventilated space where the surface feels slightly tack-free before application. For color accuracy, keep a small test area to compare the stick to the surrounding color. If you’re matching a car’s finish, test under bright light to gauge sheen differences.
Step-by-step techniques for applying paint sticks
Using paint sticks effectively requires a few core motions. Begin with a light touch and work in short, overlapping strokes around the repair area. Apply in thin layers; you can always add more, but thick layers are harder to blend. For edges, feather the transition with a clean, dry finger or a soft cloth to reduce harsh lines. Check your progress under different lighting and adjust as needed. Allow each layer to set briefly before applying another. This method minimizes lumps and creates a smooth, durable finish.
Common mistakes and how to fix them
Common errors include overloading the stick, which creates blobs, and ignoring surface prep, which causes flaking. Failing to blend edges leads to visible seams. If you make a mistake, gently wipe while the surface remains workable or apply a light second pass after curing the first layer. When colors don’t match perfectly, use a small amount of a compatible touch-up medium or blend with neighboring shades. Always test on a hidden area before committing to a visible spot.
Maintenance, cleanup, and storage tips
After finishing, seal the area if your product recommends it and let it cure according to the label. Clean tools with the appropriate solvent or a damp cloth, then store sticks upright in a cool, dry location. Label unopened sticks with the color code and date to track shelf-life. Regularly check for crystallization or separation, especially in humid environments. Proper storage preserves color integrity for future touch-ups.
Tools & Materials
- Paint sticks (oil-based and/or water-based)(Choose colors that match the target area; consider a small set for versatility.)
- Lint-free cloths(For wiping edges and cleaning surface between passes.)
- Masking tape(Protects adjacent surfaces during touch-ups.)
- Drop cloths or old sheets(Contain any residue and keep work area clean.)
- Solvent or mild cleaner(Use only if cleaning is needed per product instructions.)
- Fine-grit sandpaper (320-400 grit)(Lightly scuff glossy surfaces for adhesion.)
- Mask or respirator(Required for solvent-based sticks in poorly ventilated spaces.)
- Gloves(Protect skin from pigment and solvents.)
Steps
Estimated time: 30-60 minutes
- 1
Gather materials
Collect all required items from the Tools & Materials list and place them within easy reach. Set up a clean, well-lit workspace and protect surrounding surfaces with masking tape and drop cloths.
Tip: Lay out materials in order of use to speed the process. - 2
Prepare the surface
Wipe the repair area to remove dust and grease, lightly sand glossy patches, and wipe again with a tack cloth. Let the surface dry completely before applying color.
Tip: Use a tack cloth to pick up fine dust that sanding leaves behind. - 3
Test color and technique
Apply a small amount of paint stick on a hidden spot to verify color match and texture. Adjust pressure or stroke direction if needed before tackling the main area.
Tip: Choose a test area similar in lighting to the final visible surface. - 4
Apply in thin layers
Lightly rub the stick over the area in overlapping strokes. Build coverage gradually, avoiding heavy blobs that are hard to blend.
Tip: Start at the edge and work inward to control edge blur. - 5
Feather edges and blend
Gently feather the edges with a clean finger or cloth to avoid abrupt transitions. Check under multiple lights and adjust as necessary.
Tip: A damp, lint-free cloth can help smooth the edge during the blending phase. - 6
Cure and cleanup
Allow the final layer to cure per product instructions. Clean tools with the recommended solvent or a damp cloth and store sticks upright.
Tip: Ventilate the area during cure to reduce fumes.
Your Questions Answered
What exactly are paint sticks and where can I use them?
Paint sticks are solid blocks of pigment used for touch-up work on walls, furniture, metal, and automotive panels. They are ideal for small repairs where a full repaint would be overkill. Use on suitable surfaces with appropriate prep.
Paint sticks are solid blocks of pigment for quick touch-ups on walls, furniture, or metal; they’re best for small repairs after proper prep.
Are paint sticks suitable for auto refinishing?
Yes, but choose sticks compatible with automotive finishes and follow safety guidelines. Check the label for solvent content and curing times, and test on a discrete area first.
They can be used on auto panels if compatible with the finish and you test first.
How long do paint sticks take to dry or cure?
Drying and curing depend on the product and conditions. Expect shorter times in warm, dry spaces and longer times in high humidity. Always follow the product’s drying instructions.
Dry times vary; follow the product label for exact guidance and curing.
Can I use paint sticks on porous surfaces like bare wood?
Paint sticks may work on bare wood, especially if primed, but you may need more coats or a primer to ensure even coverage and durability.
They can work on bare wood if primed; you might need more coats.
What should I do if the color doesn’t match perfectly?
Mixing a tiny amount of another compatible stick can help, or blend with neighboring shades. Always test first on a hidden area.
If it doesn’t match, test adjustments on a hidden spot before redoing a visible area.
How should I store paint sticks long-term?
Keep sticks capped, upright, in a cool, dry place away from direct sun. Label colors and dates to track shelf life.
Store upright in a cool, dry place and label colors.
Watch Video
Quick Summary
- Choose the right paint stick type for the surface
- Prepare surface for best adhesion
- Apply in thin layers and blend edges
- Test before main area to ensure color accuracy
- Store sticks properly to extend shelf life