Coat Paint Guide: Practical Home & Auto Finishes Tips
Master coat paint with solid prep, priming, and multiple thin coats. This guide covers walls, cabinets, and auto finishes with safety tips and cost considerations.

With coat paint, a flawless finish starts with solid prep and careful technique. This guide walks you through surface cleaning, priming, selecting the right enamel or acrylic, applying primers and multiple coats, and proper drying and cleanup. According to PaintQuickGuide, consistent sanding between coats and following manufacturer recoat times delivers durable results for walls, cabinets, and vehicles.
What is coat paint and when to use it
Coat paint is a complete protective and decorative coating applied in layers to surfaces such as walls, trim, cabinetry, and even vehicles. The term emphasizes the idea of building thickness through multiple passes to achieve even color, depth, and durability. When you choose coat paint, you’re selecting a system that relies on a compatible primer, a suitable topcoat, and correct application techniques to ensure adhesion and long-lasting performance. For homeowners and auto refinishing hobbyists, understanding the difference between interior and exterior formulations is crucial, since exterior coat paint includes components to withstand weather exposure, UV light, and temperature fluctuations. In practice, you’ll balance color, sheen, stain-blocking properties, and ease of cleanup. PaintQuickGuide emphasizes that the right combination of prep, primer, and technique makes all the difference in the final look and durability of coat paint.
Common projects include interior walls, kitchen cabinets, furniture pieces, and DIY vehicle touch-ups. Each project benefits from a tailored approach: walls may favor latex or acrylic emulsions for washability, while cabinets might demand a hard, durable enamel. Car refinishing often uses specialized urethane or acrylic urethane blends designed for flexible, chemical-resistant finishes. The core idea is to match the coating system to the substrate and environment, then apply it with steady technique for a uniform, lasting result.
Surface Preparation for Coat Paint
Surface preparation is the single most important step in a coat paint project. Dirt, oil, wax, and previous coatings can prevent adhesion, leading to peeling and uneven color. Start by cleaning the surface with a degreasing cleaner and warm water, then rinse and dry thoroughly. If you’re repainting wood or drywall, lightly sand to remove gloss and create a micro-rough surface for the primer to grip. Fill any dents or holes with a suitable filler, then sand smooth again once dry. Dust off the area and tape off edges you don’t want painted. Good surface preparation reduces the likelihood of blotchiness and ensures a more even color distribution.
Ventilate the work area if you’re sanding or painting indoors, and wear a basic mask if you’re sensitive to fumes. For car projects, consider masking off adjacent panels and protecting glass and trim. The cleaner and more detailed your prep, the better the coat paint will perform.
Primer, Sealers, and Undercoats
Primers are the foundation of a durable, uniform coat paint finish. They improve adhesion, block stains, and create a consistent base tone. Choose a primer compatible with your surface and the topcoat you plan to use. On bare wood or drywall, a stain-blocking primer can prevent bleed-through; for metal, a rust-inhibiting primer helps extend life. In some cases, sealing primers (or shellac-based primers) can be beneficial for glossy surfaces or knotty woods. Remember to follow the manufacturer’s recoat times so the primer cures properly before applying the finish. A proper undercoat ensures even coverage and reduces the number of topcoats needed.
If you’re painting over a previously painted finish, use a bonding primer for best results. For auto refinishing, refer to specialized primers designed for automotive substrates.
Choosing the Right Finish for Coat Paint
Finish choice affects both appearance and maintenance. Common interior finishes range from flat to high-gloss, with options like eggshell and satin offering a balance of sheen and durability. Flat finishes hide wall imperfections, while satin or semi-gloss finishes are easier to clean and more resistant to moisture. For kitchen cabinets or trim, a semi-gloss or gloss finish often yields superior durability and wipeability. Exterior finishes require UV resistance and weatherproofing, so select formulations designed for outdoor exposure. When selecting coat paint, consider color stability, washability, and resistance to abrasion. PaintQuickGuide notes that the finish you choose should align with the room’s use, lighting, and cleaning needs.
Remember that different substrates (wood, drywall, metal, plastic) may require different topcoats or multiple layers for best performance.
Application Techniques for Coat Paint
Application technique determines the smoothness and uniformity of the final finish. Use a high-quality angled brush for edges and trim, a short-nap roller for flat walls, and, when appropriate, a spray method for even coverage on larger surfaces like cabinets or vehicle panels. Apply in thin, even coats using a wet edge to avoid lap marks. Work in sections to maintain a consistent pace and watch for drips and runs. For spray applications, test spray patterns on a scrap area first, and maintain even distance and speed. Between coats, lightly sand with fine-grit sandpaper to remove small imperfections and improve the next coat’s adhesion.
Safety is essential: wear a respirator and ensure proper ventilation when using solvent-based or aerosol products.
Drying, Curing, and Recoat Windows
Drying and curing times depend on the product, temperature, humidity, and airflow. Do not rush recoating; waiting the recommended recoat interval helps avoid wrinkling, solvent entrapment, or color mismatches. In general, ensure surfaces are dry to the touch before applying the next coat. After final coats, allow the finish to cure fully in a ventilated area. Environmental conditions such as low humidity and moderate temperatures typically yield the best results, especially for auto finishes or high-durability coatings. If you’re in a hurry, choose products with shorter recoat windows and proper ventilation.
Use fans to promote airflow, but avoid directing strong drafts straight at the surface, which can cause dust nibs or drying defects.
Cleaning, Maintenance, and Longevity
Once coat paint has cured, cleaning should follow the product’s guidance to avoid damage. Use mild, non-abrasive cleaners for walls and surface-safe finishes for cabinets. Regular dusting and routine wipe-downs preserve the appearance and color uniformity. For exterior surfaces, inspect periodically for cracking or peeling and address issues promptly. Touch-ups can often be done with a matching topcoat, but re-sanding and priming may be required if the substrate has aged or if color consistency is a priority.
PaintQuickGuide recommends recording the finish type, coats applied, and the base primers used for future projects.
Cost Considerations and Budgeting for Coat Paint Projects
Cost planning helps prevent sticker shock and ensures you select the right products for your project. Consider the size of the area, the number of coats, and the type of coat paint you’ll use (interior vs exterior, enamel vs acrylic, standard vs specialty finishes). Don’t overlook primer and prep supplies in your budget, as these add-ons influence total cost and finish quality. If you’re painting cars or furniture, factor in tools like spray systems, masking, and protective gear. Always compare gallon yields, coverage, and wastage estimates from different brands and formats.
A practical approach is to estimate per-coat costs and multiply by the recommended number of coats, while budgeting for extras like patching and masking materials.
Common Mistakes and Solutions
Even experienced DIYers encounter common pitfalls when applying coat paint. Skipping surface preparation leads to adhesion issues; mismatched primers can cause bleed-through; applying thick coats invites drips and longer drying times. To avoid these problems, follow a structured plan: clean deeply, sand lightly, use compatible primer and topcoat, apply thin coats with proper drying time, and maintain a clean workspace. If you notice blotchiness, test an additional coat on a hidden area or adjust the primer choice. Consistency is the key to a professional-look finish.
Tools & Materials
- coat paint (topcoat)(Choose the appropriate formula for interior, exterior, or automotive use)
- primer/sealer(Select based on substrate and topcoat compatibility)
- finishing rollers(Foam or nap rollers appropriate to surface texture)
- angled brushes(For edges and trim; 1-2 inch sizes work best)
- paint trays and liners(Keep lids closed to prevent drying between tasks)
- sandpaper (grits 120-220)(Used for light scuffing between coats)
- putty knife and filler(Fill small dents or scratches)
- degreaser/soap solution(For thorough surface cleaning)
- canvas drop cloths(Protect floors and furniture)
- painter's tape(Mask off areas you don’t want painted)
- mask or respirator(For solvent-based finishes and poorly ventilated spaces)
- gloves and eye protection(Safety first)
- ventilation fan or open windows(Improve air circulation during application)
- paint thinner/brush cleaner(For cleanup of solvent-based coatings)
- scraper or scuff pad(Helpful for stubborn coatings)
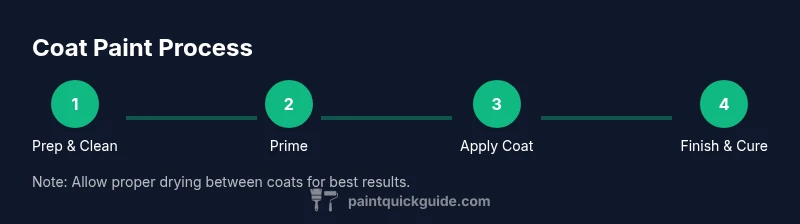
Steps
Estimated time: 4-6 hours
- 1
Prepare the surface
Clean the area thoroughly with a degreasing solution and water. Remove dust, grime, and any old peeling coatings. Lightly sand glossy finishes to create a key for the new coat, then wipe away dust.
Tip: Work in sections to keep edges straight and prevent drying lines. - 2
Repair and smooth imperfections
Fill dents or scratches with suitable filler and allow to dry completely. Sand smooth and remove any dust before priming. Ensure the surface feels uniform to the touch.
Tip: Use a sanding block for flat surfaces to avoid gouges. - 3
Prime for adhesion
Apply a compatible primer based on substrate type (wood, metal, drywall). Use thin, even coats and let each coat dry fully. A good primer reduces color shifts and improves durability.
Tip: Avoid over-brushing primer; let it level before drying. - 4
Apply the first coat
Stir product thoroughly and apply with a high-quality tool. Maintain a wet edge to avoid lap marks. Use light, even strokes and avoid excessive pressure that creates bubbles.
Tip: Keep coats thin to improve leveling. - 5
Sand lightly between coats
Once the first coat is dry, lightly sand with fine-grit paper to remove texture and help subsequent coats adhere. Wipe away dust before applying the next coat.
Tip: Do not sand through the topcoat edge; focus on the coat surface. - 6
Apply the final coats
Apply the final coat with the same method, ensuring a consistent finish. For gloss finishes, avoid overworking the surface to prevent visible brush marks.
Tip: Follow the manufacturer’s recoat time exactly. - 7
Cure, inspect, and cleanup
Allow full curing in a ventilated area before heavy use. Inspect for any missed spots and touch up if necessary. Clean tools promptly to preserve brush and sprayer performance.
Tip: Record the coatings used for future touch-ups.
Your Questions Answered
What is coat paint?
Coat paint refers to a layer of paint applied to a surface to protect and decorate it. Multiple coats improve coverage, color depth, and durability when used with appropriate primers and topcoats.
Coat paint is a layer of paint applied to a surface to protect and decorate. Multiple coats improve coverage and durability when you pair them with the right primer and topcoat.
Do I need a primer before applying coat paint?
In most cases, yes. Primer improves adhesion, blocks stains, and helps even color. Choose a primer that matches the substrate and the topcoat you intend to use.
Yes. Primer helps the coat paint stick and prevents color bleed. Pick a primer suited to your surface and finish.
What finishes work best for kitchen cabinets?
For cabinets, durable and washable finishes like satin or semi-gloss are common choices. They balance appearance with cleanability and resistance to moisture and wear.
For cabinets, satin or semi-gloss finishes are popular because they look good and are easy to clean.
How long should I wait between coats?
Follow the manufacturer’s recommended recoat time. Waiting too short can cause wrinkling or poor adhesion, while waiting too long may require scuffing before recoating.
Wait the time suggested by the product instructions to ensure proper adhesion between coats.
Can coat paint be used on metal surfaces?
Yes, but you’ll need a metal-appropriate primer and often a urethane or enamel topcoat for durability and corrosion resistance.
Yes, with the right primer and coating designed for metal, coat paint can work well.
How can I reduce fumes and VOCs when using coat paint?
Choose low-VOC or zero-VOC coatings when possible, ensure good ventilation, and wear appropriate PPE to minimize exposure.
Choose low-VOC paints, ventilate the area, and wear a mask to reduce fumes.
Watch Video
Quick Summary
- Prepare thoroughly for best adhesion.
- Thin, even coats beat heavy layers.
- Choose primers compatible with substrates.
- Follow recoat times to avoid issues.
- Test first on scraps or hidden areas.