What Paint to Buy for Furniture: A Practical Guide
Discover how to choose the right furniture paint, prep steps, finishes, and application tips. A practical guide by PaintQuickGuide for homeowners and DIY enthusiasts.

You're about to learn how to choose the right paint for furniture and get a durable, showroom-worthy finish. This quick guide outlines paint types, surfaces, prep, finishes, and application tips, plus budgeting guidance. By the end you'll know which product to buy for wood, veneer, or painted surfaces and how to apply it like a pro.
What to know before buying furniture paint
If you’re asking what paint to buy for furniture, the first decision is surface type and the look you want. This section explains the main paint categories, where they shine, and how to match them to wood, veneer, laminate, or metal pieces. According to PaintQuickGuide, surface type and durability goals drive the choice—so start by checking your furniture's material and finish you want to achieve. We'll cover chalk-style paints, latex enamels, oil-based enamels, and epoxy alternatives, plus how drying times and cleanup differ. Expect guidance on prep, primers, topcoats, and color testing so you can shop confidently.
Surface realities: wood, veneer, laminates, and mixed materials
Furniture pieces come in a mix of surfaces, each with its own painting demands. Solid wood accepts most paint types, but you’ll get better adhesion with a light sanding and a clean, dust-free surface. Veneer can be trickier because the top layer is thin; you’ll want to use a bonding primer and avoid heavy abrasion that can lift the veneer. Laminate and plastic surfaces respond best to primers designed for slick substrates. Metal hardware or metal accent pieces can rust if left bare, so if you’re painting metal, choose an enamel designed for metal surfaces and bake-on or brush-on protection. This section emphasizes testing on a small area first and keeping expectations realistic about durability on curved, carved, or highly glossy surfaces.
Paint types for furniture: chalk-style, acrylic latex, enamel, and epoxy
Chalk-style paints (often water-based) are popular for furniture because they adhere well to many surfaces, dry quickly, and accept distressing for vintage looks. Acrylic latex enamels combine durability with simpler cleanup and lower odor than oil-based variants. Oil-based enamels offer exceptional hardness and stain resistance, but they require solvent cleanup and longer drying times. Epoxy paints provide the strongest surface for high-use items like tables or dressers but require careful mixing and ventilation. Milk paint and limewash are other creative options that can age gracefully with minimal prep. When choosing, match the product's base (water or oil) to the substrate and the room’s ventilation realities.
Finishes and durability: sheen, topcoats, and color longevity
Finish choice defines how your piece will look and wear over time. Matte or flat finishes hide surface imperfections but can show wear more quickly in high-use areas. Satin and semi-gloss finishes balance durability with easy cleaning, making them popular for living rooms or kids’ rooms. For surfaces that see moisture or heavy use, a high-performance topcoat such as polyurethane or polycrylic is essential. Wax is a traditional protective option for chalk-painted furniture, offering a soft, antique look but requiring maintenance. Color longevity depends on exposure, cleaning frequency, and sun exposure, so test color under lighting similar to where the piece will live.
Prep and priming basics: cleaning, sanding, deglossing, priming
Preparation is the secret to a professional-looking finish. Start by removing hardware, cleaning with a mild detergent, and de-greasing any oily areas. Lightly sand glossy surfaces to create bite for the paint; wipe away dust with a tack cloth. Use deglosser on very smooth finishes to improve adhesion without sanding through the surface. Apply a primer only where needed—bonding primers for slick surfaces or shellac-based primers for stubborn stains—and allow adequate dry time before painting. Avoid skipping this step, as poor prep is the leading cause of peeling.
Budgeting and product recommendations: finding the right balance
Think in price bands rather than fixed prices. Budget options provide decent coverage for low-traffic pieces; mid-range products offer better color consistency and longevity; premium paints deliver the best durability and finish under demanding conditions. Choose a product family that matches your surface (wood, veneer, metal) and your desired finish (matte, satin, semi-gloss). Keep in mind that higher-quality paints often require less sanding between coats and produce fewer drips, saving time in the long run. This section helps you plan a practical shopping list without chasing hype.
Common mistakes and how to avoid them
Common missteps include skipping prep, choosing the wrong primer for the surface, or applying thick coats that take forever to dry. Another frequent error is neglecting to test color and sheen in lighting similar to the project site. Finally, failing to seal chalk-painted surfaces with a compatible topcoat can lead to rapid wear in high-traffic areas. Learning from these mistakes will save time and improve results.
Quick-start painting plan for beginners
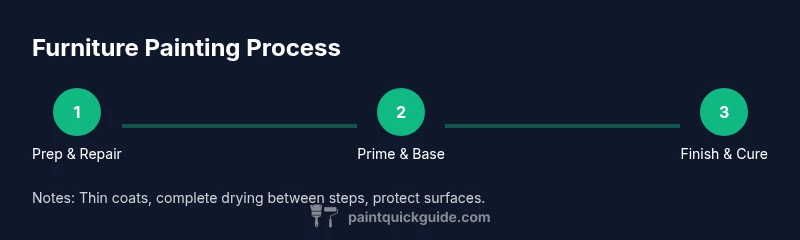
Use this starter plan to get a usable, professional-looking result with minimal trial and error: 1) Gather your materials and protect nearby surfaces. 2) Clean and degrease the piece, repair any damage, and lightly sand to dull gloss. 3) Apply a compatible primer on non-porous surfaces or slick veneers. 4) Apply the first thin coat of paint using long, even strokes; let dry. 5) Lightly sand and wipe away dust. 6) Apply a second coat and inspect for coverage. 7) Seal with a topcoat suitable for the chosen finish and cure fully before heavy use.
Tools & Materials
- Sandpaper (120–220 grit)(Use coarser grit for repairs and finer grit for final prep)
- Soft cloths or tack cloth(Dust removal between steps)
- Mild detergent or TSP substitute(Clean surfaces before painting)
- Painter's tape(Mask areas you don’t want painted)
- Primer (bonding or shellac-based)(Choose based on surface and stain potential)
- Paint (chalk-style, latex enamel, or oil-based enamel)(Select one based on surface and finish goals)
- Topcoat (polycrylic or polyurethane) or wax (for chalk paint)(Protect the finished piece; wax requires maintenance)
- Quality brushes and/or foam rollers(Synthetic for latex; avoid cheap, shedding brushes)
- Drop cloths or old sheets(Protect floors and non-painted furniture)
- Wood filler and putty knife(Repair small cracks before painting)
Steps
Estimated time: Total time estimate: 1 day 8 hours
- 1
Inspect and repair the surface
Inspect for cracks, loose joints, and stains. Clean with mild detergent and water; repair damage with wood filler as needed. Allow filler to dry before sanding.
Tip: Test a small area first to verify adhesion. - 2
Prep the surface
Remove hardware, clean again, degrease if needed, and lightly sand glossy areas to create bite for the paint. Wipe away dust with a tack cloth.
Tip: Use a deglosser on very smooth finishes to avoid heavy sanding. - 3
Prime where needed
Apply a bonding primer on slick surfaces or shellac-based primer for stubborn stains; allow proper drying time before painting.
Tip: Primer improves color uniformity and adhesion. - 4
Apply the first paint coat
Apply a thin, even coat with long strokes. Work in manageable sections and avoid overloading the brush or roller.
Tip: Keep a wet edge to minimize lap marks. - 5
Sand lightly between coats
Once the first coat is dry, lightly sand with 220–320 grit to smooth imperfections and improve next-coat adhesion; wipe dust.
Tip: A tack cloth makes dust removal quick and thorough. - 6
Apply final coat and seal
Apply the second (or final) coat; after drying, apply a compatible topcoat for durability or wax for a chalk-painted finish.
Tip: Allow full cure time before use; avoid heavy use during curing.
Your Questions Answered
What type of paint is best for wood furniture?
For wood furniture, chalk-style latex or acrylic latex enamel provides good coverage and ease of use. Oil-based enamels offer durability but require ventilation.
Chalk-style or latex enamel works well on wood, with oil-based giving extra durability but needing ventilation.
Do I need primer before painting furniture?
Primer improves adhesion and hides stains. Use bonding primer for slick surfaces and shellac-based primers for stubborn stains.
Primer helps paints stick and look even. Use the right primer for the surface.
Can I paint over veneer?
Yes, with proper prep: clean, light sanding, and a suitable primer. Satin or enamel finishes provide durability on veneer.
You can paint veneer with proper prep and primer.
Is chalk paint durable for furniture?
Chalk-style paints offer easy coverage and a matte finish. They’re durable with proper sealing and a topcoat, though may need maintenance compared with synthetic enamels.
Chalk paint can be durable with a good topcoat.
What finish should I use on kitchen cabinets?
Hard-wearing enamel in semi-gloss or satin is common for cabinets, with a polyurethane or polycrylic topcoat for extra durability.
Semi-gloss enamel with a protective topcoat is typical for cabinets.
Watch Video
Quick Summary
- Choose paint based on surface and durability.
- Prep and priming are critical for long-lasting results.
- Chalk-style latex is versatile for many furniture projects.
- Seal with a topcoat to protect against wear and moisture.