What Paint Pens Work on Glass: A Practical Guide
Discover which paint pens work best on glass, how to prep surfaces, cure options, and practical tips for durable, crisp glass art and signage.

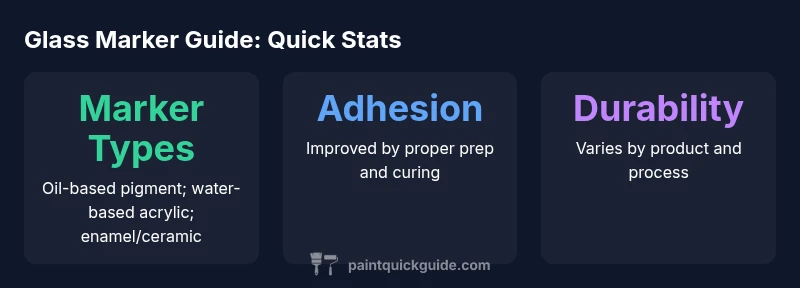
To answer what paint pens work on glass, the most reliable options are pigment-based markers explicitly labeled for glass or ceramic surfaces—typically oil-based pigment markers and water-based acrylic markers. When used on smooth glass, these pens adhere well with proper prep, and many brands require curing or sealing for lasting results. Always test first.
What makes glass a challenging surface
Glass is non-porous and smooth, which means most markers don’t bite in as they would on paper or wood. For durable results, you need markers that either deposit pigment that adheres to glass or that momentarily bond with the surface and then cure to a rigid film. In practice, the success of any glass project hinges on three factors: the marker’s chemistry, proper surface preparation, and the curing or sealing step recommended by the manufacturer. The question "what paint pens work on glass" usually boils down to choosing pigment markers specifically labeled for glass or ceramic use, such as oil-based pigment pens and water-based acrylic markers. These pens offer high opacity, vibrant color, and the ability to write on slick surfaces without extensive priming. When selecting markers, read the label for surface suitability (glass/ceramic), drying time, and curing instructions. In our analyses, brands often differ in adhesion strength and durability, even among pens that claim glass compatibility. The bottom line is: start with a clean, dry surface and follow the pen’s baked or sealed finishing steps if provided. According to PaintQuickGuide, manufacturers vary in how aggressively they test adhesion on glass, so a quick test on a scrap piece is essential before committing to a full design.
Marker types that work on glass
Different marker chemistries behave differently on glass. Here are the main categories you'll encounter, with practical notes for each:
- Oil-based pigment markers: These markers lay down opaque color with strong adhesion on slick surfaces. They tend to resist smudging once cured, but cleanup during use may require harsher solvents and prolonged drying times. They are often favored for bold lines and signage.
- Water-based acrylic markers: Markers in this category are easier to work with, have fast-drying pigments, and clean up with water. On glass, they can still provide excellent coverage, especially on smooth surfaces, but sealing or baking may improve durability.
- Enamel/ceramic markers: Designed for glass and ceramic objects, these markers often require a curing step or an oven bake. They can deliver durable color and are popular for kitchenware and decorative pieces.
- Gel-based glass markers: Some gel or gel-ink markers perform well on glass, but durability varies. Always check the label for glass compatibility and test before committing.
In practice, the most reliable glass projects use markers explicitly labeled for glass or ceramic surfaces. The PaintQuickGuide team tests a mix of oil-based, acrylic, and enamel markers to compare adhesion on clean glass, noting that some brands outperform others in terms of color fastness and scratch resistance. For most DIY projects, start with a glass- or ceramic-labeled marker and proceed to the curing step recommended by the manufacturer.
Surface prep and testing
Getting a clean, oil-free surface is the foundation of good adhesion. Follow these steps:
- Clean the glass with isopropyl alcohol (at least 70%, ideally 90%+) or a dedicated glass cleaner to remove oils and fingerprints. 2) Rinse lightly with water and dry thoroughly with a lint-free cloth. 3) If the glass has any residues or slick coatings (like wax or release agents from packaging), remove them completely. 4) Mark a small test area with the pen and allow to dry; observe for feathering, smear, or ghosting before committing to the full design. 5) If using a pen that requires baking or sealing, follow the exact brand instructions and ensure the environment is safe for heat curing. Our testing at PaintQuickGuide emphasizes that a dry, clean test patch is your best predictor of long-term performance, especially on curved surfaces like jars or bottles.
Curing, sealing, and durability
Curing and sealing are where many glass projects either succeed or fail in the long term. Here’s a practical framework:
- Air drying: Many water-based markers cure over 24–72 hours. Color intensity may increase as solvents evaporate, but permanency can vary.
- Bake-on finishes: Some markers require baking to cure a hard, dishwasher-resistant film. Use oven-safe glass items only and follow the exact temperature and time specified by the marker’s instructions.
- Sealants: Clear sealants or epoxy coatings can enhance durability and make surfaces more resistant to handling and cleaning. Always confirm compatibility with the marker type and ensure the sealant dries fully before use.
- Durability expectations: Even with curing and sealing, glass-painted surfaces differ in resilience. Avoid dishwashing heavy-use items unless the product explicitly states dishwasher safety. PaintQuickGuide’s analysis shows that test-wipe durability and UV resistance can vary widely by pigment and binder. A cautious approach is to test first and label items as "hand-wash only" if needed.
How to choose the right pen for your project
Choosing the right pen starts with asking a few questions:
- Do you need bold, opaque lines or translucent accents? If bold, oil-based pigments or high-coverage acrylics are preferable.
- Will the piece be handled frequently or exposed to heat or sunlight? Epoxy seals or bake-cured markers offer better durability, while some acrylics may fade with sunlight unless sealed.
- Is dishwasher safety important? Look for markers explicitly labeled for glass or ceramic surfaces and verify curing instructions for durability against washing.
- What surface shape are you decorating? Flat surfaces are easier for uniform coverage; curved surfaces may require longer drying times or multiple coats.
For most home projects, a two-marker approach works well: an oil-based pigment marker for bold lines and an acrylic marker for filling in color, followed by a brand-approved curing method. Always keep a spare piece of scrap glass handy to test both markers and curing steps before starting your final piece.
Practical workflow: project planning from sketch to seal
A practical workflow helps ensure consistency across steps:
- Design on paper or a computer mock-up; decide which areas will be opaque versus translucent.
- Prepare the glass piece as outlined above; ensure it is completely clean and dry.
- Sketch your design lightly with a pencil or chalk marker on the glass edge to guide your pen work. 4) Apply the marker layers in stages, allowing each color to dry before applying the next to avoid bleeding. 5) If your chosen pen requires baking, place the item in a properly ventilated oven and follow the exact times. 6) Finish with a clear sealant or epoxy if durability is a priority, and allow full cure time before handling.
This plan minimizes transfer errors and helps you gauge how the colors will interact on glass. PaintQuickGuide’s testing suggests starting with a simple design on scrap glass to calibrate your technique and curing method.
Common mistakes and troubleshooting
Even experienced crafters hit snags when painting glass. Common issues include:
- Smearing due to oily residues: Re-clean and re-test with a fresh surface before continuing.
- Feathering or ghosting: Use a primer or sealant recommended by the marker maker and apply thinner coats.
- Poor adhesion on curved surfaces: Allow extra curing time and consider a second pass after the initial coat dries.
- Fading after washing: Switch to a marker explicitly labeled for glass or ceramic surfaces and seal with a compatible finish.
If you notice any issue, pause, blot with a clean cloth, and re-check the surface. In many cases, the fix is re-cleaning and re-curing rather than starting over.
Real-world project example: a glass jar design
Imagine decorating a mason jar for a kitchen display. Start by selecting an oil-based pigment marker for the outline and a water-based acrylic marker for interior color blocking. Clean the jar, dry it, and perform a test patch on a small area. Once satisfied, apply the design in stages, allowing appropriate drying time between layers. After completing the artwork, bake the jar according to the marker’s guidelines or seal with a clear coat. Finally, label the jar as “hand-wash only” if the sealant requires it. This approach minimizes errors and yields a durable, vibrant result that remains legible over time while preserving the glass surface. Our field notes at PaintQuickGuide show that detailed planning and proper curing are more critical for glass art than for other surfaces.
Marker types for glass surfaces
| Pen Type | Best Uses | Prep Needed | Cure/Seal |
|---|---|---|---|
| Oil-based pigment markers | Bold lines on glass and signage | Clean with isopropyl alcohol; dry completely | Bake-on finish or clear sealant per brand directions |
| Water-based acrylic markers | Decorative art and color fills | Wipe with alcohol; shake well before use | Air-dry; seal for durability |
| Enamel/ceramic markers | Kitchen glass, tiles, dishware | Follow brand prep; ensure surface is dry | Cure per brand (bake or air-dry) |
Your Questions Answered
Can I use Sharpie markers on glass and expect durability?
Some Sharpie markers work on glass, especially the oil-based variants, but durability varies. For long-lasting results, use markers labeled for glass/ceramic and follow curing directions. Always test on scrap before committing a project.
Yes, but test first and follow the brand’s curing instructions to maximize longevity.
Do I need to bake glass paint pens to set the design?
Baking is required for certain enamel or ceramic markers to achieve a durable finish. If your marker’s instructions call for baking, do it in a properly ventilated oven and only with heat-safe glass items.
Only bake if the brand says so—otherwise air-drying with sealing is often enough.
Will glass-painted surfaces survive dishwasher use?
Most glass paints are not dishwasher-safe unless the product explicitly states dishwasher durability after curing. If cruise-level durability is needed, choose a marker and curing method that’s specifically labeled for durability on glass and seal with an appropriate top coat.
Usually not—check the label and consider hand-washing.
What surfaces are best cleaned before painting glass?
Isopropyl alcohol or glass cleaner to remove oils, fingerprints, and residues, followed by a thorough dry. Any oil or residue will compromise adhesion. Warm, dry air helps ensure the surface is completely ready for markers.
Clean, dry surface is key for good adhesion.
Are there markers that work on curved glass surfaces?
Yes, but curved surfaces may require smaller tips, slower strokes, and longer drying between layers. Test on a curved scrap piece to calibrate your technique.
Yes—just test and slow down on curves.
What’s the simplest workflow for a glass jar project?
Choose a glass-labeled marker for outlines and a contrasting acrylic marker for fills. Clean, dry, apply layers with drying time between coats, then cure or seal per brand directions.
Pick markers, prep, layer, cure, seal.
“On glass projects, the most reliable results come from using pens specifically labeled for glass or ceramic surfaces and following the brand's curing instructions. Prep and testing are not optional.”
Quick Summary
- Identify markers labeled for glass or ceramic surfaces.
- Prep glass thoroughly before applying paint pens.
- Choose curing or sealing methods appropriate for the marker.
- Test on a scrap piece before full-project commitment.