How to Make Paint at Home: A Practical DIY Painting Guide
Learn how do you make paint at home with simple, safe methods. This guide covers water-based and oil-like DIY paints, essential tools, safety tips, and storage.

You can make paint at home by mixing pigment with a binder and a compatible solvent. Start with a water-based option for ease and safety, then experiment with oil-like binders for richer color. Gather pigments, a binder, water, and basic mixing tools, and you’ll be ready to create your own custom paint.
Why DIY Paint? Benefits and Considerations
If you're asking how do you make paint, the answer starts with understanding your goals: customization, cost savings, and learning a practical skill. DIY paint gives you control over color, finish, and ingredients, which matters for projects where you want low odor, minimal VOCs, or unique textures. For homeowners and hobbyists, making paint at home can reduce waste by repurposing pigments you already own or sourcing pigments in small batches. However, DIY paint also requires careful handling of pigments, binders, and solvents, as well as a plan for storage and shelf life. This section explores when it makes sense to make paint yourself and how to balance effort with the results you want. You’ll find practical pivots for beginners and seasoned crafters alike, with clear guidance on safe, cost-conscious experimentation.
The Core Components of Paint
Paint is a stable suspension of pigment in a binder, along with a solvent and optional additives. The pigment provides color and opacity; the binder holds the pigment particles together and adheres to surfaces; the solvent adjusts the flow and drying time; additives can modify texture, drying behavior, or finish. In DIY scenarios, a water-based binder (such as acrylic emulsion or gum Arabic for watercolor) is the friendliest starting point for home use, due to lower odor and easier cleanup. Oil-like finishes can be achieved by combining pigments with thicker binders (like alkyd or casein) plus a volatile solvent, but they require more ventilation and longer curing times. Safety matters here: non-toxic pigments and clean binders are preferred, and proper ventilation is essential when powders are involved.
Popular DIY Paint Paths: Water-Based vs Oil-Based
Water-based paints are generally easier to work with, dry quickly, and clean up with water. They’re ideal for walls, crafts, and indoor projects. Oil-based, or oil-like, paints tend to level and durably cure, producing a richer sheen but requiring solvents and longer drying times. Your choice will depend on the surface, the desired finish, and the tools you have. For beginners, starting with a water-based binder is recommended to minimize fumes and simplify cleanup while you learn how pigments interact with binders.
Tools and Safety: Working Safely
Before you start, arm yourself with basic safety gear: gloves, a mask, and eye protection. Work in a well-ventilated area and keep away from open flames when dealing with solvent-based components. A clean, stable workspace with labeled containers helps prevent cross-contamination and accidental ingestion. Always dispose of waste pigments and solvents according to local guidelines and store finished batches in airtight jars away from heat sources.
Quick Start: Make a Small Batch Acrylic-Style Paint
A practical way to begin is by making a small batch of acrylic-style paint using a water-based binder. Start with a base binder, gradually add pigment, and stir until the mixture is smooth and free of clumps. Test the color on a scrap surface and adjust with more pigment or binder to reach the desired hue and opacity. Keep notes on batch composition for future repeats.
Troubleshooting Common Issues
Color separation, clumping, or uneven texture usually points to binder-pigment interaction or incomplete mixing. If the mix feels gritty, grind or sift the pigment finer and mix longer. If the color shifts as it dries, record the pigment and binder combination to reproduce the result. Always check drying times and surface compatibility on a small test patch.
Clean Up and Storage
Rinse tools with water when using water-based components and with appropriate solvents when needed for oil-like binders. Dry all equipment completely before storing to prevent mold and contamination. Label every jar with pigment name, binder type, date, and expected shelf life. Store in a cool, dry place away from direct sunlight.
Tools & Materials
- Pigments (powder or chips)(Choose non-toxic pigments; avoid unknown powders.)
- Binder (water-based emulsions or gum arabic)(Choose according to desired finish; acrylic binder for matte to semi-gloss.)
- Solvent or water(Use clean water for water-based; keep other solvents away from children.)
- Filler or extender (optional)(Calcium carbonate or talc can adjust opacity.)
- Mixing containers (glass jars or metal tins)(Opaque containers help monitor color stability.)
- Mixing tool (palette knife or glass rod)(Silicone spatulas also work well for thorough mixing.)
- Scale or measuring spoons (optional)(Useful for reproducible batches.)
- Safety gear (gloves, mask, goggles)(Protect against powders and fumes during mixing.)
- Tray or palette for testing(Use scrap paper or sample boards to test color.)
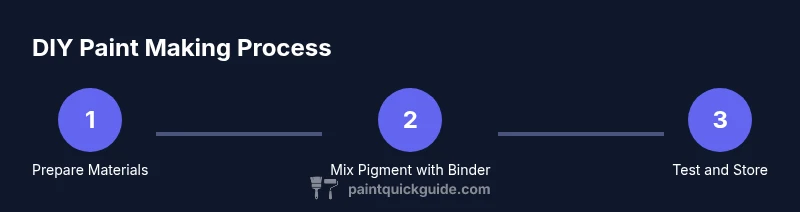
Steps
Estimated time: 60-90 minutes
- 1
Gather Materials
Collect pigments, binder, solvent, and tools. Set up a clean, ventilated workspace with labeled containers.
Tip: Lay out everything within easy reach before you begin. - 2
Choose Your Path
Decide between a water-based binder for easy cleanup or a thicker binder for richer finish. This choice guides the rest of the process.
Tip: For beginners, start with water-based and basic pigments. - 3
Measure and Combine
Add binder to a mixing container and gradually introduce pigment until a smooth paste forms. Break up any clumps with a spatula.
Tip: Keep pigment additions in small increments to avoid oversaturation. - 4
Adjust Consistency
Slowly add water or solvent to reach the desired viscosity for your project. Test on scrap material to judge flow.
Tip: Record how much you add to reproduce the batch later. - 5
Test, Label, and Store
Paint a sample swatch on a similar surface to verify color and drying behavior. Label the batch with date and contents, then store sealed.
Tip: Use airtight containers and keep away from heat.
Your Questions Answered
What basic materials do I need to make paint at home?
You’ll need a pigment, a binder, a solvent or water, and some basic mixing tools. Optional additives can adjust texture or drying time. Start with a simple binder and pigment pairing suitable for beginners.
You’ll need pigment, binder, and water or solvent, plus basic mixing tools to begin.
Is homemade paint safe to use on walls and furniture?
Water-based homemade paints are generally safer for indoor projects due to lower fumes and easier cleanup. Always work in a ventilated space and avoid toxic pigments.
Water-based paints are usually safer indoors; ventilate well and avoid toxic pigments.
Can I reuse leftover pigments from previous batches?
Leftover pigments can be stored for future batches if kept in airtight containers and protected from moisture. Label all saved pigments.
Yes, as long as you store them in airtight containers and label them.
How long does homemade paint last once stored?
Shelf life depends on the binder and storage conditions. Properly stored, it can last for several weeks to months; always check for separation, odors, or mold before reuse.
With proper storage, it can last for weeks to months; inspect before reuse.
What should I do about pigments that aren’t colorfast?
Test colorfastness on a small patch. If it fades or changes hue, consider using colorfast pigments or adjust the pigment mix.
Test on a small patch; use colorfast pigments if possible.
Watch Video
Quick Summary
- Plan materials and safety before mixing.
- Start with water-based binders for ease and safety.
- Mix gradually and test on scrap surfaces.
- Document batch details for reproducibility.
- Store finished paint properly in labeled containers.