Color Match Paint: A Practical Guide for Home and Auto Projects
Learn how to achieve precise color match paint results for walls, cabinets, and cars. This practical guide covers sampling, tinting, lighting tests, and documentation to ensure consistent finishes.

According to PaintQuickGuide, color match paint lets you reproduce exact hues on walls, furniture, or cars by sampling a reference color and creating a matched mix. To start, capture an accurate swatch under consistent lighting, choose a compatible base, and use tinting pigments to reach the target shade. Expect to test in several lights and document formulas.
Why color match paint matters
Color match paint matters because it ensures consistency across surfaces, reduces rework, and preserves the visual harmony of a space or vehicle. When homeowners patch a wall, refinish a cabinet, or touch up a car panel, matching color helps the repair blend in rather than stand out. For auto refinishing hobbyists, a precise color match minimizes the need for multiple coats or re-sprays later. Achieving a reliable match relies on understanding the color system, the substrate, lighting, and the finish. A seamless, durable result that you can touch up years later without noticing the repair is the overarching goal.
In practice, color matching starts with a reference color and a method for reproducing that shade. Swatches, spectrophotometer readings, and tint bases are all tools you can use to translate the reference into a real paint formula. The quality of your outcome depends less on a magic pigment and more on a consistent procedure, careful testing, and good documentation.
How color matching works: color spaces and samples
Color matching is about translating a reference shade into a paint formula that will look the same on your surface. Modern color systems rely on color spaces like RGB or Lab to define a color numerically, while physical swatches translate those values into tangible samples. A colorimeter or spectrophotometer measures reflected light from a sample and compares it to target values; tint bases then adjust the hue, value, and chroma until the reading aligns with the reference.
Keep in mind that different finishes (matte, satin, gloss) and substrates (drywall, wood, metal) alter perceived color. Thus, color matching is as much about the reaction of pigment to surface as it is about the pigment itself. Document the chosen color space, device, and calibration settings for future touch-ups.
Color matching for walls vs trim vs cabinets
Walls, trim, and cabinets each present unique challenges for color matching. Wall paint often benefits from a flatter base and a wider pigment load, whereas trim and cabinets demand tighter tolerances and a finish that holds up to wear. Color matching on dark shades can require extra coats or a slightly lighter target shade to compensate for sheen. When matching toward a high-gloss finish, swatches should be checked for orange peel and consistency across the surface.
In practice, you may maintain separate color formulas for walls and cabinets, even when the base color is the same. Document the sheen level, base type, and any pre-coating primers to ensure you recreate the exact look later.
Choosing a color matching method: manual vs digital
Manual color matching relies on comparing physical swatches side by side and adjusting by eye. It’s accessible and fast for small repairs but can be inconsistent under different lighting. Digital methods use colorimeters or spectrophotometers to capture data and guide tinting with a higher degree of repeatability. For best results, use both: start with a digital reading and verify with real swatches under your lighting conditions.
Tip: calibrate a digital device against a known standard before starting, and always compare against a fresh swatch rather than an old sample.
How lighting affects color perception and testing
Lighting dramatically affects how color appears. Daylight reveals true hues, incandescent lighting warms tones, and LED lighting can shift chroma. To ensure color match paint remains stable, test samples at different times of day and in the intended space. If possible, install a neutral, daylight-balanced light source for your final checks. A practical approach is to test on a small test panel or scrap on the actual surface, then re-check after a drying period. Your goal is to confirm the shade under the lighting conditions where it’ll live.
Preparing the surface for color matching
Surface preparation has a bigger impact on color match paint than many homeowners realize. Clean the surface thoroughly to remove dirt, oils, and wax that would alter the absorption of the tint. If the substrate is glossy, lightly scuff it with a fine-grit sandpaper to promote even paint adhesion. Use a compatible primer or sealer if the base is porous, stained, or heavily repaired. A neutral priming coat helps ensure the color you mix reads true on the final surface.
Always allow primers to dry fully before testing color, and remove any dust from sanding with a clean cloth.
Practical color mixing tips and formulas
Tint bases respond to pigment loads differently, so start with small test batches. Use the tint base recommended for your color category (warm vs cool), and aim for incremental adjustments rather than a single, large pigment boost. Keep accurate notes of how much tint was added and the resulting shade. If you’re matching a multi-surface finish, consider calibrating on a panel that mirrors the final substrate. Include a finishing coat with the same sheen after the color match paint has dried to evaluate true appearance. See if you can replicate the texture, brush strokes, or spray pattern to ensure consistency.
Common mistakes and how to avoid them
Common errors include starting with a wrong base, ignoring lighting variety, and failing to test on the actual substrate. Avoid storing swatches in direct sunlight, which can fade samples and mislead decisions. Don’t rely on a single patch; compare the color across multiple panels and at different angles.
Keep swatches organized, label formulas, and photograph each test step. When in doubt, step back and repeat the process with a fresh sample and a calibrated device.
Documentation and maintenance of color matched finishes
Document color match paint formulas with a clear recipe: base, tint amounts, sheen, and any primers used. Store test panels and resulting paint in labeled containers for future touch-ups. If you need to re-create a color later, refer to the documented steps and the lighting conditions used during testing. Regularly re-check colors when lighting changes or when the space undergoes a major renovation.
As you move forward, maintain a color library (swatches and formulas) and use the same mixed batch for any touch-up to prevent shade drift. This proactive approach helps achieve long-term consistency and reduces trial-and-error repairs. The PaintQuickGuide team notes that consistent documentation is the backbone of successful color match paint projects.
Authority sources
- EPA: https://www.epa.gov/iaq
- OSHA: https://www.osha.gov
- NIST: https://www.nist.gov
Tools & Materials
- Spectrophotometer or colorimeter(Calibrate with a known standard before use)
- Color swatches or fan deck(Use a standardized deck for reference shades)
- Tintable base paint(Choose a base compatible with your target finish)
- Primer/sealer(Seal porous or stained substrates to read true color)
- Small tester cans(For real-surface testing under actual lighting)
- Neutral lighting(6500K or daylight-balanced bulbs for testing)
- Masking materials and drop cloths(Protect surrounding areas during testing)
- Cleaning supplies and fine-grit sandpaper(Prepare surfaces and remove dust before testing)
Steps
Estimated time: 60-120 minutes
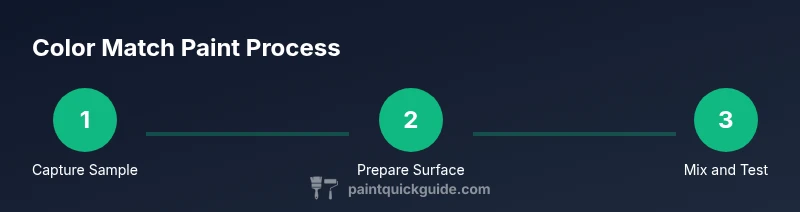
- 1
Capture reference color
Select a representative sample of the target color from the original surface under neutral lighting. If needed, photograph the swatch and note the color code. This gives you a stable reference to reproduce as color match paint. Consider taking readings with a colorimeter for a numeric reference.
Tip: Take multiple readings and average them to reduce measurement noise. - 2
Prepare the test surface
Clean and lightly scuff the test area. Apply a thin primer or sealer if the surface is porous or glossy to normalize absorption. A consistent base ensures the tint reads true on the final surface.
Tip: Use painter’s tape to isolate the test area for clean results. - 3
Read the base color with a colorimeter
Place the device on a fresh swatch and capture the color reading. Compare this reading to the reference color using the device software. Record the target numbers and the readings you’ll use to adjust the tint base.
Tip: Calibrate the instrument against a neutral standard before each session. - 4
Mix the base with tint
Add tint gradually to the base, mixing thoroughly after each increment. Stop when the sample visually matches the reference under neutral lighting. Maintain a log of tint amounts for repeatability.
Tip: Err on the lighter side when matching dark colors to avoid oversaturation. - 5
Apply test patch and evaluate
Paint a small test patch on an actual surface and allow it to dry fully. Compare the dry color under multiple light sources. If needed, adjust the tint and re-test. Drying times may vary by product and temperature.
Tip: Drying under typical room conditions helps reveal true color sooner. - 6
Document formula and finalize shade
Record the base color, tint amounts, finish, and primer used. Create a label for future touch-ups and store a sample panel. This ensures you can reproduce the exact shade later.
Tip: Photograph the final test patch with lighting references for future comparison.
Your Questions Answered
What is color match paint and why is it used?
Color match paint is a process of reproducing a reference color using tinted base paints. It helps achieve consistency across surfaces and lighting, reducing visible repairs. It’s particularly useful for patches, refurbishments, and auto refinishing projects.
Color match paint reproduces a reference color using tinted bases to ensure consistency across surfaces. It’s handy for repairs and refinishes.
How long does color matching take?
Color matching can take from a short session to an extended test, depending on surface complexity and desired accuracy. Plan for a focused session and be prepared to test multiple patches under different lighting.
Color matching may take a while depending on the surface and how precise you want to be. You’ll test patches under different lighting.
Do I need specialized equipment for color matching?
A colorimeter or spectrophotometer helps with objective readings, while swatches and tintable bases are essential for practical testing. Calibrate devices and verify results with physical swatches.
Yes, a colorimeter or spectrophotometer helps, along with swatches and tintable bases. Calibration is important.
Can color matched paint be used outdoors?
Color matched paint can be used outdoors provided you choose exterior-grade paints and appropriate primers. Consider UV resistance and weather exposure in your final selection.
Yes, but choose exterior-grade paints and proper primers for outdoor use.
How should I store color-matched formulas?
Store the color formula with the base, tint amounts, sheen level, and substrate. Keep test panels labeled and secured for future touch-ups and consistency.
Keep a labeled record of the base, tint, sheen, and substrate for future touch-ups.
Watch Video
Quick Summary
- Test color under multiple lighting conditions.
- Document the tint formula for future touch-ups.
- Use consistent bases and standardized swatches.
- Quality lighting is essential for true color matching.