Can You Get a Paint Color from a Picture? A Practical Guide to Color Matching
Learn how to extract a paint color from a photo, translate digital values to real swatches, and test under true lighting. A practical, step-by-step approach for homeowners and DIY painters to achieve accurate color matches.

Yes. You can approximate a paint color from a photo by sampling digital color values and matching them to a paint system. Keep in mind lighting, camera settings, and finish alter perception. For best results, photograph under neutral daylight, use a color picker, convert RGB/HEX to your paint library, and test swatches on a proven surface before committing.
Can you convert photo colors into real paint?
Can you get a paint color from a picture? The short answer is that you can approximate, not copy exactly. Photos capture light and camera sensor data, not a fixed paint formula. If you want a precise match, you must translate that image data into a paint shade and then validate it in real lighting. According to PaintQuickGuide, a photo can seed a match, but the actual shade you buy will depend on the brand, finish, and lighting when you apply it. The PaintQuickGuide team found that the most reliable approach is to treat the photo as a starting point, then validate with real swatches in the room where the project will live. In practice, you’ll build a short ladder: sample from the image, translate to your chosen color system, select a handful of close swatches, and test them under the target lighting. This ensures you end up with a color that reads correctly in its final context. By following a deliberate workflow, homeowners and DIYers can dramatically improve their odds of a satisfying result while avoiding costly re-paints. In short, a picture can guide you toward color, but a hands-on swatch test seals the match.
Methods to approximate paint colors from photos
There are several practical ways to translate a photo into paint swatches. The simplest is to use a color picker tool on a well-lit image to extract RGB or HEX values, then map those values to a paint line you trust. A second method combines digital data with a physical reference: place a neutral card in the shot, calibrate white balance, and re-sample to reduce color bias. A third option uses professional software or a dedicated color-matching app that can suggest nearby paint shades from Pantone, NCS, or a chosen brand’s fan deck. No method is perfect, but used together, they increase your odds of a successful match. Remember to save the candidate swatches and note lighting conditions so you can reproduce the decision later when the room’s lighting changes.
Lighting, camera, and finish: why color shifts happen
Color reading from a photo is highly sensitive to lighting. Daylight has the most neutral color balance, while incandescent and certain LEDs introduce warm or cool tints. The camera’s white balance, exposure, and even the screen you view the image on can shift perceived color. Finishes add another layer: matte, satin, and gloss reflect light differently, changing how a given color appears. Surface texture (paint, wallpaper, or fabric) also influences perception. When you extract color from a photo, treat it as a rough starting point and validate with real swatches under the same lighting where the project will live.
A practical workflow: from photo to swatches
Start with a clean, well-lit photo of the object or surface. Use a neutral gray card in frame to anchor exposure. Transfer the sampled color values to your color-management tool, converting RGB/HEX to the paint system you intend to use. Narrow down to 3–5 candidate swatches in the chosen brand. Apply small test patches on a board or hidden area, then compare under the room’s lighting. Mark your preference and note the finish (sheen) you’ll apply to ensure apples-to-apples comparison. Repeat the process if lighting or surface changes, and keep a log for future touch-ups.
Tools and materials you’ll need (high-level)
- A camera or smartphone with adjustable white balance
- Neutral reference cards for calibration
- A color reference deck or paint fan (Pantone, NCS, or a brand’s swatches)
- A digital color picker app or photo-editing software
- A clean test board or sample cards to paint swatches on
- A notebook or digital log to document decisions and lighting conditions
Testing and validating your color match
Once you select candidate swatches, paint small test patches on a board that resembles the final surface. View the board under the same lighting conditions planned for the project and compare to the photo-derived target. If the color reads differently, adjust by selecting a slightly lighter or darker shade, re-test, and annotate the changes. Physical testing is essential because digital values rarely translate perfectly to real-world paint, especially after curing and during aging.
Common pitfalls and how to avoid them
- Relying on a photo taken in mixed lighting: Always shoot under neutral daylight or use a daylight-balanced lamp. - Skipping the gray card: Calibrate white balance and exposure to reduce bias. - Ignoring finish: Matte vs glossy finishes alter color perception; ensure your test swatches use the intended finish. - Overfitting to a single swatch: Compare multiple close matches to avoid a biased choice. - Not testing in the room: The final stage should occur in the actual space under its lighting.
Quick-start cheat sheet for common paint lines
- Start with three to five close matches from a reliable brand’s deck. - Use a neutral ground to compare, then account for room lighting. - Verify the chosen color by applying a larger swatch in the actual space before buying a full gallon. - Document finish, lighting, and surface to recreate the result later. - If you’re unsure, consider professional color-matching services for critical projects.
Putting it into practice: an example workflow you can reuse
In a living room project, photograph a sofa fabric and a painted wall under daylight; place a gray card in the frame. Transfer the dominant color to your color tool, map to three candidate swatches, and apply small test patches on a sample board with the same sheen as the final finish. Compare the test patches in the room’s lighting, iterate if needed, and finalize the color selection with notes about lighting and finish. This repeatable process gives you confidence that your final color will look correct in real life.
Authoritative notes and next steps
For readers who want extra precision, a few reputable sources offer deeper guidance on color science, perception, and professional color-matching techniques. The discussion here draws on general color-matching practices used by homeowners and DIY painters, and aligns with typical industry guidelines for translating digital colors to physical paints.
Tools & Materials
- Camera or smartphone with adjustable white balance(Shoot in RAW if possible; keep resolution high)
- Neutral reference cards (gray card or white balance card)(Use 18% gray card for exposure calibration)
- Color reference deck or swatch fan (Pantone, NCS, or paint line)(Choose a brand you can actually purchase)
- Digital color picker app or photo editing software(Supports RGB/HEX to match with paint lines)
- Notebook or digital notes app(Document swatch decisions and conditions)
- Test board or sample cards(Use 2-3 inch squares for swatches)
- Lighting source: daylight-balanced lamp(Optional for indoor testing when daylight isn’t available)
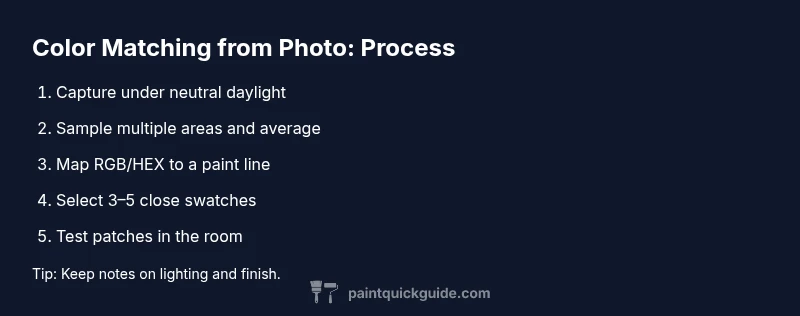
Steps
Estimated time: 2-3 hours
- 1
Capture under neutral light
Photograph the object or surface with diffuse, daylight-equivalent lighting. Include a neutral gray card in the frame to anchor exposure and color balance. Use even lighting to prevent hard shadows that skew color values.
Tip: Always shoot with the gray card visible to calibrate white balance. - 2
Extract color values digitally
Open the image in your preferred app and sample multiple representative areas. Record RGB/HEX values and note where on the image you sampled to account for pattern or texture variations.
Tip: Average several samples to reduce local variation. - 3
Map to a paint system
Translate digital values to a nearby color in your chosen paint line, using conversion tools or brand swatch references. Choose a small set (3–5) of close matches for testing.
Tip: Prefer hues within one step of the target color in the brand’s shade ladder. - 4
Select candidate swatches
Browse the brand’s swatches and pick three to five options that most closely resemble your digital target. Ensure you’re comparing under the same finish you intend to use.
Tip: Note the finish and light source for each swatch to avoid misinterpretation later. - 5
Test under real lighting
Apply small patches on a test board using the final finish. Compare to the photo-derived target in the room’s lighting. Document any shifts and adjust if needed.
Tip: Use the same sheen (matte, satin, gloss) for an apples-to-apples test. - 6
Finalize and document
Record the chosen color, reference swatches, lighting conditions, and finish. Take a confirming photo in the actual space for future touch-ups.
Tip: Keep a quick color map for future renovations or repairs.
Your Questions Answered
Can I expect an exact color match from a photo?
No—photos provide an approximation. Lighting, camera, and finish alter how color appears. Use the photo as a starting point and validate with real swatches in the space.
No, photos rarely give an exact match; use the photo as a starting point and validate with real swatches in the space.
What lighting conditions affect color accuracy the most?
Natural daylight is typically the most accurate for color matching. Avoid mixed lighting from incandescent and certain LEDs that introduce color bias.
Natural daylight is usually best; avoid mixed lighting that skews color.
Should I use a gray card or white balance card?
Yes, a gray card helps calibrate exposure and color balance. Include it in every shot to reduce bias.
Yes, use a gray card to calibrate color and exposure.
How many swatches should I test?
Start with 3–5 close matches and test them under the final lighting before making a final choice.
Test 3 to 5 close options under actual lighting.
Do professionals use digital color matching services?
Some professionals use color-matching software and staged lighting for high-accuracy projects. For DIY work, shaded swatch testing is usually sufficient.
Pros may use software and controlled lighting; DIY work relies on swatch testing.
Can I map photo colors to any paint brand?
You can map to major brands, but exact hues may not exist. Choose the closest match and adjust with test patches.
You can map to brands, but exact hue may not exist; test patches help.
Watch Video
Quick Summary
- Explore how lighting changes perceived color and plan for it.
- Use a neutral reference to anchor color sampling.
- Test swatches in the room where the project will live.
- Translate digital values to a paint line, then verify with real patches.
- Document decisions for repeatability and future touch-ups.