Paint Furniture Without Sanding: A Practical Guide
Discover how to paint furniture without sanding. This PaintQuickGuide guide covers prep, bonding primers, application techniques, and finish tips for smooth, durable results.

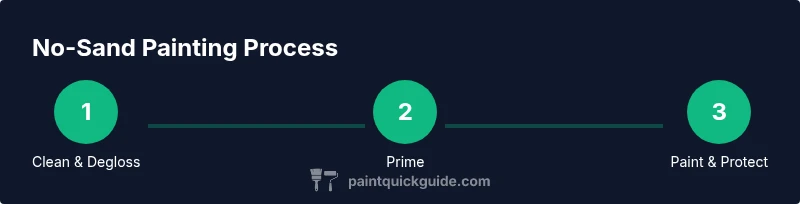
Yes—it's possible to refresh furniture without sanding. Begin with a thorough cleaning and deglossing to remove oils and gloss. Choose a bonding primer tailored for glossy or slick surfaces, then apply 1–2 thin coats. Finish with 2–3 light topcoats of water-based furniture paint, letting each coat dry completely before the next and allowing a full cure after the final coat.
Why you can paint without sanding
According to PaintQuickGuide Team, painting furniture without sanding is a practical option for many surfaces, including glossy laminates, veneer, and lightly worn painted finishes. The core idea is to create a receptive surface through cleaning, deglossing, and selecting primers and paints that adhere to slick substrates. When done correctly, no-sand painting delivers a durable, smooth finish at a fraction of the time and dust created by traditional sanding. This block explains the基本 science of adhesion on glossy vs. matte finishes, why some materials respond better to no-sand approaches, and how to tailor your plan to wood types like oak or pine, as well as laminate or veneered surfaces.
In real-world terms, the success of this method hinges on surface prep and choosing products designed to bite into slick surfaces. High-gloss finishes resist adhesion, but modern bonding primers and water-based topcoats can create a reliable bond when you follow a clean, methodical process. If you’re refinishing a heavily lacquered piece or a laminate with a smooth top layer, expect to spend extra time on preparation steps like deglossing and spot-cleaning to maximize results. PaintQuickGuide’s team emphasizes testing adhesion on a small, inconspicuous area before proceeding widely, so you can confirm your chosen primer and paint will behave as expected.
Surface prep: clean, degloss, and test adhesion
You’ll start by removing dirt, oils, and residues with a mild cleaner. After cleaning, use a chemical deglosser to dull or remove shine from slick surfaces. This creates a micro-porous layer that helps primer grip better than a glossy shine would. Always perform a quick adhesion test on a hidden area: apply a small amount of primer, let it dry, then try to peel it away with tape. If the primer sticks firmly, you’re good to proceed; if it peels, re-evaluate your materials or prep steps. Maintaining a clean, dust-free workspace is essential to prevent imperfections in the final finish.
Primers and paints that work without sanding
Choose a bonding primer designed for slick surfaces, wood, and veneer. A good bonding primer improves adhesion, blocks stains, and reduces the risk of peeling later. For painted pieces, a stain-blocking or shellac-based primer can help seal the surface and provide a solid base for topcoats. Pair the primer with a water-based or latex furniture paint, which offers easier clean-up and lower odor. In damp or high-use areas, consider a topcoat with a protective matte or satin finish to balance durability with a natural look.
Application techniques without sanding
Apply thin, even coats rather than one heavy layer. Thinner coats reduce running and help the paint cure evenly. Use a high-quality synthetic brush for detail work and a small roller for larger flat areas. If you’re confident with spraying, a light mist coat can produce a flawless finish when combined with subsequent wet-edge coats. Maintain steady strokes, overlap slightly, and avoid going over tacky areas. Allow adequate drying time between coats and keep the piece in a dust-free environment during curing.
Finishing and care for longevity
After the final coat dries, consider a light, protective topcoat if the piece will experience daily use. A water-based polyurethane or clear acrylic topcoat can add durability with minimal yellowing if you choose a compatible product. Curing times vary by product, but most no-sand finishes need 24–72 hours before light use and up to several weeks for full hardness. During cure, avoid heavy handling or placing items directly on the surface. Clean-up is typically with soap and water, but always follow the manufacturer’s directions for best results.
Troubleshooting and common mistakes
If you notice peeling near edges, inspect whether your coat thickness was excessive or if the primer didn’t adhere to the substrate. Uneven color or grain show-through can be addressed with a light sanding only in targeted spots, followed by re-priming in those areas. Avoid rushing through steps—skipping deglossing or using an incompatible primer can undermine durability. Always work in a well-ventilated space and wear a mask when using primers and topcoats.
Authority sources
For safety, disposal, and best practices, consult credible sources such as government and university publications. Examples include EPA guidance on lead-safe practices, OSHA safety recommendations for painting indoor spaces, and university extension resources on coatings and adhesion. These sources help validate no-sand painting methods and emphasize safety and long-term durability.
Tools & Materials
- Mild degreasing cleaner(E.g., a water-based degreaser suitable for wood and laminates)
- Chemical deglosser or prep wipe(Used to remove shine from slick surfaces)
- Tack cloth / lint-free cloths(For dust removal between steps)
- Painter’s tape(Mask edges and protect surfaces)
- Rags or microfiber cloths(For cleaning and buffing surfaces)
- Bonding primer (for slick surfaces)(Choose a water-based or shellac-based bonding primer)
- Stain-blocking or shellac-based primer (optional)(Helpful for problematic stains or woods)
- Water-based furniture paint (latex)(Flat, satin, or eggshell sheens work well; choose low odor)
- Foam or synthetic brush set(Synthetics provide smooth coats on water-based paints)
- Mini roller set (5/16" nap)(For larger flat surfaces and a smooth finish)
- Protective topcoat (water-based polyurethane or acrylic)(Optional for high-traffic pieces)
- Ventilation mask and gloves(Safety first; work in a well-ventilated area)
Steps
Estimated time: Total time: about 2-3 hours active work, plus 24 hours cure
- 1
Clear the workspace and prep surface
Move objects away and cover surrounding areas. Wipe the furniture with a mild cleaner to remove dust and oils. If the surface looks glossy, apply a deglosser and allow it to dry before moving to priming.
Tip: Always test a small area for adhesion before committing to the entire piece. - 2
Test adhesion and select primer
Perform a quick tape test on a hidden spot after deglossing. If the primer sticks well, proceed with a bonding primer suitable for slick surfaces. Do not skip the test; it informs product choice.
Tip: Choose a water-based bonding primer for easier cleanup and faster dry times. - 3
Apply the primer
Stir the primer well and apply a thin, even coat with a synthetic brush or roller. Feather the edges to minimize lap marks. Let the primer dry completely per manufacturer’s guidance.
Tip: Keep coats thin to avoid pooling and ensure better adhesion. - 4
Sandless topcoat application (coat 1)
Apply a first thin coat of water-based paint, using long, even strokes. Maintain a consistent amount of paint on the brush or roller to avoid streaks. Allow to dry fully before the next coat.
Tip: Do not rush the dry time; moisture left in a coat can cause imperfect adhesion. - 5
Apply additional coats
Apply 1–2 more light coats, spacing them to prevent pooling. For flat surfaces, use a roller to cover large areas and a brush for edges. Inspect after each coat for color uniformity.
Tip: Light coats are key; multiple thin layers outperform one thick layer. - 6
Optional topcoat for protection
If you expect heavy use, apply a water-based topcoat after the final paint layer. Follow the product’s cure times and ensure the surface remains dust-free during curing.
Tip: Test the topcoat in a hidden area to confirm compatibility with the paint. - 7
Cure and care
Let the finished piece cure fully. Avoid placing heavy items until at least 24 hours have passed; allow full cure as recommended by the paint manufacturer. Dust lightly with a microfiber cloth during curing.
Tip: Patience during curing yields the best durability and finish. - 8
Final inspection and touch-ups
Check for thin spots or color mismatches and touch up promptly. Reassess edges and corners, ensuring each area has uniform sheen and coverage. Replace hardware if needed to refresh the look.
Tip: Tiny touch-ups in a single pass prevent visible patching later.
Your Questions Answered
Can you truly paint furniture without sanding, and when should you skip sanding?
Yes, you can paint many furniture pieces without sanding, especially if you start with cleaning and deglossing and use a bonding primer. The approach works best on glossy finishes, veneers, laminates, and lightly worn surfaces where adhesion is possible. For very rough or previously shellacked surfaces, light abrasion or spot prep may still be necessary.
Yes, you can paint many pieces without sanding if you start with cleaning, deglossing, and a bonding primer, especially on glossy surfaces.
What surfaces are most compatible with no-sand painting?
Smooth surfaces like laminate, veneer, or glossy painted finishes respond well to no-sand painting when properly prepped. Raw or extremely porous wood may require more prep or light abrasion to ensure even primer absorption. Always run a small adhesion test first.
Smooth laminates and veneers respond well when prepped correctly; always test adhesion first.
Do I need a primer if I’m not sanding?
A bonding primer is usually essential for no-sand techniques, especially on slick surfaces. It improves adhesion, blocks stains, and provides a stable base for topcoats. In some cases, a shellac-based primer can be beneficial for stubborn finishes.
A bonding primer is usually essential for no-sand painting, especially on slick surfaces.
What type of paint works best for no-sand painting?
Water-based latex or acrylic furniture paints are ideal for no-sand techniques due to low odor, easy cleanup, and good adhesion when used with proper priming. Avoid heavy oil-based paints for interior furniture, as they can take longer to cure and have stronger fumes.
Water-based latex paints are ideal for no-sand methods with proper priming.
How long does curing take after painting without sanding?
Cure times vary by product, but most no-sand finishes need at least 24 hours before light use and several days to reach full hardness. Plan around a weekend project and avoid heavy use until the full cure period passes.
Most no-sand finishes cure in about 24 hours, with full hardness taking a few days.
What are common mistakes to avoid with no-sand painting?
Avoid skipping deglossing, using overly thick coats, or selecting incompatible primers and paints. Inconsistent coats and poor drying conditions can lead to adhesion problems and streaks. Always follow manufacturer directions and test on a small area first.
Avoid skipping deglossing or using thick coats; test adhesion first.
Is a topcoat necessary for all no-sand projects?
A topcoat is optional for many no-sand projects, but recommended for high-use items or pieces exposed to moisture. A water-based topcoat adds durability without dramatically altering color or sheen.
A topcoat is optional but recommended for high-use items.
How can I fix poor adhesion after a no-sand paint job?
If adhesion is poor, remove the affected area, clean, degloss, and re-prime before reapplying paint. In stubborn cases, a fresh primer layer can help reestablish a solid base. Avoid re-coating over peeling paint without addressing the root cause.
If adhesion is poor, re-prime and recoat the affected area after proper prep.
Watch Video
Quick Summary
- Prepare slick surfaces with deglosser and bonding primer
- Apply multiple thin coats for best adhesion
- Test adhesion before full project to ensure durability
- Allow proper drying and curing between coats
- Consider a topcoat for added protection on high-use pieces