Concrete Floor Paint: A Practical DIY Guide
Learn how to choose, prep, apply, and seal concrete floor paint with practical steps, cost considerations, and safety guidance from PaintQuickGuide.

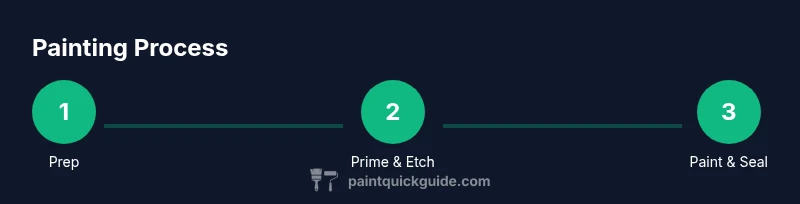
Follow these steps to paint a concrete floor: assess moisture, pick a compatible paint and finish, properly prep the surface, apply primer if required, and apply multiple coats with adequate drying times. Ensure ventilation and PPE, protect surrounding areas, and perform a final seal for durability. This guide covers tools, costs, and safety considerations.
Surface prep and moisture management
The success of concrete floor painting hinges on surface prep. According to PaintQuickGuide, the most reliable results come from a clean, dry, and properly profiled surface. Moisture is the silent killer of adhesion; even small vapor transmission can cause peeling later. Before you touch a roller, inspect the slab for moisture sources, sealants, or previous coatings, and plan ventilation. Start with a visual check for stains, efflorescence, and pitting. If needed, use a degreaser or a concrete cleaner to remove oils, and then thoroughly rinse. Allow the floor to dry completely—this can take 24–48 hours depending on humidity. If your space is damp or poorly ventilated, use a dehumidifier and increase airflow to accelerate drying. A properly dried, dust-free surface improves primer and paint bonding dramatically, reducing the risk of peeling after heavy use. As you prep, document problem spots (cracks, holes, and rough patches) so you can address them before coating. The more you invest in prep, the longer your finish will last under foot traffic and equipment.
Brand guidance: plan around a dry window, test a small patch, and confirm the surface is ready before committing to full-scale coating. Pro tip: label zones to help with consistent coverage across the floor while you work.
Choosing the right paint system and finish
Selecting the right concrete floor paint affects durability, maintenance, and color retention. For most homes and light-duty garages, an acrylic latex or waterborne epoxy hybrid provides good adhesion and easier cleanup than solvent-based systems. If you expect heavy impact, wear, or chemical exposure, epoxy-based coatings or urethane topcoats offer superior durability but require careful surface preparation and ventilation. Consider the sheen you want: matte hides minor imperfections, while satin or semi-gloss reflects more light and is easier to clean. Remember that darker colors may show dust more readily on floors with shallow textures, so plan accordingly.
In addition to the paint itself, verify compatibility with primers and sealers. Some products are self-priming on properly prepared concrete, while others require an interim primer to improve adhesion and coverage. Do not mix waterborne primers with solvent-based paints, as poor curing and adhesion may result. If you’re painting a garage floor where moisture is a concern, look for moisture-tolerant formulations designed for slab adhesion and vapor resistance. The goal is a uniform color with strong coverage in 2–3 coats, followed by a protective topcoat if your chosen system requires it. PaintQuickGuide suggests testing a small test area to ensure color, texture, and adhesion match your expectations before committing to the full floor.
Cleaning and moisture testing: creating a proper profile
A clean surface is non-negotiable for lasting adhesion. Begin by sweeping or vacuuming away loose dust, then perform a degreasing step if you notice oil or grease. For stubborn residues, use a TSP-based cleaner or a commercially available concrete cleaner. Rinse thoroughly and allow to dry completely. Moisture testing is essential for cement slabs; the plastic-sheet test (placing a clear plastic sheet on the floor for 24–48 hours) is a simple, inexpensive method to gauge moisture movement. If condensation forms under the sheet or the concrete remains damp after removing the sheet, you should postpone painting and consult a professional about moisture barriers or sub-slab drying.
If your concrete has old coatings, you’ll need to remove or mechanically profile them so the new paint can bond. A wire brush, scraper, or mechanical grinder can create a roughened surface that improves adhesion. For new slabs, ensure cure time per manufacturer guidance before applying anything, and consider a primer that accommodates the slab’s porosity. A good surface profile (rough, clean, and dry) is the foundation for even color and long-term durability.
Notes: always wear eye protection and gloves when using cleaners or etching solutions. If the floor is porous, expect more primer usage to seal the surface adequately and avoid pinholes in finish coats.
Repairing cracks and patches for a smooth base
Cracks and voids in concrete are normal and can telegraph through paint if left unaddressed. Use a concrete crack filler or patching compound designed for interior or exterior concrete, depending on where you’re painting. Clean the cracks as you prep, remove loose material, and apply filler in layers if the crack is wide. Allow each layer to cure according to the product’s instructions before sanding lightly to create a smooth transition to the surrounding surface. For larger cracks, you may need additional reinforcement, such as fibrous repair products, to prevent re-cracking under movement. After repairs cure, re-clean the area and inspect for ridges or raised patches; smooth them with light sanding so the entire surface has uniform contact with primer.
This step is critical for achieving an even color and a durable finish. Skipping crack repair can lead to moisture infiltration under the finish and early failure. Pro tip: prime patched areas with the same primer you’ll use on the entire floor to ensure consistent adhesion and topcoat performance.
Primers, sealers, and adhesion strategies
Primers are the bridge between bare concrete and paint. If your concrete is highly porous or has inconsistent porosity due to repairs, a penetrating or bonding primer helps achieve uniform color and superior adhesion. Some primers are compatible with multiple topcoats; others require a specific pairing. Follow the manufacturer’s recoat window and ensure the primer is completely dry before applying paint. In spaces with high moisture or chemical exposure, consider a sealing primer or a specialized epoxy primer that creates a moisture barrier and improves durability. If you choose an epoxy paint, you may still want a sealer on top to facilitate easier cleaning and resist staining. When using primers and sealers, apply thin, even coats and avoid puddling, especially in joints or low spots. Maintain a consistent roller pressure and use crosshatching to distribute the product evenly.
Compatibility matters: read labels to confirm that your primer, topcoat, and sealer are designed to work together and on concrete. For best results, test a small area first and ensure no odor or tackiness remains after curing. Observing proper ventilation reduces health risks during application and curing.
Application plan: coats, timing, and technique
A typical concrete floor painting project uses 2–3 coats of color with a recommended cure time between coats. Start with edges and corners using a brush to avoid streaks, then switch to a roller for the main field. Apply thin, even coats and avoid overworking the material to reduce lap marks. If you need to alter color or sheen, remember that deeper tones may require more coats for consistent coverage. Drying times vary based on temperature, humidity, and air movement; plan to recoat only when the previous coat is dry to the touch and not tacky. Maintain spacing between coats according to the product’s guidelines, and do not rush curing. In some cases, a final protective topcoat is advised to improve wear resistance and chemical resistance.
Practical workflow tip: label application zones and use a color-coded plan to ensure consistent coverage. This helps you avoid missing spots or applying too much product in one area, which can lead to uneven color or longer cure times.
Curing, ventilation, and safety considerations
Proper curing is essential for maximum durability. Maintain good ventilation to reduce solvent exposure and help evaporate moisture from the coating. Use PPE, including respirator or mask, safety glasses, and gloves as dictated by product labels. Keep pets and children away from the work area until coatings reach their recommended hard cure time. Temperature and humidity affect cure speeds; ideal conditions are typically moderate temperatures with low humidity. If conditions are less than ideal, extend waiting times between coats and before light foot traffic. After curing, keep the floor clean by sweeping regularly and using a damp mop with a mild cleaner, avoiding harsh solvents that can degrade the finish over time.
The payoff for careful curing is a durable, easy-to-clean surface that resists staining and wear under traffic and equipment. PaintQuickGuide stresses that following the manufacturer’s guidance for curing times and topcoat compatibility yields the best long-term results.
Cost considerations and long-term maintenance
Costs for concrete floor paint vary with product type, area, and the need for primers or sealers. Budget options for basic color coatings can be more affordable but may require more frequent maintenance, especially in high-traffic spaces. Higher-quality epoxy or urethane systems offer extended durability and chemical resistance, which can reduce long-term maintenance costs. Always include preparation materials (cleaners, etchants, patches), primers, topcoats, and safety gear in your project budget. Remember to account for curing times that affect labor costs if you hire a professional.
Maintenance involves routine cleaning with non-abrasive cleaners, addressing chips promptly, and re-coating when color loss or wear becomes noticeable. The key is selecting a finish that suits your space, traffic level, and maintenance preferences. PaintQuickGuide notes that choosing the right combination of prep, primer, paint system, and topcoat can significantly extend life and reduce total cost of ownership over time.
Common mistakes and troubleshooting tips
Common mistakes include inadequate surface prep, skipping moisture testing, using incompatible primers and topcoats, applying too thick coats, and not allowing sufficient cure time between coats. If you notice peeling, bubbling, or a tacky surface after painting, stop using the area and reassess prep, moisture, and adhesion. Re-sand or profile rough areas and apply a compatible primer before attempting additional coats. For stubborn stains or high-traffic floors, consider switching to a more durable epoxy or styrene-based topcoat and ensure proper ventilation during application. If colors look uneven, test a small area first, adjust opacity with thinning recommendations from the manufacturer, and apply even coats across the entire floor. The goal is uniform coverage with good adhesion and a smooth, easy-to-clean surface. Publisher's tip: test in a small, inconspicuous area first to minimize risk to the overall appearance.
Authoritative sources and further reading
For safety and best practices related to paints and coatings, consult authoritative resources:
- https://www.epa.gov/lead
- https://www.cdc.gov/niosh/topics/lead/default.html
- https://www.osha.gov/SLTC/lead/
These sources provide guidance on exposure, safety, and regulatory considerations that can influence your painting project. They reinforce that proper surface prep, ventilation, and PPE are essential for a successful and safe DIY project.
Tools & Materials
- Concrete cleaner or degreaser(Use a product suitable for concrete and oil-based residues)
- Broom, dust mop, or shop vac(Keep surface dust-free before cleaning)
- Scraper or putty knife(Remove flaking material and loose coatings)
- Wire brush or grinder (for profiling)(Optional for very smooth surfaces)
- Concrete crack filler/patching compound(Fill cracks up to 1/4 inch; larger cracks may need professional repair)
- Painter's tape and drop cloths(Protect adjacent surfaces and fixtures)
- Primer compatible with chosen paint(Bonding primer for porous surfaces or epoxy primers for tough surfaces)
- Concrete floor paint (color of choice)(Select urethane-modified acrylic or epoxy-based systems)
- Paint rollers (1/4-3/8 inch nap) and brushes(Edge brushes for corners; rollers for field coverage)
- Extension pole and roller tray(Eases large-area coverage)
- Ventilation equipment (fans, open doors/windows)(Maintain safe air quality during application)
- Protective gear (respirator/ cartridge mask, goggles, gloves)(Safety first—follow product instructions)
- Sealant/topcoat (if recommended)(Use only if your system requires it)
Steps
Estimated time: 48-72 hours
- 1
Clear the space
Move furniture and items off the floor. Cover adjacent walls and vents with drop cloths or plastic sheeting. Create a clear, well-lit work zone so you can lay out tools and work in sections without stepping on wet paint.
Tip: Label zones to maintain consistent coverage and avoid backtracking. - 2
Clean and degrease
Sweep and vacuum to remove dust. Apply a concrete cleaner or degreaser to remove oil and stains, then rinse thoroughly. Let the surface dry completely before testing for moisture.
Tip: Avoid leaving cleaners on the surface—residue can interfere with adhesion. - 3
Test moisture and prep profile
Perform a plastic-sheet moisture test for 24–48 hours. If moisture is detected, address sources or consult a moisture barrier solution. Profiling (etching or light grinding) may be needed to create a key for the paint.
Tip: A dry concrete surface is the single strongest predictor of adhesion. - 4
Repair cracks and patches
Fill cracks with a compatible patching compound and smooth flush with the surface. Allow curing, then lightly sand to remove ridges. Re-clean the area to remove dust before priming.
Tip: Do not skim coat too thickly; multiple thin layers cure better and bond stronger. - 5
Apply primer
Apply a primer that matches your paint system. Use a thin, even coat and allow it to dry completely per manufacturer instructions. A good primer improves color uniformity and adhesion across the floor.
Tip: If porous, a second primer coat may be needed for uniform coverage. - 6
First coat of paint
Cut in edges with a brush, then roll the main surface in smooth, even strokes. Avoid heavy coats that lead to bubbles or extended dry times. Allow the first coat to dry fully before applying the next.
Tip: Work in small sections to maintain a wet edge and prevent lap marks. - 7
Second coat and finish
Apply a second coat in the same manner, ensuring full color depth and even coverage. If a topcoat sealer is recommended, apply it after the final color coat has cured as directed. Verify cure times before light use.
Tip: Always follow the paint’s recoat window for best results. - 8
Cure and protect
Cure times vary by product, temperature, and humidity. Keep the space ventilated and avoid heavy traffic until full cure is achieved. Clean with recommended cleaners to preserve the finish.
Tip: Avoid cleaning agents that can degrade the finish during the first two weeks.
Your Questions Answered
Do I need to etch concrete before painting?
Etching or profiling helps create a key for adhesion on smooth concrete. If the surface is highly polished or very smooth, mechanical profiling is recommended. Always follow product guidelines for safety and effectiveness.
Etching helps the paint stick. If you have a very smooth floor, you may need to profile it first, following the product instructions.
Can I paint over existing epoxy floor paint?
Yes, but only with a primer compatible with epoxy and the new topcoat you plan to use. Ensure the old finish is clean, dry, and lightly abraded to promote adhesion. In some cases, removing the old epoxy yields a more durable result.
You can paint over epoxy, but you’ll want a compatible primer and a topcoat designed for epoxy surfaces.
How long does concrete floor paint take to cure?
Cure times vary by product and conditions, but expect 24–72 hours between coats and several days for full cure. Always verify the manufacturer’s guidance and avoid traffic until the surface is fully cured.
Cure times depend on the product and the room conditions; check the label for exact durations.
What type of paint should I use for garage floors?
Garage floors typically benefit from epoxy or polyurethane-modified paints for durability and chemical resistance. For easier DIY, waterborne epoxy or latex-based garage coatings offer solid performance with simpler cleanup.
Epoxy-based or high-durability garage coatings are ideal for garages.
Is primer always required?
Primer is recommended on porous or uneven concrete to ensure color uniformity and adhesion. Some systems are self-priming, but when in doubt, apply the manufacturer-recommended primer.
Primers help with adhesion and color consistency; follow the product’s guidance.
How should I clean up spills of paint?
Wipe spills promptly with a compatible solvent or water-based cleaner, depending on the paint type. For cured spills, consult the product’s cleanup instructions and avoid harsh solvents that could damage cured coatings.
Clean spills quickly with the right cleaner, and follow the paint label for cured spills.
Watch Video
Quick Summary
- Assess moisture and surface conditions before painting
- Choose a compatible paint system and finish
- Prep thoroughly for optimal adhesion
- Follow curing times and recoat windows
- Seal or topcoat as recommended for durability