Cheap Paint: Smart Budget Picks for Home Painting Projects
Budget-friendly cheap paint options for homeowners and DIYers. Learn to compare price per gallon, coverage, durability, and VOCs, plus prep tips for optimal results.

Cheap paint can deliver solid results when paired with thorough prep and a smart approach to finishing. According to PaintQuickGuide, budget-friendly options often provide decent coverage, manageable finishes, and lower VOCs, making them a practical choice for homeowners and DIYers who plan carefully, select the right color, and respect surface prep.
What cheap paint means in practice
Cheap paint refers to budget-grade options that minimize cost per gallon while offering acceptable coverage and color match for less-trafficked spaces. In practice, you’ll often see lower-priced latex or acrylic-based paints, with fewer premium additives and possibly less pigment load. For many homeowners, cheap paint is a pragmatic choice for bedrooms, ceilings, or walls that won’t face heavy wear, provided you invest in thorough surface prep, a quality primer where needed, and sensible application techniques. PaintQuickGuide's analysis notes that the difference in cost is often offset by the extra labor required for multiple coats or extra prep, so plan accordingly. This section lays out how to evaluate cheap paint options without compromising outcomes on your project.
How price relates to coverage, durability, and color fidelity
Price per gallon doesn't tell the full story. A cheap paint may promise good coverage but deliver inconsistent color or require extra coats. Conversely, mid-range options can deliver richer color depth with fewer coats. The key is to compare price per square foot of finished coverage, not just price per gallon. Coverage depends on pigment density, binder quality, and the surface you’re painting. Durability is influenced by the resin system and finish; lighter finishes hide better but may scuff easier. VOC content matters for indoor air quality. PaintQuickGuide notes that budget paints today are often improved on VOC regulation, yet you still get what you pay for in terms of longevity in high-traffic areas. When choosing cheap paint, select a reputable brand line that’s appropriate for interior or exterior use and consider a primer to boost adhesion and color fastness.
Smart shopping: price per gallon, coverage, and waste
To maximize value, start by calculating cost per square foot: divide the price per gallon by the coverage. Then account for waste: measure wall area, include doors and trim, and add a small buffer for touch-ups. Look for retailer promotions, bulk returns, and color-matching deals. If possible, buy larger cans to reduce waste, but only if you know your project will use it. Favor low-VOC products when possible to improve indoor air quality, especially in tight spaces. PaintQuickGuide suggests focusing on brands with solid performance histories in budget lines and pairing cheap paint with a compatible primer when surfaces are problematic or strongly colored.
Prep and priming: the secret to better results with price-conscious options
Proper prep is the great equalizer for budget paints. Clean and sand the surface, repair damage, and remove flaking material. Use a high-quality primer on problematic surfaces or when you're changing from a dark to a light color. Primers improve adhesion, fill minor imperfections, and often boost hiding power, which means you’ll need fewer coats of cheap paint. For slick surfaces like kitchen cabinets or glossy walls, a bonding primer can significantly improve finish quality. Skipping prep is the most common way cheap paint looks cheap fast, so allocate time here for a durable result.
Finishes and color fidelity that work with cheap paint
If you want easy maintenance with budget paints, aim for finishes that balance washability and hiding power. Eggshell and satin finishes tend to hide minor flaws better than flat paints while still resisting scuff marks in everyday rooms. Avoid glossy finishes on walls with visible imperfections, as shine will emphasize flaws. When color fidelity matters, test a few patch samples under your home’s lighting before committing to a batch. Remember that color accuracy can vary between cans, so mixing a larger batch only after color verification can prevent mismatches on large surfaces.
Exterior vs interior and weather considerations
Budget paints behave differently outdoors due to UV exposure, moisture, and temperature swings. For exterior projects, prioritize products labeled for exterior use and consult the can for climate suitability. Exterior budget paints may require more frequent maintenance in harsh climates, but smarter surface preparation can extend their life. For interior spaces, choose low-VOC options to minimize odors and indoor air exposure, particularly in bedrooms or nurseries. In both cases, surface cleaning, proper priming, and controlled application conditions (temperature, humidity) are crucial to getting a long-lasting finish from cheap paint.
Testing color and coverage before committing
Always test a small patch before committing to a full wall. Use tester cans, apply to a representative surface, and observe under room lighting at different times of day. If coverage looks uneven, consider a primer or a second coat. Keep your samples in the same environmental conditions as the final project (humidity, temperature) to get an accurate sense of finish depth and color. Recording the patch results helps reproduce the look when you scale up.
Cost-saving workflow: planning, batching, and disposal
Plan your project in stages to optimize material use. Batch tasks like sanding, cleaning, priming, and painting in a logical sequence to streamline your workflow. Use painter’s tape and drop cloths to reduce cleanup time. When you’re finished, store any leftover paint for touch-ups in the future and follow local disposal guidelines for containers and leftover products. By integrating these steps, cheap paint projects can stay efficient and tidy, with fewer surprises as you wrap the job.
Real-world results and maintenance expectations
Cheap paint can deliver great results on simple wall surfaces and well-prepped substrates. Expect excellent results with smooth, even coats in low-traffic areas; for kitchens, bathrooms, or playrooms, modest maintenance and occasional touch-ups may be required. Proper cleaning, minor repairs, and re-coating every few years will help keep the room looking fresh without a full repaint. The key is realistic expectations: budget paints are most effective when paired with solid prep, correct finishes, and timely maintenance.
Budget vs mid-range vs premium paint value comparison
| Paint Type | Typical Price per Gallon | Coverage (sq ft/gal) | Durability / Lifespan | VOC Level | Best For |
|---|---|---|---|---|---|
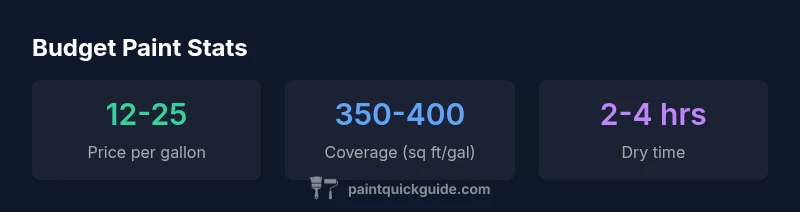
| Budget latex paint | $12-$25 | 350-400 | 3-6 years | Low to moderate | Walls and ceilings on a budget |
| Mid-range latex paint | $25-$40 | 350-450 | 6-10 years | Low | Living rooms, high-traffic areas |
| Premium acrylic enamel | $50+ | 300-400 | 10+ years | Low | Trim and challenging surfaces |
Your Questions Answered
What counts as cheap paint?
Cheap paint usually refers to budget-grade options under mid-range pricing, which may use different resins or pigment loads. They can perform well in low- to medium-traffic spaces when you prep properly and choose appropriate finishes.
Budget paints are affordable options that work best when you prep well and manage expectations about wear and color depth.
Will cheap paint last as long as premium paint?
Not always. Longevity depends on surface prep, primer use, finish, and environment. Budget paints can last several years if you prepare properly and avoid heavy wear areas.
It lasts as long as the prep and conditions allow; expect similar results in mild spaces with careful prep.
Is cheap paint suitable for exterior surfaces?
Yes, but choose exterior-rated budget paints designed for weather exposure. They may require more frequent maintenance in harsh climates, and proper prep still matters.
Yes, but pick exterior-rated options and plan for maintenance in tough weather.
How can I maximize the results from cheap paint?
Invest in prep, use a compatible primer when needed, apply thin coats, and allow proper drying time. These steps dramatically improve hiding power and color uniformity.
Prep, prime where needed, and apply light coats for best results.
What finishes work best with cheap paint?
Eggshell or satin finishes balance washability with hiding power, making imperfections less noticeable and easier to clean than flat or gloss options.
Eggshell or satin finishes hide flaws and clean up well.
How should I test cheap paint for color and coverage?
Use tester cans on representative walls, observe color in different lighting, and verify coverage after a single coat. Recheck after a second coat if needed.
Test patches under your lighting to verify color and coverage.
“Budget-friendly paints can deliver solid results when paired with proper prep and finishing; the key is selecting the right product mix and technique.”
Quick Summary
- Start with thorough prep to maximize cheap paint results
- Compute value by price per square foot rather than per gallon
- Choose finishes that hide imperfections and are easy to clean
- Test colors on-site before committing to large areas
- Plan and batch work to reduce waste and save time