Porch Paint Guide: A Step-by-Step DIY Exterior
Learn to choose, prep, and apply porch paint for durable exterior finishes. This practical guide covers materials, weather considerations, techniques, and maintenance for wood, concrete, and vinyl porches.

Learn how to paint a porch with a durable, weather-ready finish. This guide covers selecting porch paint, prepping the surface, and applying coats that stand up to sun, rain, and foot traffic. You’ll need basic outdoor tools, weather-friendly materials, and a window of dry conditions to start.
Why porch paint matters
Porch paint does more than add color; it protects the underlying structure from sun, rain, snow, and wear from foot traffic. The right finish helps prevent moisture from seeping into wood or concrete, reduces cracking, and slows mildew growth on shaded surfaces. A durable paint job can extend the life of a porch by years with proper maintenance. According to PaintQuickGuide, porch projects benefit from thorough prep and durable, weather-resistant finishes. When you choose porch paint, you must consider the surface type (wood, concrete, or vinyl) and the climate you live in. Wood pavers and railings absorb moisture, while vinyl mantles and concrete steps behave differently under freeze-thaw cycles. The goal is to select a coating with strong adhesion, UV protection, and flexible film that moves with the surface without cracking. In practice, porch paint becomes part of your home's weatherproofing and curb appeal. A thoughtful approach to color, sheen, and maintenance ensures you’ll enjoy a refreshed look without frequent touchups.
Porch paint types and finishes
Porch paints come in several formulations, each with trade-offs in durability, odor, cleanup, and drying time. The most common exterior options are water-based latex/acrylic paints and oil-based enamels (alkyds). Latex paints offer easy cleanup, low odor, and good flexibility, making them a popular choice for wooden porches and concrete slabs. Oil-based enamels tend to be tougher and satin/semi-gloss finishes wear well under heavy foot traffic but require longer drying times and ventilation. For vinyl porches, choose a paint or coating designed for plastic surfaces to ensure proper adhesion. Finishes range from flat to high-sheen; a satin or semi-gloss is typically preferred for outdoor porches because it resists dirt and is easier to clean. When selecting porch paint, also consider UV resistance, mildew inhibitors, and lo- or zero-VOC formulations to minimize indoor/off-gassing during layering.
- Surface compatibility: wood, concrete, vinyl
- Flexibility and adhesion: essential for moving surfaces
- UV and mildew resistance: protect against weathering
- Finish choices: satin/semi-gloss balance beauty and maintenance
The PaintQuickGuide team recommends noting the porch’s exposure (sun, shade, rain) and any previous coatings to decide whether primer or bonding agents are needed for optimal adhesion.
Prep and surface prep for porches
Thorough prep is the foundation of a long-lasting porch finish. Start by clearing the area and removing furniture, planters, and debris. Sweep or power wash to remove dirt, mold, and chalky residues. If you detect mildew, treat the area with a deck cleaner or a mild bleach solution, then rinse and allow surface to dry completely. Inspect for loose boards, peeling paint, or rot; repair or replace damaged sections before painting. Sand glossy surfaces to dull the sheen and promote adhesion, but be mindful of overly abrasive sanding on soft wood. Remove loose material with a scraper and fill large cracks or holes with wood filler or exterior filler. Finally, wipe down surfaces with a tack cloth to remove dust prior to priming. The goal is a clean, dry, and stable surface that accepts paint evenly and bonds firmly.
Color and design considerations for porches
Color choices for a porch should complement the home’s exterior and the porch’s architectural style. Lighter colors can brighten shaded spaces, but they may show dirt sooner; darker hues hide dirt but show imperfections more readily on rough surfaces. Consider using a base color for walls and a contrasting trim shade for railings, posts, and steps to create depth. When planning color, test paint chips on small non-prominent areas to observe how they weather over a few weeks. Sheen level matters: satin or semi-gloss finishes are easier to clean and resist moisture better than flat finishes, making them ideal for porches. If the porch has metal or concrete elements, verify compatibility and use appropriate primers or bonding agents. Finally, plan how color will look under different lighting—morning sun versus late-afternoon shade can dramatically change perceived color.
Application techniques and tools
Application quality hinges on technique and the right tools. Start with a quality brush (angled sash brush) for cutting in along edges and railings, then switch to a roller with a 3/8-1/2 inch nap for broad surfaces. For very smooth concrete, a shorter nap or a painted roller can achieve even coverage; rough wood benefits from a longer nap. Apply paint in thin, even coats to avoid drips and ensure uniform color. Maintain a wet edge by brushing or rolling slightly into the previously painted area to blend. If using a sprayer, practice on a scrap surface and use light, even passes to avoid thick coats. Temperature and humidity matter: paint within the manufacturer’s recommended range and avoid painting in direct sun on hot surfaces, which can cause lap marks. Allow each coat to dry according to product guidelines before applying a second coat. Clean tools promptly to prevent hardened brushes and rollers.
- Cutting in around edges first
- Rolling in consistent X or W patterns for even coverage
- Maintaining a clean spray pattern if using a sprayer
Maintenance, curing, and long-term care
After the final coat, allow the porch to cure without heavy traffic for the recommended period—this helps prevent scuffing and premature wear. Clean the surface periodically with a soft brush and mild detergent solution to remove dirt and mildew; avoid harsh chemicals that can degrade the coating. Plan annual inspections to catch peeling, cracking, or water intrusion early, and touch up affected areas as needed. Recoat intervals depend on exposure and traffic; high-traffic porches exposed to sun and rain may require more frequent refreshes. Use a quality paint compatible with existing coatings to simplify future maintenance. With proper care, a porch paint job maintains color brightness, protects the substrate, and preserves curb appeal for years to come.
Tools & Materials
- Exterior porch paint (latex/acrylic or enamel)(Choose water-based acrylic for easy cleanup if possible; oil-based enamel lasts longer but requires ventilation)
- Primer suitable for porch surfaces(Bonding primer on bare wood or slick surfaces; use stain-blocking primer as needed)
- Paint roller with 3/8-1/2 inch nap(For wood and concrete; use 1/4 inch nap for smooth concrete)
- Angled sash brush (2-1/2 to 3 inches)(For cutting in along edges, rails, and trim)
- Paint tray and liners(Keep paint materials tidy and portable)
- Extension pole(To reach higher sections without ladder strain)
- Drop cloths or plastic sheeting(Protect surrounding ground and furniture)
- Painter's tape(Mask off edges and railings for clean lines)
- Putty knife and exterior wood filler(Repair cracks and holes before painting)
- Sanding block or palm sander(Create a dull surface for better adhesion)
- Degreaser or TSP substitute(Remove oils, waxes, and contaminants)
- Safety gear: gloves, safety glasses, respirator(Outdoor use; ensure proper ventilation)
- Water, rags, and scrub brushes(For cleanup and surface prep)
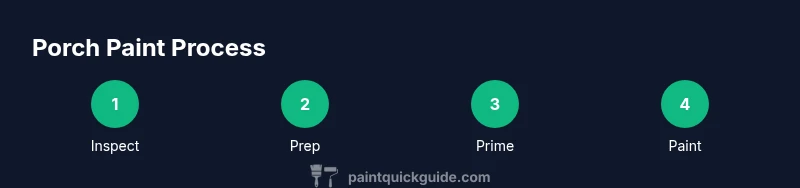
Steps
Estimated time: 2-3 days
- 1
Assess and prep the porch surface
Walk the area to identify loose boards, rot, and peeling spots. Remove all furniture and sweep the surface. Document repairs needed and gather materials before you begin.
Tip: Start with the worst areas first so repairs cure while you work on others. - 2
Clean thoroughly and dry the surface
Use a degreaser or TSP substitute to remove dirt, mildew, and old wax. Rinse thoroughly and let the surface dry completely; moisture can sabotage adhesion.
Tip: Avoid high-pressure washing on delicate wood; use a soft-bristle brush for stubborn grime. - 3
Repair, fill, and sand as needed
Fill cracks and holes with exterior filler; let cure, then sand smooth. Wipe away dust with a tack cloth before priming.
Tip: Dampen wood fibers lightly before sanding to reduce dust and heat buildup. - 4
Prime bare or problem surfaces
Apply a bonding primer to bare wood or slick surfaces to ensure coating adhesion. If repainting existing paint, use a high-adhesion primer for best results.
Tip: Primer is the foundation; don’t skip it on problematic areas. - 5
Select and prepare your porch paint
Choose a weather-ready exterior paint suitable for your porch surface. Stir thoroughly, and pour into a tray ready for use with rollers and brushes.
Tip: Mix small amounts at a time to avoid skinning and color variations. - 6
Apply coats with proper technique
Cut in around edges first, then roll in even, thin coats. Allow adequate drying between coats according to product guidelines; a second coat is usually required for even coverage.
Tip: Work with a wet edge to reduce lap marks; don’t rush between coats.
Your Questions Answered
What is the best type of paint for a porch?
Exterior latex/acrylic paints are common for porches due to easy cleanup and flexibility. Oil-based enamels are tougher but take longer to dry and require ventilation. Match the coating to the porch surface and weather exposure.
For porches, latex paints are usually best for ease of use and flexibility, while enamel can be an option for high-traffic areas if ventilation is available.
Do I really need a primer for porch painting?
Yes. Primer improves adhesion, blocks stains or tannins from wood, and helps the topcoat cover evenly, especially on bare wood or slick surfaces.
Primer helps the paint stick and look even, especially on new wood or slick surfaces.
What temperature is best for porch painting?
Paint should be applied within the manufacturer's recommended temperature range, typically mild days with low humidity. Extreme heat or cold can affect drying and film formation.
Paint in mild, dry weather to get the best finish and durability.
How long does porch paint take to dry between coats?
Dry times vary by product; expect a few hours to reach a light tack and longer for a full cure. Plan for at least a full day if applying multiple coats under normal conditions.
Dry times depend on the product; usually you wait several hours between coats and a full day for cure.
Can I spray porch paint or should I roll it?
Both are possible. Spraying can speed coverage on large flat surfaces, but requires masking and practice. Rolling with a suitable nap offers more control for tight edges and trim.
You can spray or roll porch paint; spraying is faster but needs masking, while rolling gives great control.
Watch Video
Quick Summary
- Thorough prep leads to lasting adhesion.
- Choose porch paint that matches surface and climate needs.
- Apply thin coats and allow proper cure times between coats.
- Maintain surfaces with regular cleaning and checks.