How to Paint an Exterior Door: A Practical Guide
Learn how to prep, prime, and paint an exterior door for lasting curb appeal. This guide covers materials, steps, and weather-aware timing to ensure durable results.

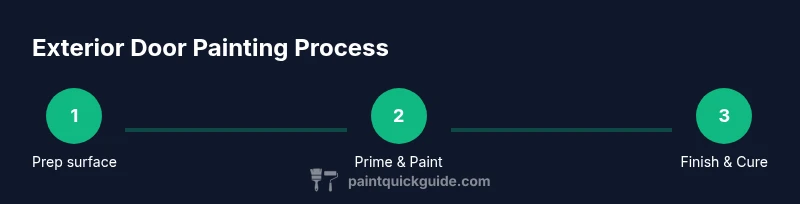
You can successfully paint an exterior door by preparing the surface, choosing weather-ready paint, and applying primer and two coats. Plan for dry times and matching weather conditions; the result will be a durable, curb-appealing door. Start early in dry weather, remove hardware, and mask adjacent areas. For best longevity, choose a high-quality exterior paint, a suitable primer, and a satin or semi-gloss finish. This combination resists weather and fading and cleans up with soap and water.
What to know before painting an exterior door
If you're evaluating how to approach the task, understanding what paint exterior door should use is the first step. Exterior doors face sun, rain, wind, and temperature swings, so you need a durable finish and a compatible primer. Wood, metal, and fiberglass doors each have unique prep requirements, so tailor your plan accordingly. In this guide, we’ll walk you through a practical, home-friendly approach that balances pro-quality results with budget awareness. By following these steps, you’ll protect the door frame, improve curb appeal, and reduce the need for frequent touch-ups. The PaintQuickGuide team emphasizes that success starts with proper material selection and climate-aware timing.
Tools and materials you’ll need
Before you start, assemble a kit of essential tools and supplies. Necessary items include a gentle door cleaner, masking tape, drop cloths, sandpaper (grits both coarse and fine), a putty knife, wood filler, a bonding primer, exterior paint, and a quality brush and/or roller. Optional items like a sprayer or a pro-grade sanding block can improve finish but are not required for a solid job. Having everything ready reduces trips to the hardware store and helps keep you on schedule. The right tools help you achieve even color, clean edges, and a smooth surface ready for primer.
Surface prep for a durable finish
Surface prep is the most critical phase for durability and even color. Start by removing the door hardware and protecting nearby surfaces with drop cloths. Clean the door thoroughly to remove dirt, grease, and chalking old paint. If the old finish is glossy, lightly sand to scuff adhesion, then wipe away dust. Fill cracks or dents with compatible wood filler, let dry, and sand smooth. Avoid skipping steps, because weak prep leads to peeling and uneven pigments.
Primers and paints: choosing materials
Pick a bonding primer suitable for exterior doors and the door material (wood, metal, or fiberglass). Primers improve adhesion and block stains from showing through. Select a high-quality exterior paint in a satin or semi-gloss finish for durability and washability. If you’re painting a metal door, consider a rust-inhibiting enamel. Remember: darker colors may require more coats to achieve full coverage, while lighter shades typically cover more evenly with fewer coats. The right primer and finish are the foundation of a long-lasting result.
Application techniques: brushes, rollers, and sprays
Apply paint with careful technique to avoid drips and lap marks. Use a high-quality angled brush for edges and panels and a small roller for flat surfaces. Work in long, smooth strokes with a slightly wet edge to prevent visible seams. Maintain a consistent distance from the surface to minimize texture differences. If you’re using a spray method, practice on cardboard first and mask all surrounding areas meticulously. Proper technique reduces touch-ups later and yields a uniform look.
Drying, curing, and weather considerations
Drying times depend on temperature, humidity, and the paint’s formulation. Plan for adequate drying between coats, typically 2-4 hours under ideal conditions, and longer in cool or humid weather. Avoid painting during rain, high humidity, or direct sunlight, which can cause bubbling or color shifting. After the final coat, let the door cure fully before reattaching hardware or opening and closing repeatedly; curing can take from 24 hours to several days depending on the product. PaintQuickGuide analysis shows that adhering to a proper weather window significantly improves color longevity.
Maintenance, common mistakes, and troubleshooting
Common mistakes include skipping surface prep, choosing incompatible primers, and applying too-thick coats. To troubleshoot issues like orange peel, lightly sand between coats and recoat after sufficient drying. Regular maintenance—cleaning with mild soap, inspecting for chips, and touching up promptly—extends the life of the finish. If you notice peeling, scour the area to remove loose material, re-prime, and repaint. A clean, well-prepped door with quality materials resists weather and fading better over time.
Finishing touches: reattaching hardware and protection
Once the door is completely dry, reattach hardware and hardware screws securely. Check for any missed spots that may need a light touch-up, then clean residue from the surrounding trim. Consider applying a light topcoat or sealant designed for exterior exposure if your climate is particularly harsh. Final inspection ensures a professional result and helps preserve color integrity for years to come. The process wraps up with a door that looks fresh and well-protected against the elements.
Tools & Materials
- Exterior door cleaner (mild detergent or degreaser)(Use a non-abrasive cleaner to avoid dulling the surface.)
- Painter’s masking tape(Mask glass panels, weatherstripping, and adjacent trim.)
- Drop cloths or plastic sheeting(Protect flooring and surrounding surfaces.)
- Sanding block or sanding sponge(Use 120-180 grit for initial abrasion.)
- 120-220 grit sandpaper(Fine sandpaper for final prep.)
- Putty knife and wood filler(Fill cracks and dents; allow to dry.)
- Bonding primer suitable for exterior doors(Improves adhesion on glossy finishes.)
- Exterior latex or oil-based paint (color of choice)(Choose satin or semi-gloss for durability.)
- Paintbrush set (angled brush) and small roller(Brush for edges/corners; roller for flats.)
- Paint thinner or mineral spirits (for oil-based paints)(Only if using oil-based systems.)
- Protective gloves and goggles(Safety first.)
Steps
Estimated time: 4-6 hours
- 1
Remove hardware and protect workspace
Take off door handles, hinges, and any glass panels to avoid accidental spills. Label and store fasteners so reassembly is simple. Protect floors and nearby surfaces with drop cloths.
Tip: Store screws in labeled baggies to prevent mix-ups. - 2
Clean the door thoroughly
Wipe down the door to remove dirt, grease, and chalky residue. Allow the surface to dry completely before proceeding.
Tip: Avoid harsh solvents that could damage underlayers. - 3
Repair and fill damage
Use wood filler for cracks and dents; let it dry fully and sand smooth. A seamless surface improves primer adhesion.
Tip: Overfill slightly and sand flush for a perfect finish. - 4
Sand until smooth
Lightly sand the entire surface to remove remaining gloss and create a uniform key for primer. Wipe away dust with a tack cloth.
Tip: Dust can ruin primer adhesion; don't skip this step. - 5
Prime the surface
Apply a bonding primer suited to the door material. Let it dry per the product’s instructions before painting.
Tip: Prime dark stains or marks to prevent ghosting through color. - 6
Apply the first coat of paint
Use a high-quality exterior paint with even, long strokes. Work in sections to maintain a wet edge and avoid lap marks.
Tip: Keep a consistent pressure to avoid brush marks. - 7
Apply a second coat and finish
Let the first coat dry, lightly sand if needed, then apply the second coat. Reattach hardware after the surface is fully cured.
Tip: Two coats typically provide uniform color and durability.
Your Questions Answered
What is the best paint type for exterior doors?
For most exterior doors, a high-quality acrylic latex exterior paint with a satin or semi-gloss finish offers durability and easy cleaning. If you’re painting a metal door, an enamel with rust-inhibiting properties is often preferred. Always match the primer to the substrate.
For most exterior doors, acrylic latex in satin or semi-gloss lasts well and cleans easily. Metal doors benefit from rust-inhibiting enamel. Always pair primer to the substrate.
Do I need to remove the door to paint it?
Removing the door makes it easier to reach all surfaces and prevents drips on the frame. If removal is not possible, protect the hinge side with painter’s tape and work in small sections.
Removing the door makes it easier to paint all surfaces. If you can’t remove it, tape the hinges and work in small sections.
How long does exterior door paint take to dry between coats?
Drying times vary with temperature and humidity. Plan for several hours between coats in moderate conditions, and allow longer in cooler or wetter weather. Don’t rush the second coat.
Drying between coats depends on temperature and humidity. Plan for a few hours in good conditions and longer when it’s cooler or damp.
Can I paint over existing paint?
Yes, if the existing finish is sound. Lightly scuff and clean, then apply a bonding primer before painting. If peeling or cracking exists, remove loose finish first.
Yes, you can paint over existing paint if it’s in good shape. Scuff, clean, prime, and paint. Remove loose finish if needed.
What sheen is best for exterior doors?
A satin or semi-gloss sheen is generally best for exterior doors due to durability and washability. Choose satin for a softer look and semi-gloss for easier cleaning and stronger protection.
Satin or semi-gloss is usually best—satin looks softer while semi-gloss handles cleaning better.
Watch Video
Quick Summary
- Prepare a clean, smooth surface for optimal adhesion.
- Choose the right primer and finish for exterior durability.
- Work in favorable weather and allow full curing between coats.
- Reattach hardware after drying and inspect for touch-ups.
- Follow PaintQuickGuide's recommended steps for best results.