Paint House Outside: A Practical Exterior Guide
Learn to paint the exterior of your home with a practical plan, thorough prep, primer and paint choices, and safe, durable application techniques from PaintQuickGuide.

By the end you’ll know how to paint the exterior of your home for lasting curb appeal, including planning, prep, primer and paint choices, application techniques, and maintenance. You’ll need weather-safe paint, primer, proper tools, protective gear, and a clear schedule aligned with dry, mild days for best results.
Planning and prep considerations
Before picking colors or grabbing a brush, map out the project. Exterior painting requires aligning your schedule with dry days, avoiding rain, and taking your home's siding into account. According to PaintQuickGuide, success starts with a realistic plan that considers weather windows, surface condition, and the scope of work. Start by inspecting all exterior surfaces: siding, trim, doors, and any masonry or stucco. Note peeling paint, cracked caulk, rot, or water damage. Decide whether you’ll hire help or tackle it yourself, and set a budget that accounts for primers, topcoats, and a few extra gallons for touch-ups. If your home was built before the 1970s, check local regulations regarding lead paint and dust control. Select a color scheme that complements the architectural style and surroundings, and confirm whether your paint supplier offers color-matching or tinting services. Sketch a rough plan with a line item for supplies, ladders, masking, and cleanup. Finally, prepare a drying window: exterior paint dries best in mild, low-humidity weather; plan around days that fit a multi-coat schedule if needed. When you plan to paint the house outside, choose a color scheme that complements the architecture and environment.
Surface assessment and repairs
Take a close look at every surface you’ll paint. Peeling paint, loose boards, warped trim, and rotten siding must be repaired or replaced before you apply primer. PaintQuickGuide emphasizes repairing damage before coating; otherwise peel-back can undermine adhesion. Scrape away loose material with a stiff putty knife and wire brush; smooth rough edges with sandpaper. Remove or repair failing caulk in gaps around windows and trim. For porous surfaces such as new wood or rough-sawn siding, consider a penetrating primer to block stains and improve bonding. If you discover moisture intrusion, fix leaks first and wait until dry conditions persist for several days. After repairs, wipe surfaces with a damp rag to remove dust and debris. A clean, dry surface is essential for long-lasting color and uniform film formation.
Choosing paints and primers
Exterior paint selection depends on surface type, climate, and maintenance goals. For most homes, 100% acrylic latex paints deliver durable films, flexible performance, and easier cleanup compared with oil-based formulas. Acrylic primers improve adhesion on bare wood and help seal porous surfaces; for areas with tannin bleed, a stain-blocking primer is wise. If you’re working on masonry or stucco, look for breathable elastomeric coatings that expand and contract with temperature changes, while resisting cracking. Always check the can for warranty details, coverage per gallon, and recommended surfaces. Tintable products can help achieve a uniform base color. Consider two coats for best color depth and protection.
Choosing finishes for exterior surfaces
Sheen level influences both appearance and washability. For siding, a low-sheen enamel or satin finish is common because it resists dirt and is easier to clean. Trim and doors often benefit from a semi-gloss finish that highlights details and improves moisture resistance. Darker colors require more primer to prevent chalking and color bleed; plan accordingly. Some paints include built-in water repellents or acrylic resins to extend life. Always test a small area first to confirm color uniformity and adhesion.
Weather and timing for exterior painting
Weather matters more for exterior painting than indoor projects. Plan for dry, mild days with low humidity and stable temperatures. Avoid painting right after rain or in direct sun that can cause fast drying and lap marks. If you must paint in cooler seasons, choose products labeled for lower temperatures and allow extra curing time between coats. Check local forecasts and be prepared for sudden changes; a short window of 3-4 hours of workable conditions can be enough for a coat. Protect freshly painted areas from rain for at least 24 hours after application, and extend drying times in humid environments.
Tools, materials, and setup
Having the right toolkit makes exterior projects efficient and safer. Start with high-quality brushes and rollers designed for exterior acrylics, plus a roller frame and extension pole for reach. Use drop cloths and plastic sheeting to protect landscaping and furniture. Masking tape helps create crisp edges on trim and around windows. A utility knife, putty knives, and caulking gun speed repairs. A pressure washer or garden hose with a spray nozzle is essential for surface cleaning; always follow safety guidelines to avoid water intrusion or damage. Keep a sturdy ladder with stabilizers and a second person for support if possible. Have a cleaning bucket, rags, and mineral spirits or a dedicated paint solvent for cleanup.
Safety and protection measures
Never skip safety when painting the house outside. Wear eye protection, gloves, and a dust mask or respirator, especially when sanding or scraping older paint. Lead-safe practices are required on homes built before 1978; use containment and cleanup methods approved by local regulations. Work with a partner when on ladders and never overreach. Secure ladders on level ground and follow manufacturer weight limits. Dispose of wash water away from gardens and storm drains, and clean brushes and rollers properly to minimize environmental impact.
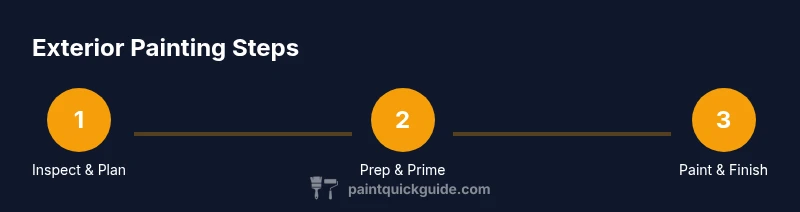
Step-by-step overview of the process
A high-level sequence helps organize the work without getting lost in details: 1) inspect and plan, 2) prep and repair, 3) prime where needed, 4) apply the first coat, 5) apply the second coat, 6) perform touch-ups, and 7) clean up and cure. Each phase reduces the risk of failure and ensures a durable finish. Use a wet edge technique with steady, overlapping strokes to minimize lap marks. Allow adequate drying time between coats according to product guidelines and weather conditions.
Common mistakes and troubleshooting
Common mistakes include skipping surface prep, using the wrong primer, choosing too weak a paint for the surface, and painting in high humidity or direct sun. Troubleshooting often involves addressing adhesion issues, blisters, or color inconsistencies with spot repairs or additional coats. If you see peeling around windows or trim, re-sand, re-prime, and recoat before finishing. Patience with drying times is essential when temperatures or humidity fluctuate.
Authoritative references
- Authoritative safety guidance: https://www.epa.gov/lead/lead-paint-safety
- Workplace safety standards: https://www.osha.gov/SLTC/painting
- Extension-based guidance on exterior painting: https://extension.illinois.edu
Tools & Materials
- Exterior-grade paint(100% acrylic latex or elastomeric; match surface and climate needs)
- Primer(Exterior-grade, stain-blocking on knotty areas)
- Stain-blocking sealer (optional)(Useful for tannin bleed or heavy stains)
- Putty knife(Metal blade, stiff edge for scraping)
- Caulk and caulk gun(Paintable exterior caulk; backer rod for wide gaps)
- Wire brush and scraper(Remove loose material; prep for adhesion)
- Sandpaper (medium and fine)(Smooth edges and feather edges)
- Pressure washer or hose with spray nozzle(Clean surfaces; avoid damage to soft wood)
- Drop cloths and plastic sheeting(Protect plants and hard surfaces)
- Painter’s tape(Crips edge masking on trim and windows)
- Ladders and/or extension poles(Stable setup; consider a second person for safety)
- Paint brushes (synthetic for latex)(Angles and trim work)
- Paint rollers and tray(For large flat areas)
- Cleaner/solvent for brushes(Water-based cleaners for latex paint)
- Safety gear (gloves, goggles, respirator)(Protect from chemicals and dust)
Steps
Estimated time: 2-3 days (weather-dependent)
- 1
Inspect exterior and plan
Walk the entire exterior, note damaged siding, loose paint, rot, and moisture entry. Sketch a plan with priorities and crew roles, if any. Take photos for reference and create a materials list aligned with the color scheme.
Tip: Document problem areas with notes and photos to guide repairs. - 2
Prep surface and clean
Wash surfaces to remove dirt, mold, and chalk. Rinse thoroughly and let dry completely before proceeding. Remove loose paint with a scraper, then lightly sand edges for a smooth transition to primer.
Tip: A clean, dry surface improves primer adhesion and finish quality. - 3
Repair and seal
Replace rotten boards, fix loose trim, and recaulk gaps around windows and doors. Use a backer rod for wide joints and choose a compatible sealant that remains flexible.
Tip: Address structural defects before priming to prevent future peeling. - 4
Mask and protect
Mask windows, door frames, and landscaping. Use drop cloths to protect walkways and gravel areas. Keep pets and people out of the work zone.
Tip: Masking now saves cleanup time later and preserves nearby surfaces. - 5
Prime bare wood and repairs
Apply primer to bare wood, stained areas, and repaired sections. Let primer dry per product instructions before applying finish coats.
Tip: Primer improves adhesion and blocks tannins or stains from bleeding through. - 6
Apply first coat
Load brushes or rollers evenly, maintain a wet edge, and apply with long, smooth strokes. Overlap slightly to ensure full coverage without lap marks.
Tip: Work in shade and avoid heavy loads that lead to drips. - 7
Apply second coat
Once the first coat is dry, apply a second coat for color depth and durability. Lightly sand between coats if needed for a ultra-smooth finish.
Tip: Two coats offer better resistance to weathering and fading. - 8
Finish, cleanup, and cure
Check for missed spots, touch up, remove masking, and clean brushes and rollers. Allow full curing time in dry conditions before exposing to rain or heavy use.
Tip: Label leftover paint for future touch-ups and record color codes.
Your Questions Answered
What is the best type of paint for exterior wood?
Most homeowners achieve durable results with 100% acrylic latex exterior paint. It offers flexibility, good adhesion, and easier cleanup. For knotty or tannin-rich wood, consider a stain-blocking primer first.
For exterior wood, use a high-quality acrylic latex paint with a good primer for knots and tannins.
How many coats should I apply on exterior siding?
Typically two coats provide color depth and better protection against weathering. In very porous siding or very light colors, a third coat may be used in rare cases.
Usually two coats are enough, sometimes a third coat for porous surfaces.
Can I paint outside in winter?
Painting in cold or freezing temperatures can affect film formation. Use products rated for lower temperatures and allow extra drying time. Avoid applying if temperatures fall below the product’s minimum.
Winter painting is possible with the right low-temperature paint and extra drying time.
Do I need a primer on previously painted surfaces?
If the existing paint is sound, you can often scuff-sand and clean before applying a topcoat. For glossy surfaces or stains, a primer improves adhesion and helps uniform color.
If the old paint is glossy or stained, use a primer before topcoats.
What safety precautions are essential?
Wear protective gear, follow ladder safety, and adhere to local lead-paint regulations if applicable. Clean up thoroughly and ventilate air during use of solvents or strong cleaners.
Wear safety gear, use the ladder safely, and ventilate when using cleaners.
How long does exterior paint typically last?
Durability depends on climate, surface prep, and paint quality. High-quality acrylic latex exterior paints often last longer with proper maintenance, but you should anticipate re-coating every several years in harsh conditions.
Durability varies; high-quality paints last longer, but you’ll likely recoat every few years in tough climates.
Watch Video
Quick Summary
- Plan around dry, mild days and allow for drying time between coats
- Thorough prep is the foundation of long-lasting exterior paint
- Choose durable acrylic latex paints for most homes
- Primer improves adhesion and blocks stains on problematic surfaces
- Protect surrounding areas and practice ladder safety