Paint for Outside Concrete: Practical Guide
A practical, step-by-step guide to selecting, prepping, applying, and maintaining paint for outside concrete surfaces—balancing durability, aesthetics, and budget with guidance from PaintQuickGuide.

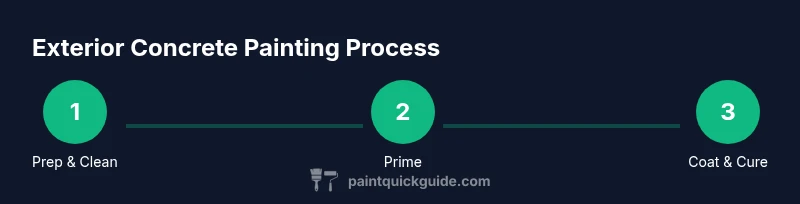
Paint for outside concrete can deliver a durable, attractive finish when you pick the right product, perform thorough surface prep, and follow a disciplined application plan. This guide covers paint types, priming needs, application methods, and maintenance strategies to maximize adhesion and longevity for exterior concrete surfaces. It reflects practical guidance from the PaintQuickGuide team.
Surface prep and cleaning for outside concrete
Exterior concrete surfaces collect dirt, oil, algae, and efflorescence that can sabotage adhesion. Start with a clean, dry canvas: remove loose material with a stiff brush, then scrub stubborn stains with a concrete cleaner or degreaser. If you have oil spots, repeat cleaning until you see no residue. A power washer set to moderate pressure can help, but avoid blasting edges or sealers loose. After washing, allow the surface to dry completely—moisture trapped under paint is a common failure point. Proper prep is the foundation of lasting adhesion, and as PaintQuickGuide analysis demonstrates, a clean, dry surface accepts paint far more reliably than a dirty one.
Assessing moisture and crack management
Moisture is the silent adversary of exterior coatings. Before painting, test for vapor migration by placing a small piece of tape on the surface and checking for moisture under the tape after several minutes. If dampness remains, postpone painting and address the source—surface moisture, seepage, or leaking cracks. Inspect for cracks or structural movement; fill hairline cracks with a compatible crack filler and allow it to cure as directed. Treat larger cracks according to their width and depth. A dry, stable surface prevents coating failure and reduces the risk of blistering or peeling.
Selecting paint: types, finishes, and compatibility
For exterior concrete, choose breathable masonry paints that resist blistering and peeling in temperature swings. Options include acrylic latex masonry paints, silicate-based paints for mineral substrates, and elastomeric coatings for highly porous or weathered surfaces. Acrylic latex is the most common for homes, offering flexibility and easy maintenance. Elastomeric coatings provide extra water resistance on rough textures but may trap moisture if the substrate isn’t prepared properly. Whatever you pick, ensure the product is labeled for exterior concrete or masonry and compatible with primers or sealers you plan to use.
Primers and sealers: when to use them
Primers improve adhesion on porous or glossy surfaces and sealers help reduce moisture uptake. Use a bonding primer on slick or previously painted concrete and a penetrating acrylic primer on highly porous, dry substrates. If you have efflorescence, apply a penetrating stain-blocking primer or a specific moisture-blocking sealer before the color coat. Allow primers to cure fully according to the manufacturer’s guidance before applying the topcoat. A good primer can dramatically improve coating uniformity and color hold.
Application methods: tools and technique
Apply coats with appropriate tools based on the surface texture. Smooth concrete often benefits from a long-nap roller, while textured or broom-finished surfaces may require a brush for corners and a hooded sprayer for larger areas. Start with tight edges, then flood the surface with even strokes. Maintain a wet edge to avoid lap marks, and avoid overworking the paint, which can cause surface imperfections. Allow the first coat to dry as required before applying a second coat for full coverage and color depth.
Climate, drying, and curing guidance
Outdoor painting is weather-sensitive. Plan for days with mild temperatures and low humidity to promote even drying. High humidity slows drying and can increase topcoat dwell time, potentially trapping moisture under the finish. Direct sun can cause rapid drying and lead to lap marks or brush lines; paint during cooler parts of the day or provide shade. Even after the final coat, allow sufficient cure time before foot traffic or heavy use to ensure the coating reaches maximum hardness and weather resistance.
Maintenance and long-term care
Regular maintenance extends life. Clean the surface periodically with a mild detergent and a soft brush; avoid harsh solvents that can degrade the finish. Inspect annually for cracks, peeling, or efflorescence and address issues promptly. A breathable topcoat with a long life expectancy, combined with timely cleaning, helps preserve color and gloss. Recoat when you notice color fading or surface wear, following the manufacturer’s guidelines for recoating intervals.
Common mistakes and troubleshooting
Common issues include applying paint to damp surfaces, using incompatible primers, and skipping crack repair. Over-rollering can squeeze out too much paint and create uneven texture, while insufficient drying time between coats can cause peeling. If you see bubbling or fisheyes, stop painting, wash the surface, and reassess moisture and surface prep before continuing. Always test an inconspicuous area before committing to the full surface.
Budgeting and material selection considerations
Prices for exterior concrete coatings vary by product type and performance. Generally, you’ll balance upfront cost with durability and maintenance. Higher-quality elastomeric or silicate-based coatings tend to offer longer life but may require more precise surface prep. Budget for primers, sealers, and a topcoat, plus protective gear and masking supplies. Remember that investing in proper prep and a compatible system will save maintenance costs and extend the surface life over time.
Quick-start planning: a practical 2-week prepschedule
Plan your project with a realistic timeline. Week 1 focuses on surface prep, crack filling, and primer selection, with days allocated for curing. Week 2 covers color selection, topcoat application, and a final inspection. Build in contingency days for weather delays, and schedule labor or assistive help if needed. A structured plan reduces mistakes and ensures you hit optimal conditions for best adhesion and durability.
Tools & Materials
- Pressure washer or garden hose with spray nozzle(Moderate pressure; avoid blasting edges)
- Stiff-bristle brush(For scrubbing stains and embedded dirt)
- Concrete cleaner or degreaser(Follow label for dilution and dwell time)
- Masking tape and drop cloths(Protect adjacent surfaces and plants)
- Concrete crack filler or epoxy crack repair kit(Use for visible cracking)
- Bonding primer (concrete/masonry)(Enhances adhesion on slick or previously painted surfaces)
- Penetrating acrylic primer (porous surfaces)(Recommended for highly porous substrates)
- Acrylic latex masonry paint(Exterior-grade with good breathability)
- Elastomeric concrete coating (optional)(Extra water resistance for rough textures)
- Paint roller with 1-1/4 to 1-1/2 inch nap(For even coverage on flat surfaces)
- Extension pole for rollers(Access high areas without ladder)
- Angled brush (2-4 inch)(Edges and corners)
- Paint sprayer (optional)(Faster large-area application)
- Safety gear: goggles, gloves, respirator(Protect from fumes and dust)
- Caulk gun and acrylic caulk (if joint sealing is needed)(Seal expansion joints if necessary)
Steps
Estimated time: 2-3 days (plus additional curing time as recommended by product labels)
- 1
Inspect and clean surface
Survey the area for cracks, oil stains, and peeling coating. Clean thoroughly with a degreaser, scrub with a stiff brush, and rinse completely. Ensure the surface dries fully before proceeding.
Tip: Spot-test a small area to confirm it dries clear and adheres well. - 2
Test moisture and repair cracks
Use a moisture test or tape test to confirm the surface is dry. Fill cracks with appropriate filler and smooth with a putty knife. Allow filler to cure per product guidelines before priming.
Tip: Address moisture sources before painting to prevent future peeling. - 3
Protect surrounding areas
Mask edges, plants, and adjacent siding. Lay drop cloths to catch drips and spills. Preparation protects surfaces you don’t intend to paint and keeps cleanup easier.
Tip: Use painter’s tape to create crisp edges at joints. - 4
Choose and apply primer
Select a bonding primer for non-porous surfaces or a penetrating primer for porous concrete. Apply evenly with a roller or brush and allow to dry according to the label.
Tip: Primer improves adhesion and color uniformity across the surface. - 5
Mix and prepare topcoat
Stir the paint thoroughly to a uniform consistency. If using multiple cans, mix them together in a larger container to ensure color consistency.
Tip: Do not thin unless the product specifies; thinning can affect film formation. - 6
First coat application
Apply the first coat with even strokes along the substrate grain. Maintain a wet edge and avoid overworking the paint. Edge corners first with a brush, then fill larger areas with a roller.
Tip: Work in sections to prevent lap marks. - 7
Second coat and finish
Allow the first coat to dry fully, then apply a second coat for full coverage and color depth. Cross-roll if texture requires it for uniformity.
Tip: Two coats often deliver the best durability on concrete. - 8
Curing and final inspection
Let the coating cure undisturbed, following manufacturer guidance. Inspect for missed spots and touch up as needed after the final cure.
Tip: Avoid foot traffic and lawn sprinklers during initial cure period.
Your Questions Answered
Do I need a primer before painting exterior concrete?
Most exterior concrete projects benefit from a primer, especially on porous or previously painted surfaces. Primers improve adhesion, reduce staining, and help color uniformity. Always follow the primer and paint manufacturer's compatibility guidelines.
Yes. Primers improve adhesion and color uniformity, especially on porous or previously painted surfaces.
Can I paint over existing paint on concrete?
You can if the existing coating is sound and well-adhered. If it’s peeling or chalking, remove or sand those areas and apply a bonding primer before repainting. Always test adhesion in a small area first.
Paint over only if the current coating is well-adhered; otherwise strip, sand, and use a bonding primer.
How long does exterior concrete paint last?
Durability depends on surface prep, climate, and coating quality. Proper prep and a compatible topcoat extend life, while harsh weather and moisture accelerate wear. Regular maintenance helps preserve color and performance.
Durability varies with prep, climate, and product quality; good maintenance extends life.
What is the best time of year to paint exterior concrete?
Choose mild, dry conditions with moderate humidity. Avoid extreme heat, cold, rain, or high dew points, which can interfere with adhesion and curing. Plan for a window with stable weather.
Paint in mild, dry conditions with stable weather for best results.
Can I use a sprayer for exterior concrete painting?
Sprayers can speed up large-area jobs but require masking and proper technique to avoid runs and overspray. They’re best used for uniform surfaces and when the coating is compatible with spraying. Follow manufacturer guidelines and practice first.
Yes, but use masking and practice first to avoid over-spray and runs.
Are elastomeric coatings suitable for all exterior concrete surfaces?
Elastomeric coatings offer excellent water resistance on rough or porous concrete but can trap moisture if the substrate isn’t properly prepared. They’re ideal for rough textures but may not be necessary for smooth, well-sealed concrete.
Elastomeric coatings are great for rough surfaces but require careful prep to avoid moisture issues.
What safety considerations should I follow?
Wear protective gear, use proper ventilation for solvent-based products, and follow all label directions. Keep bystanders away from work areas and store chemicals safely after use.
Wear PPE, ventilate well, and follow product directions for safety.
Watch Video
Quick Summary
- Prepare a clean, dry surface for best adhesion.
- Choose a paint system compatible with exterior concrete and primers.
- Apply at least two coats for durability and even color.
- Control moisture and temperature to optimize cure.
- Maintain coatings with regular cleaning and timely re-coating.