Outdoor Furniture Paint: A Practical DIY Guide
Learn how to paint outdoor furniture with durable, weather-resistant finishes. This step-by-step guide covers prep, primer selection, paint types, finishes, and long-term care for wood, metal, and plastic pieces.

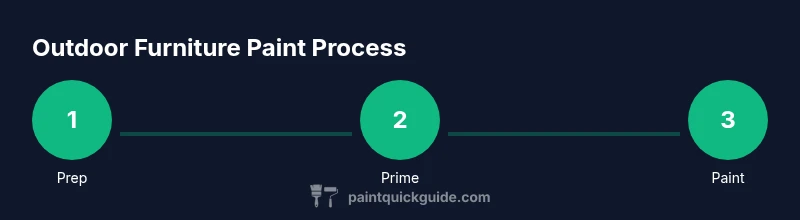
Goal: Paint outdoor furniture with a weatherproof finish that lasts. You’ll prep surfaces, select outdoor-rated latex or acrylic paint, apply primer where required, and seal with a UV‑resistant topcoat. This guide provides a step‑by‑step process and surface-specific tips for wood, metal, and resin pieces to ensure lasting color and protection.
Understanding the value of durable outdoor furniture paint
Outdoor furniture faces sun, rain, and temperature swings. A durable paint system—primer, color, and UV-resistant topcoat—extends life and preserves color. According to PaintQuickGuide, choosing products with bonding adhesion, flexibility, and weather resistance yields the best long-term results. Material matters: wood expands, metal can rust, and resin plastics may craze if finish is too rigid. This guide explains why proper prep and finish selection matter for different materials and climates, with practical cost considerations and real-world examples from patio projects. By applying proven techniques, you can refresh weathered pieces, extend their life, and avoid frequent replacements. The goal is a color that lasts through seasons while resisting chipping and fading.
Choosing the right paint for outdoor furniture
Outdoor furniture benefits from water-based acrylic (latex) paints for modern durability, easy cleanup, and lower odor. For high-traffic metal pieces, oil-based enamels can offer excellent hardness, but require good ventilation and longer cure times. Plastic and resin surfaces usually respond best to paints designed for plastic, paired with a bonding primer to improve adhesion. For most homeowners, a satin or semi-gloss finish is ideal: blends well with outdoor light, hides minor imperfections, and cleans easily with a damp cloth. Always choose products labeled for exterior use and UV resistance to prevent sun bleaching.
Surfaces and primers: prepping wood, metal, and plastic
Wood surfaces benefit from a clean finish and a bonding primer that can handle expansion and contraction. Sand smooth, remove loose fibers, and patch cracks with wood filler before priming. Metal pieces should be rust-removed and treated with a rust-inhibiting primer and a bonding topcoat to seal bare metal. Plastic surfaces require thorough cleaning, roughening with #120 grit sandpaper, and the use of a specialized bonding primer to improve paint adhesion. Always test primer on a small area to verify adhesion and avoid peels in high-traffic zones.
Primers and sealers: when and why
Primers are not just a nice-to-have; they set the stage for color, adhesion, and longevity. A bonding primer helps porous woods and metals resist peeling, while a stain-blocking or sealing primer can prevent tannin bleed or wood knots from showing through. After painting, a UV-protective topcoat or clear sealer provides extra resistance to sun and moisture. For furniture exposed to harsh elements, consider two coats of color with a light sanding between coats and a final sealant to lock in the color.
Step-by-step prep plan
Start with a plan: decide color, finish, and whether you’ll use brushes, rollers, or a sprayer. Move outdoor pieces to a shaded, well-ventilated area and lay down drop cloths. Clean thoroughly with mild soap and water, rinse, and let dry. Inspect for damage and repair with wood filler or rust remover as needed. Sand the surfaces to a uniform texture, remove dust, and wipe down again. Apply primer on the prepared areas, allow it to dry per product guidelines, then proceed to the color coats. Finish with a topcoat that matches your protection needs.
Application techniques: brushing, rolling, spraying
Brushes provide control for edges and detail work; rollers cover flat surfaces quickly with a smooth, even layer; spraying delivers a uniform coat on intricate shapes but requires masking of adjacent areas. For fabric-like cushions or intricate scrolls, spray may be slower to set; consider combination methods. Maintain a wet edge to prevent lap marks and apply thin, even coats rather than one thick layer. Follow the manufacturer’s recommendations for inter-coat times and curing guidance to avoid cracking or peeling.
Drying times and weather considerations
Outdoor painting is best done in moderate temperatures with low humidity. Drying and curing times vary by product and climate; follow the label for recoat windows and full cure. Avoid painting during rain or extreme heat, as rapid drying can lead to brush marks or surface cracking. After final coat, allow adequate time for curing in shade or under a canopy if possible. In windy conditions, protect the project from dust and debris while drying.
Color ideas and finishes for outdoor furniture
Bright, sun-friendly hues can energize a patio, while muted greens and blues blend with garden scenery. Chalky or matte finishes hide imperfections but require more frequent maintenance, whereas satin/semi-gloss finishes are easier to clean and weather resistant. For a modern look, pair a bold accent with a neutral base. If you’re refurbishing old wood, consider staining or tinting with semi-transparent finishes to preserve wood grain while adding color.
Maintenance and care for long-lasting color
Clean outdoor furniture with mild soapy water between seasons to remove grime and residue. Re-coat when color starts to fade, chips, or shows wear in high-traffic zones. Store pieces indoors during harsh winters when possible, or cover them with breathable covers to protect from moisture. Regular inspection for peeling, rust, or cracks allows timely maintenance and protects the investment. PaintQuickGuide recommends annual checks in areas with intense sun or heavy rainfall.
Tools & Materials
- Exterior-grade bonding primer(Choose primer compatible with your surface (wood/metal/plastic))
- Exterior acrylic/latex paint (outdoor-rated)(Choose satin or semi-gloss for washability)
- Oil-based enamel (optional for metal)(Use only if you have good ventilation)
- Clear UV-resistant topcoat or sealer(Helps protect color from sun and moisture)
- Fine-grit sandpaper (120–220), sanding block(Scuff surfaces for better adhesion)
- Mild dish soap and water, scrub brush(Remove dirt and grime before painting)
- Drop cloths and painter’s tape(Protect surrounding areas)
- Paintbrushes (various sizes)(Synthetic bristles recommended for latex paint)
- Foam rollers and tray(Use for flat surfaces; avoid shedding fibers)
- Paint sprayer (optional)(For large flat surfaces or intricate shapes)
- Mask, gloves, eye protection(Safety first; outdoors is best for ventilation)
Steps
Estimated time: 6-9 hours
- 1
Inspect and plan
Assess furniture materials, decide color and finish, and choose application method. This reduces rework and ensures compatibility with outdoor conditions.
Tip: Draft a quick color mood board before you start. - 2
Move and prep the workspace
Clear the area, lay drop cloths, and mask off nearby plants or walls. A tidy space prevents staining and simplifies cleanup.
Tip: Do this in shade to prevent rapid drying. - 3
Clean surfaces thoroughly
Wash with mild soap and water to remove dirt, oils, and mildew. Rinse well and let dry completely to avoid trapping moisture under primer.
Tip: For metal, remove loose rust before priming. - 4
Scuff and repair
Lightly sand to create a mechanical bond. Fill cracks or gouges with exterior filler and sand smooth after it dries.
Tip: Wipe away dust with a tack cloth for a clean surface. - 5
Prime appropriately
Apply bonding primer suitable for your surface. This promotes adhesion and blocks stains or tannins from bleeding through.
Tip: Seal knots in wood with appropriate stain-blocking primer. - 6
First coat of paint
Apply a thin, even coat using your chosen method (brush/roller/sprayer). Avoid overloading to prevent drips and peel.
Tip: Keep a consistent wet edge to minimize marks. - 7
Let coat dry and inspect
Check for coverage gaps and smoothness. Lightly sand between coats if needed to achieve an even surface.
Tip: Use a white foam roller for a smooth finish. - 8
Second coat and sealer
Apply a second coat for color depth and durability, then apply a UV-resistant topcoat if using a color-seal system.
Tip: Choose a topcoat with UV protection for exterior exposure. - 9
Cure and maintenance
Allow full cure time as per product guidelines. Clean and inspect annually; touch up as needed to extend life.
Tip: Avoid heavy use or stacking while curing.
Your Questions Answered
What is the best type of paint for outdoor furniture?
For most outdoor furniture, water-based acrylic (latex) paints offer a good balance of durability, color retention, and cleanup. Oil-based enamels can be very hard-wearing but require better ventilation and cleaning solvents.
For most outdoor pieces, use water-based acrylic paint for durability and easy cleanup. If you need extra hardness on metal, an oil-based enamel can work, but ensure good ventilation.
Can I paint over existing finishes like varnish or stain?
Yes, but you’ll need to sand and clean the surface, and apply a bonding primer to improve adhesion. If the existing finish is peeling, remove loose layers first for the best results.
You can paint over varnish or stain, but sand and clean first, then use a bonding primer to ensure the new paint sticks properly.
Is spray painting better for detailed or curved surfaces?
Spraying delivers even coverage on complex shapes, but requires masking and ventilation. Brushes and rollers work well for edges and flat surfaces and are easier for beginners.
Spray can cover curves nicely, but needs masking and good ventilation. Brushes and rollers are great for beginners and for tight areas.
How can I prevent peeling and cracking on outdoor furniture?
Ensure surfaces are clean, dry, and properly primed. Apply thin, even coats and avoid painting in extreme temperatures. Allow adequate curing time between coats.
Peeling happens when surfaces aren’t clean or primed, or if coats are too thick. Apply thin coats and cure properly between coats.
Are there disposal considerations for paint and solvents?
Follow local regulations for disposal of paint and solvents. Use containers with lids tightly closed and avoid pouring leftover paint down drains. Consider recycling centers or hazardous waste programs when available.
Check local rules for paint disposal. Don’t pour solvents down the drain; use proper disposal programs.
How often should exterior-painted furniture be refreshed?
Refresh as color fades, chips, or shows wear in high-traffic areas. Outdoor materials may need re-coating every few seasons depending on climate and exposure.
Recoat when the color fades or chips, especially in busy outdoor areas. Climate affects timing.
Watch Video
Quick Summary
- Prepare surfaces thoroughly for best adhesion.
- Choose outdoor-rated paints and appropriate primers.
- Follow product-specific drying and recoating guidelines.
- Seal with UV-protective topcoat for longevity.