How to Get Started Painting a Room: A Practical Guide
Learn how to get started painting a room with practical prep, color choices, tool lists, and a step-by-step plan for a durable, clean finish.

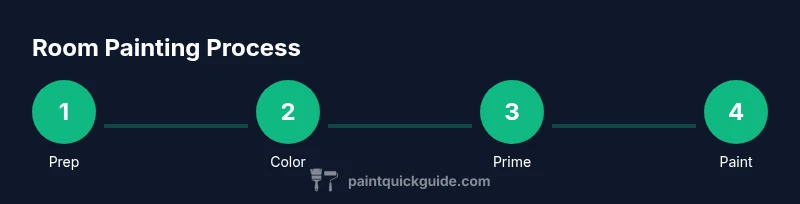
To get started painting a room, plan color and finish, prep every surface, and gather the right tools. Protect floors and furniture, mask edges, and repair imperfections. Start with a primer if needed, cut in around trim, then apply two coats of paint for a smooth, durable finish. Work in dry conditions with steady technique. This approach also helps you budget time and avoid common painting mistakes.
Prep Your Room for Painting
If you’re learning how to get started painting a room, the first step is preparation. According to PaintQuickGuide, preparation is the secret to crisp edges, even coverage, and minimal touch-ups. Start by moving or protecting furniture with drop cloths, then seal off adjacent areas with painter’s tape. Remove outlet covers and switch plates to avoid splatter, and lay down old sheets to protect floors. Inspect walls for cracks, dents, or peeling paint, and repair with filler or spackle. Sand glossy surfaces so the new paint can grip, and wipe away dust. Vacuum corners and trim areas for a clean base. Finally, ensure the room dries completely after cleaning and ventilation. Proper prep reduces the risk of staining floors and creating bleed-through and creates a smooth base for primer and paint. This stage typically takes 30–60 minutes, but larger rooms or rough walls can extend the timeline, so plan accordingly.
Choosing Colors and Finishes
Choosing colors and finishes sets the mood and perceived size of a room. Start by testing swatches on the wall and viewing them in different lighting across the day. Consider warmth or coolness of the room, existing furniture, and the level of light. Small color boards or sample pots on poster boards can help compare at-a-glance. If you’re undecided, start with a neutral base and bring in accent colors through accessories or a feature wall. For finishes, matte hides imperfections but shows wear more; satin or eggshell strikes a balance between washability and sheen; gloss is best for trim and high-traffic surfaces. Remember to label samples and keep a color log so you can reproduce selections later. Acrylic latex paints are common for interiors for easy cleanup and durability. The color you choose will influence the amount of primer you need and the number of coats required.
Tools, Materials, and Setup
Having the right tools can dramatically improve results and speed. Gather both essential and optional items before you start. The core kit includes brushes for cutting in, rollers and trays, painter’s tape, a drop cloth, roller cover (nap appropriate for wall texture), a paint tray, and a stir stick. Keep a damp rag nearby for quick cleanups. Optional extras include a roller extension pole for higher walls, a edger for precise corners, and a paint can opener. For rooms with previous finishes, consider a scraper or sanding block to smooth rough patches. Safety gear such as gloves and a mask is advisable if you’re sensitive to fumes. Finally, choose a reliable mixing container and a way to organize cans by color and finish so you don’t mix shades by mistake.
Surface Prep and Primer Essentials
Primer matters when you’re changing colors dramatically, tackling stains, or painting over glossy surfaces. For most interior walls, a basic latex primer provides good adhesion and coverage. If you’re covering a dark color with a light one, a tinted primer can reduce coats. For knotty wood or resin panels, use a stain-blocking primer to prevent bleed-through. Surface prep continues with filling holes and smoothing patches; allow filler to dry fully, then sand until flush. Detailing around windows and baseboards benefits from properly masked edges. After prepping, wipe surfaces again to remove dust. Finally, stir primer and test with a small brush stroke; if the primer dries clear and evenly, you’re ready to start painting.
Application Techniques and Cleanup
Begin by cutting in along ceilings and trim with a steady hand, then switch to rolling walls in a W-pattern to maximize coverage. Maintain a wet edge to avoid lap marks and work in small sections, watching for drips. Apply a second coat after the first has dried according to the paint’s label; drying times vary with humidity and temperature. Between coats, keep doors and windows open to improve airflow and prevent tackiness. When you finish, remove tape while the paint is slightly tacky to avoid peeling. Clean brushes and rollers with water for latex paints, or with mineral spirits for oil-based finishes, and store leftovers properly in labeled containers. Finally, dispose of used materials according to local guidelines and recycle where possible. A clean cleanup routine helps you finish quickly and keeps surfaces looking fresh for years.
Tools & Materials
- Drop cloths or old sheets(Protect floors and furniture)
- Painter's tape(Masks edges and trim)
- Drop cloths and floor protection(Non-slip preferred)
- Angled sash brush (2–2.5 inches)(For cutting in along ceilings and corners)
- Medium-nap paint roller (4–9 inches)(Choose nap by wall texture)
- Paint tray and liners(Keep paint evenly distributed)
- Stir sticks and paint mixer(Ensure consistent color)
- Sandpaper block or sanding sponge(Smooths walls between coats)
- Putty knife and spackle(Fill holes and cracks)
- Spill containment and rags(Quick cleanups and wipe-ups)
- Ladder or step stool(Reach high areas safely)
- Ventilation mask or respirator(Safer for fumes)
Steps
Estimated time: 2-6 hours total, room size dependent
- 1
Prepare the room
Move furniture, lay drop cloths, mask edges with tape, and remove outlets. Ensure good lighting and airflow. This creates a clean canvas and prevents accidental staining.
Tip: Use a 9-inch roller for walls and a small sash brush for tight corners. - 2
Choose colors and finish
Select color and finish, test swatches in natural light, and compare at different times of day. Neutral bases with bold accents work well in many spaces.
Tip: Label swatches and keep track of which wall each applies to. - 3
Prep surfaces
Inspect walls for cracks and dents; fill with spackle and sand smooth. Clean surfaces to remove dust, ensuring primer adheres properly.
Tip: Dampen a cloth to lift stubborn dust without creating streaks. - 4
Prime if needed
Apply primer where changing color dramatically or covering stains. Allow primer to dry fully before painting.
Tip: Opt for tinted primer when covering dark colors to reduce coats. - 5
Cut in and paint
Start with edges (cutting in) using a sash brush, then fill larger areas with a roller in a W pattern. Maintain a wet edge to avoid lap marks.
Tip: Keep a damp cloth handy to fix minor mistakes while still wet. - 6
Second coat and cleanup
Apply a second coat after the first dries; assess coverage and evenness. Clean tools, remove tape promptly, and ventilate while drying.
Tip: Back-roll after taping to blend newly painted areas with edges.
Your Questions Answered
Do I need to prime before painting a room?
Primer is often essential when changing colors dramatically, covering stains, or painting over glossy surfaces. It improves adhesion and can reduce the number of coats required.
Yes, primer is usually important, especially when you’re changing colors or painting glossy surfaces.
How many coats should I apply?
Two coats are typical for most interior walls to ensure even color and durability. Adjust for color strength and existing surface conditions.
Usually two coats give the best balance of coverage and finish.
What order should I paint a room in?
Paint the ceiling first, then walls, and finally trim. This sequence minimizes drips on finished surfaces and makes cleanups easier.
Ceiling, walls, then trim is the recommended order.
How long does it take to finish a standard bedroom?
Time varies with room size, prep work, and drying times. Plan for a full day plus setup and cleanup, especially if you’re learning.
It can take a full day depending on size and prep.
What safety precautions should I follow?
Ventilate the room, wear eye protection and a mask when needed, and keep ladders stable and floors dry to prevent falls.
Ventilate and wear protection; keep things stable and dry.
Watch Video
Quick Summary
- Plan color and finish before you start.
- Prep thoroughly to create a smooth base.
- Follow proper cutting-in, rolling, and coating order.
- Ventilate and clean up for best results.