Glow in the Dark Spray Paint: A Practical DIY Guide
Learn to use glow in the dark spray paint safely, achieve bright, even glow, and finish with durability. Step-by-step prep, application, curing, and care for DIY projects on wood, metal, plastics, and more.

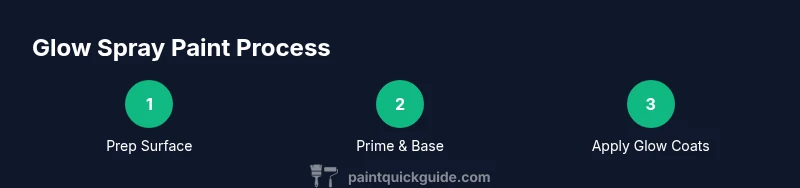
This guide shows you how to apply glow in the dark spray paint for bright, even luminescence on various surfaces. You’ll learn proper surface prep, layering techniques, and curing, plus safety and maintenance tips for durable, eye-catching results. The steps work for small crafts and larger refinishing projects alike.
How glow in the dark spray paint works
Glow in the dark spray paint uses phosphorescent pigments that absorb ambient light and release it when the surroundings dim. The brightness depends on pigment quality, the number of coats, and how well the surface was prepared. This section explains the science in simple terms and helps you set realistic expectations for glow intensity after the project is complete. According to PaintQuickGuide, choosing a high-quality pigment and giving the coating enough light exposure are key to achieving a reliable afterglow. Expect results that are stronger in darker environments and fade gradually over time with use.
Choosing the right glow pigment and color
Not all glow paints glow the same way. There are two broad approaches: pigment-based glow and encapsulated glow. Pigment-based options tend to produce brighter afterglow, while encapsulated pigments can offer more color variety. When selecting a color, remember that the glow color is typically a greenish or blue hue, regardless of the base color you apply on top. For best results, test a small patch on the intended surface to verify color, brightness, and uniform glow after charging. PaintQuickGuide recommends verifying the pigment’s charging time and how long the glow lasts under your typical lighting conditions.
Surface prep and priming
A clean, dry, and properly primed surface is essential for even glow and adhesion. Start by removing dirt, oils, and old coatings from the area. Light sanding with 400–600 grit helps the coating bite better, followed by a tack cloth to remove dust. If you’re painting metal or glossy surfaces, apply a compatible primer suited to the substrate to improve adhesion and reduce tackiness. If you’re working on dark surfaces, consider a light gray or white primer to maximize glow brightness; darker primers can dull the glow.
Layering strategies: base coat and glow coats
For many projects, applying a light base coat first can improve glow brightness and ensure color uniformity, especially on irregular shapes. Let the base coat dry completely before applying glow coats. Apply the glow paint in thin, even layers, keeping the spray distance around 8–12 inches and using sweeping, overlapping motions. Multiple light coats produce a brighter glow than one heavy coat and reduce runs or sags. If you want a tint, add a light base color beneath the glow layer, but test compatibility first.
Application technique for smooth, even glow
Spray in short, controlled bursts rather than long passes to prevent sagging. Maintain a consistent distance and move methodically across the surface. Work in well-ventilated areas and avoid spraying into corners or threads where buildup can occur. Allow a short dry period between coats (as specified by the product) and avoid touching the surface until it’s fully dry to prevent fingerprints.
Curing, sealing, and longevity
Glow pigments require exposure to light to 'charge' before they glow in the dark. After achieving the desired brightness, seal the surface with a clear protective topcoat to improve durability and chemical resistance. Choose a finish (matte, satin, or gloss) that fits your project and doesn’t excessively trap moisture. Remember that some topcoats can slightly dampen glow brightness, so test a patch before committing to the entire surface.
Real-world projects: ideas and color ideas
Glow in the dark spray paint works on a variety of surfaces—from decorative garden sculptures to night-light accents on furniture, automotive trim, and kids’ craft projects. For safety-themed projects, a subtle glow can highlight shapes and letters on a sign or display. Layering with contrasting base colors can create striking effects—try a light base with a vivid glow layer for a vivid, eye-catching result.
Safety considerations and ventilation
Always use glow spray paint in a well-ventilated area. Wear an approved respirator, safety glasses, and gloves to protect against fumes and paint on skin. Keep a dust mask nearby when sanding or cleaning on the surface. Work with the product at or above room temperature for the best spray pattern, and never spray near flames or ignition sources due to solvent content.
Troubleshooting: common issues and fixes
If you notice orange-peel texture, reduce spray distance and apply lighter coats. Runs or drips can be avoided by mid-coat flattening motions and small touch-ups after the surface dries. If brightness is inconsistent, check that the surface is clean, dry, and free of wax or oils, then add an extra glaze coat in even, light layers. For stored items, re-charge by exposing to bright light before re-use.
Tools & Materials
- Glow-in-the-dark spray paint(Choose a high-quality phosphorescent pigment with strong afterglow; test brightness on a scrap piece first.)
- Primer suitable for the surface(White or light-gray primer helps glow brightness; select a primer compatible with your substrate.)
- Clear protective topcoat(Matte or satin finish is common; ensure compatibility with glow paint.)
- Masking tape(Fine painter’s tape to protect edges and create clean lines.)
- Sandpaper or abrasive pad (600–1000 grit)(Lightly scuff glossy surfaces for better adhesion.)
- Lint-free cloths and tack cloth(For cleaning dust and residues before painting.)
- Respirator mask and safety goggles(NIOSH-approved respirator for organic solvents; safety glasses recommended.)
- Drop cloth or plastic sheeting(Protect work area and nearby objects from overspray.)
- Ventilation plan (fan or open area)(Ensure air exchange; never spray in a sealed room.)
- UV flashlight (optional)(Helpful to visualize glow in dim areas after charging.)
Steps
Estimated time: 2-3 hours total including dry times and cure
- 1
Prepare the surface
Clear the area and remove any loose material. Repair chips or rust as needed, and ensure the surface is dry before proceeding. A well-prepared base is essential for even glow.
Tip: Use a clean, lint-free cloth to wipe away dust and debris before sanding. - 2
Clean and degrease
Wipe the surface with isopropyl alcohol or a mild degreaser to remove oils. Let it dry completely to avoid trapping oils under paint.
Tip: Do not skip this step; remaining oil will cause poor adhesion. - 3
Mask edges and protect surroundings
Apply painter’s tape to trim lines and cover nearby areas with a drop cloth. Masking helps achieve crisp borders and prevents overspray on unwanted surfaces.
Tip: Use small pieces to follow curves neatly along edges. - 4
Prime the surface
If the surface is glossy or non-porous, apply a compatible primer and let it dry per the manufacturer’s instructions. A good primer improves adhesion for glow coatings.
Tip: Choose a primer color that won’t dull glow brightness. - 5
Base coat (optional)
Apply a thin base coat if you want color beneath the glow or to even out the surface tone. Allow it to dry completely before applying glow coats.
Tip: Test how the base color affects perceived glow via a patch test. - 6
Apply glow coats (first pass)
Spray the glow paint in light, even coats, keeping the can 8–12 inches away. Use smooth, overlapping strokes to avoid runs.
Tip: Avoid heavy coats; multiple thin coats yield better glow and fewer defects. - 7
Build glow with additional passes
Let each coat dry according to product guidelines, then add 2–3 more light coats for stronger brightness. Don’t rush between coats to prevent cracking.
Tip: Charge in between coats with bright light to maximize glow potential. - 8
Seal with topcoat
Apply a clear topcoat to protect the glow layer from wear and UV exposure. Choose a finish that suits your project and note potential brightness changes.
Tip: Test topcoat on a scrap patch to gauge brightness change. - 9
Charge and test glow
Expose the finished surface to bright light for 15–60 minutes depending on pigment. Then view in darkness to confirm even glow.
Tip: If brightness is uneven, lightly respray sparse areas after full cure.
Your Questions Answered
Is glow in the dark spray paint safe for indoor use?
Indoor use is possible with proper ventilation and protective gear. Always wear a respirator and ensure adequate air exchange. Follow the product’s safety data sheet and local regulations.
Yes, but make sure you’re in a well-ventilated area and wear a respirator. Follow the product safety instructions.
Can I mix glow paints with regular colors?
Mixing glow paints with regular colors can affect glow brightness and adhesion. If color is important, test compatibility on a scrap piece before applying to your project.
Mixing glow with regular colors isn’t usually recommended; test first to see how the glow is affected.
How long does glow last after charging?
Glow duration depends on the pigment and the number of coats. Recharging under bright light will restore brightness for longer viewing periods.
Brightness fades with time; keep charging under light to maintain glow.
What surfaces work best for glow paint?
Wood, metal, plastic, and glass can work well with proper prep and primer. Porous surfaces may require a sealer to avoid absorption and uneven glow.
Most surfaces work well with good prep and a suitable primer.
Do I need a clear topcoat after glowing layers?
A clear topcoat protects the glow layer from wear and UV exposure. It can slightly affect brightness, so test compatibility with your glow paint.
Yes, a topcoat protects the glow and extends durability.
Will the topcoat dull the glow?
Some topcoats can reduce brightness slightly, but choosing a compatible clear and applying thin coats helps preserve glow.
There can be a small brightness change; test first on a patch.
Watch Video
Quick Summary
- Test glow on scrap material first
- Prepare surface thoroughly for best adhesion
- Apply multiple thin coats for stronger glow
- Seal with a clear topcoat for durability
- Charge under bright light before testing glow
- Work in a well-ventilated area for safety