Glowing Paint in the Dark: Practical DIY Safety Guide
Discover how to select glow-in-the-dark paints, prep surfaces, apply safely, and maintain glowing effects. Practical guidance for homeowners and auto enthusiasts.

You're about to master glowing paint in dark projects. This quick guide shows how to choose safe glow paints, prep surfaces, apply with the right tools, and maintain the glow over time. You’ll also learn essential safety steps, drying times, and practical tips to achieve durable, visible results in low-light conditions.
What glowing paint in dark is and how it works
Glowing paint in dark relies on phosphorescent pigments that store light energy and re-emit it after the light source is removed. This section explains the basics: phosphors, charging light, and the difference between phosphorescent, fluorescent, and chemiluminescent systems. For most DIY projects, the glow you see is produced by safe, water-based pigments that charge from natural or artificial light and glow for minutes to hours depending on formulation. Understanding these basics helps you set expectations for brightness, duration, and reuse across home and automotive surfaces. Paints marketed for hobby use are often designed for interior walls, while automotive formulations emphasize durability and solvent resistance. Always verify product labels and safety data sheets before purchase.
Safety considerations and ventilation
Working with glow paints still involves chemical components that can irritate skin, eyes, or lungs if used improperly. Always work in a well-ventilated area and wear protective gloves, a breathable mask, and eye protection. Keep pigments away from children and pets, and avoid inhaling powder concentrates from dry pigments. Use a dedicated workspace to prevent contamination of household items and ensure you can control spills with a damp cloth or proper absorbent materials. After painting, ventilate the room until odors dissipate and the coating is fully cured according to the manufacturer’s guidance. If you’re spraying, ensure you use a respirator rated for organic solvents and wear a spray booth or hood.
Chemistry and pigments explained
Glow paints rely on phosphorescent pigments, typically mixed with a resin binder to form a durable film. When exposed to light—sunlight or artificial lighting—the pigments absorb energy and later re-emit it as visible light in the dark. There are different classes of glow formulations: persistent phosphorescence (longer glow lasting hours) and shorter-lived variants suitable for accents. Water-based systems are popular for home use due to lower odor and safer cleanup, while solvent-based formulations may offer higher durability in automotive settings. Always check the pigment concentration and safety data, and avoid paints containing heavy metals unless clearly certified as safe under consumer regulations.
Choosing the right glow paint: pigments, brightness, longevity
Selecting a glow paint depends on intended use, surface, and exposure to light. Look for: (1) labeling that specifies phosphorescent pigments and safety certifications; (2) a brightness rating or glow duration indicated by the manufacturer; (3) compatibility with your surface (walls, wood, metal, plastic); (4) VOC content and clean-up requirements. For glowing paint in dark applications, higher pigment loads generally mean brighter results, but this can increase viscosity and affect evenness. Consider tinted bases if you want a colored glow rather than plain white. Always test a small swatch on your chosen surface to verify adhesion, shade, and glow behavior before committing to a full project.
Surface prep for glowing paint on walls, cabinets, or cars
Preparation is the foundation of any durable glow finish. Clean the surface thoroughly to remove dust, grease, and wax. Lightly sand glossy surfaces to create a micro-roughness that helps the binder grip. Wipe away dust and let the surface dry completely. If you’re painting over a dark color, apply a white or light-primer so the glow will appear bright when charged. Sealing the surface with a compatible primer also helps prevent staining and improves uniform glow. For cars, ensure you degrease and remove old wax, and use a suitable adhesion promoter if the surface is non-porous. Always test adhesion on a small area before full application.
Application techniques: priming, layering, and curing
Start with a solid base coat or primer suitable for the surface. Allow it to cure fully according to the manufacturer’s timeline. Apply the glow paint in thin, even coats using a brush or roller designed for smooth finishes; multiple thin coats yield better glow consistency than a single thick coat. Between coats, follow the recommended drying times—often 1–2 hours for acrylic systems or longer for solvent-based formulas. For a vivid glow, you may apply 2–3 coats, allowing proper curing between layers. After finishing, seal with a clear topcoat compatible with glow paints to protect the glow layer from UV damage and wear.
Layering and charging: maximizing glow
To maximize glow, expose the freshly painted surface to bright light for a recommended charging period (natural sunlight or a strong LED source). The brighter and longer the exposure, the longer the afterglow will persist. Avoid exposing the glow layer to aggressive cleaners or abrasive scrubbing, which can dull the pigment’s surface. If you want color-tinted glow, a transparent color glaze can be added in a thin layer after the glow coat so the glow remains visible but tinted during daylight. Regular recharging by light exposure keeps the glow vivid for continued use.
Maintenance and durability: recharging and reapplication
Glow finishes require periodic recharging as the phosphorescent pigment gradually loses intensity with use. Clean with mild, non-abrasive cleaners to preserve the glow layer, avoiding harsh solvents that could degrade the binder. If the glow seems dim after long exposure, recharging under bright light for several minutes can restore brightness. Over time, the glow finish may wear or craze in high-traffic areas; in such cases, light sanding and a fresh glow topcoat can restore performance. For car surfaces, reapplication should be scheduled with professional guidance to maintain durability and UV resistance.
Project ideas: interior walls, furniture, car refinishing
Glow paints open creative possibilities in various spaces. Interior walls and accent panels can benefit from a subtle glow for nighttime ambiance, while furniture pieces may sport decorative accents that glow softly. For cars, glow paints are typically used for decorative accents, logos, or safety markings on non-safety-critical areas. Always verify paint compatibility with automotive clear coats and perform tests on inconspicuous areas before committing to large panels. Keep expectations realistic: glow is most effective in dark environments and under sufficient charging light.
Budgeting, costs, and buying tips
Glow paints vary by pigment, base, and brand. Budget for base coats, glow coats, topcoats, tools, and protective gear. Estimate higher for automotive applications due to adhesion promoters and special topcoats. Look for sales, multi-pack options, and kits designed for beginners. When comparing products, prioritize safety certifications, VOC content, and explicit glow duration claims. Remember that higher pigment density often means longer charging times but brighter results; balance your needs against your budget and workspace.
Troubleshooting common issues
If glow is weak after charging, check surface prep, primer compatibility, and whether you applied enough coats. Uneven glow can result from missed spots or clogged spray equipment; recoat after proper drying. If peeling occurs, inspect surface adhesion and choose a more compatible primer or adhesion promoter. For interior surfaces, avoid high-gloss varnishes that can reflect light away from the glow layer. Always follow manufacturer guidance for cleanup and disposal of glow paints and dried residues.
Tools & Materials
- glow-in-the-dark paint (phosphorescent pigment)(Water-based preferred; check VOC content and glow duration on label)
- primer compatible with glow paints(White or light-tinted primer helps glow appear brighter)
- topcoat/sealant for glow paints(Choose a clear, UV-resistant finish compatible with the glow layer)
- drop cloths or plastic sheeting(Protect floors and furniture from spills)
- masking tape(Sharp edges for clean lines)
- sandpaper 180-220 grit(Light sanding to improve adhesion on glossy surfaces)
- brushes and/or foam rollers(Synthetic bristles work well with acrylic glow paints)
- paint tray and liners(For rolled applications)
- nitrile gloves(Protect skin during application)
- safety mask or respirator(Ventilated area; avoid inhaling powders and fumes)
- charging light source(Bright LED/ sun exposure for charging glow)
- mild detergent and water for cleanup(Gentle cleaner keeps surfaces safe)
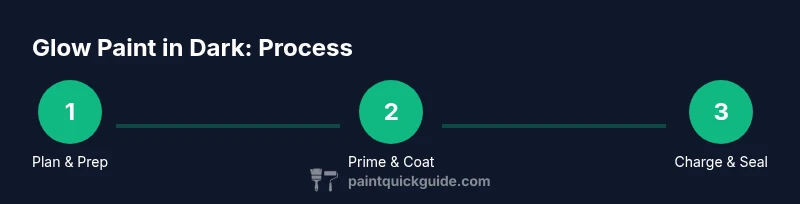
Steps
Estimated time: 2-6 hours
- 1
Protect and prepare workspace
Clear the area, lay down drop cloths, and tape off edges to prevent accidental spills. This step minimizes cleanup and ensures a crisp edge around your glow project.
Tip: Set up a dedicated work zone with good ventilation and a bright charging light nearby. - 2
Select suitable glow paint
Read labels to confirm phosphorescent pigments, base type, and curing times. Choose water-based formulas for easier cleanup and safer indoor use.
Tip: Prefer low-VOC products and check the recommended charging duration for optimal brightness. - 3
Prepare the surface
Clean the surface with mild detergent, dry completely, and lightly sand glossy areas to improve adhesion. Wipe away dust before priming.
Tip: Test adhesion on a small area before full coverage. - 4
Prime the surface
Apply a primer compatible with glow paints. Let it dry fully; a light sanding after priming yields a smoother glow layer.
Tip: Use white or light primer to maximize glow brightness. - 5
Apply glow coats
Brush or roll thin coats, allowing each coat to dry as directed by the manufacturer. Two to three coats often provide even glow without pooling.
Tip: Keep coats uniform in thickness to avoid visible ridges. - 6
Charge and inspect
Expose the painted surface to bright light to charge the phosphors. Inspect the glow in the dark and identify any uneven spots needing touch-ups.
Tip: Charge for longer for brighter effects; avoid overheating the surface. - 7
Seal the glow layer
Apply a compatible topcoat to protect the glow layer from wear and UV damage. Ensure the sealant is compatible with the glow paint.
Tip: Test topcoat on a small sample area first. - 8
Clean up and maintain
Clean brushes promptly with water (or solvent if needed). Store leftover paint properly and label containers for future touch-ups.
Tip: Keep a charging light handy for quick recharges when needed.
Your Questions Answered
What exactly is glowing paint in dark?
Glowing paint in dark uses phosphorescent pigments that absorb light and re-emit it when dark. The effect depends on pigment concentration, base binder, and surface preparation.
Glowing paint uses phosphorescent pigments to store light and glow after exposure, depending on pigment, binder, and preparation.
Is it safe to use glow paints on walls or cars?
Yes, when you choose certified, low-VOC glow paints and follow the manufacturer’s safety guidelines. For cars, ensure compatibility with clear coats and adhesion promoters.
Safe options exist when you pick certified glow paints and follow the instructions for walls or automotive use.
How long does the glow last after charging?
Glow duration varies by product; most provide visible brightness for several minutes to hours after charging, depending on pigment concentration and ambient light exposure.
Glow duration varies by product, usually minutes to hours after charging.
Can glow paint be cleaned or washed once applied?
Clean gently with mild detergents and avoid harsh scrubbing that can wear away the glow layer. For vehicles, follow auto paint cleaning guidelines and avoid abrasive cleaners.
Clean glow surfaces gently with mild cleaners; avoid harsh scrubs that wear the glow layer.
What’s the best approach for glow on cars?
Use glow paints designed for automotive use with proper adhesion primers and protective topcoats. Test in a small area and follow proper curing and safety steps.
For cars, use automotive-grade glow paints with proper primers and topcoats, and test first.
How should I recharge glow after long use?
Expose the painted surface to a bright charging light for several minutes to restore brightness. Regular recharging helps maintain the glow over time.
Recharge by exposing to bright light for several minutes to restore brightness.
Watch Video
Quick Summary
- Choose approved glow paints with safety certifications
- Prepare surfaces thoroughly for best adhesion and brightness
- Apply in thin coats and cure between layers
- Charge with adequate light to maximize afterglow