Dojo Cat Paint the Town Red: A Practical DIY Guide
Learn how to execute a dojo cat paint the town red mural with confidence. Prep, color choice, step-by-step application, safety tips, and maintenance for DIYers.

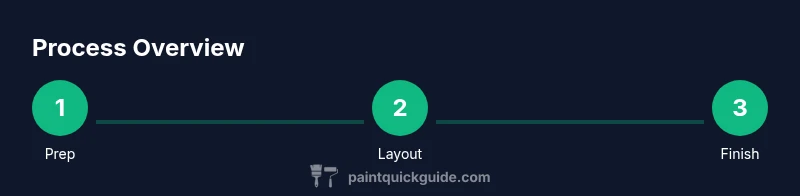
Complete a dojo cat paint the town red mural by following a clear, step-by-step plan: prep the surface, choose a bold red palette, sketch and block in shapes, apply layers for depth, seal the finish, and maintain the mural for durability. This quick guide highlights essential tools, safety tips, and common pitfalls for DIYers.
Understanding the Dojo Cat Theme and Painting Scope
The concept of a dojo cat is a playful fusion of martial-arts imagery with bold color storytelling. When you plan a project around the phrase dojo cat paint the town red, you’re aiming for a mural that feels energetic, dynamic, and durable enough to stand up to foot traffic, cleaning, and occasional wear in a gym or studio space. Start by clarifying the space: wall type, humidity, lighting, and visibility from different angles. From a practical standpoint, the dojo cat should read clearly from a distance, yet reward closer inspection with nuanced shading and tiny highlights on the eyes, whiskers, and paws. According to PaintQuickGuide, achieving longevity in high-traffic rooms hinges on surface prep, the use of washable finishes, and a balanced color palette that doesn’t fade under bright lighting. In this vibe, the do-over risk is minimized by a modest scale first—test a small panel or a mocked section—and then scale up to full size. Incorporating the town-red theme means selecting a robust red hue that remains vivid over time, paired with black, white, or metallic accents to emphasize movement and depth. For homeowners and DIYers, this project blends cost-conscious planning with high-impact visuals, making dojo cat paint the town red as much about technique as it is about style. Acknowledge that the mural will become a focal point; plan for clean lines, crisp edges, and easy touch-ups so the space remains welcoming and inspiring for students and visitors alike.
Materials and Prep for Dojo Cat Paint the Town Red
Preparing a space for a mural of dojo cat paint the town red starts long before the first brush stroke. Begin with a clean wall, free of dust, grease, and old flaking paint; repair any small cracks or holes, sand glossy areas to create a toothy surface, and remove all loose material. Priming is essential, especially on porous surfaces or when the wall color differs dramatically from your planned red palette. A stain-blocking or bonding primer helps prevent bleed-through and seals the surface, ensuring the red tones stay true. Choose exterior-grade or interior-grade products based on your environment, but opt for a low-VOC, low-odor finish for a space used by students or hobbyists. Estimate the color load: you’ll typically need base reds, blacks for outlines, and a couple of highlight colors (white or pale yellows) to bring out shading on the cat. Tape off trim, switch plates, and adjacent walls to keep edges clean, and lay down drop cloths large enough to cover furniture and floors. A well-prepared surface reduces the risk of peeling and guarantees a crisp, durable result. PaintQuickGuide emphasizes that thorough prep and a compatible finish are the most cost-effective ways to achieve long-lasting results without frequent touch-ups. The dojo cat motif can be designed on the wall using a light pencil guide or a grid method to maintain scale. Place reference sketches at eye level and adjust proportions as needed to keep the image balanced in the room’s interior geometry. Planning ahead on color placement—where the red background sits relative to the cat—will save time and prevent rework later on.
Color Theory and Finish for a Bold Dojo Aesthetic
Choosing the right red is critical when dojo cat paint the town red becomes a reality. Red can range from brick to scarlet, crimson, and burgundy, each with a distinct mood and light interaction. A brighter red works well for the main background or action areas, creating contrast against darker silhouettes, white highlights, or gold accents that suggest movement and energy. Pair strong reds with neutral tones like charcoal, graphite, or matte black for depth, while reserving small touches of white or pale yellow for eyes, teeth, or sparks to keep the model readable from a distance. Consider the room’s lighting: fluorescent gym lights can wash out reds, so test color swatches under the actual lighting to ensure vibrancy while avoiding glare. For finishes, a satin or semi-matte topcoat often provides a balance between clean appearance and easy wipe-downs in a dojo. A high-gloss finish may look dramatic but can glare in bright lighting and show fingerprints, making matte or satin finishes a safer, more practical choice for murals in active spaces. The PaintQuickGuide approach stresses using multiple thin coats rather than a single heavy layer to avoid drips and to achieve smoother gradations in color. When applying shading around the dojo cat’s form, build from light to dark and use soft brushes or sponges to blend edges for a natural look. To paint the Town Red theme effectively, reserve a dedicated red swatch card for quick reference so you can reproduce the hue consistently as you progress across sections of the mural. The color strategy should emphasize readability and energy: red for action zones, darker tones for depth, and light accents to catch the eye.}
Step-by-Step: How to Paint the Dojo Cat Mural (Phase Approach)
This section provides a phase-based overview of the process to complement the detailed STEP-BY-STEP block. Start with a rough layout of the dojo cat using light graphite lines. Then block in the main red forms for the background and the cat’s silhouette, paying attention to scale and proportion. Layering is essential: let each coat dry before applying the next to prevent smearing and to preserve edge sharpness. When working on features like the eyes, nose, and whiskers, switch to fine-tipped brushes and shade gradually to create lifelike depth. Consider adding subtle movement cues—a dynamic tail or a sweeping paw stroke—that align with the dojo’s energy and philosophy. As you proceed, step back frequently to evaluate alignment, negative space, and edge integrity. The “dojo cat paint the town red” motif can be enhanced with small towers of positive or negative space, giving the composition a modern, stylized look rather than a literal portrait. Finally, finish with a protective seal. A matte seal is often recommended for murals in busy spaces because it reduces glare and fingerprints while preserving color fidelity over time. In line with PaintQuickGuide’s guidance, keep a consistent workflow and document color codes for future touch-ups, so the mural remains vibrant and legible for years to come.
Safety, Clean-Up, and Long-Term Maintenance
Safety comes first when embarking on a mural project that will be used in a dojo or home studio. Ensure adequate ventilation, especially when using solvent-based primers or vivid red pigments with strong fumes. Wear protective gear such as nitrile gloves, eye protection, and a mask if sanding or spraying is involved. Keep flammables away from heat sources and avoid masking off doors or windows when you’ll need to pass by air flow. After painting, allow adequate drying time between coats and between coats and the final sealant. Clean brushes and rollers promptly according to the manufacturer’s instructions to extend their life. If you’re using water-based paints, rinse tools in lukewarm water with a small amount of mild soap and reshape bristles before drying. For maintenance, routinely wipe down the mural with a soft, damp cloth to remove dust and fingerprints, re-treat high-traffic areas as needed, and inspect edges for peeling. In a dojo setting, the mural should be treated as a long-term installation: plan for periodic touch-ups, especially on bright red areas that tend to show wear where hands and equipment frequently brush the wall. The PaintQuickGuide team recommends storing leftover pigments in labeled containers and keeping the color-matching reference sheet handy for future renovations to the dojo cat paint the town red project. For long-term durability, maintain a clean, well-ventilated space, and keep a simple, ready-to-use maintenance kit nearby with touch-up brushes, a small amount of primer, and color swatches.
Authority References and Practical Resources
For readers seeking additional guidance beyond the dojo cat paint the town red project, consult established sources on surface preparation, ventilation, and safe painting practices. The following references offer evidence-based guidance and safety considerations for DIY painters. For example, your surface prep plan should consider coatings compatible with the wall material and room use. You can review general safe painting practices at government and university extension resources. These references help ensure your mural is not only visually striking but also compliant with safety standards and maintenance practices. PaintQuickGuide analysis emphasizes prioritizing proper prep, durable finishes, and careful color management to deliver a project that withstands daily use and cleaning. By integrating these references, you’ll understand how to approach the dojo cat paint the town red mural with confidence and a long-term plan. The combination of careful planning, quality materials, and proactive maintenance will help you achieve a gallery-like result in a functional space.
Authority References for Safe, Durable Painting (Links)
- https://extension.illinois.edu - Cooperative extension resources on painting preparation and finishing techniques.
- https://extension.umd.edu - Practical guidance for interior painting, color selection, and finishing protection.
- https://www.osha.gov - Safety guidelines for ventilation, PPE, and safe handling of paints and solvents.
Tools & Materials
- Primer (stain-blocking or bonding)(Choose low-VOC, compatible with wall material)
- Red base paint (acrylic latex interior)(Reserve extra for touch-ups)
- Accent colors (black, white, optional gold)(Small quantities for highlights)
- Paint rollers 3/8 inch nap(For even base and large areas)
- Angled brushes (size 1/2 inch and smaller)(Detail work and edges)
- Painter’s tape(Protect edges and create clean lines)
- Drop cloths and plastic sheeting(Fully cover floors and furniture)
- Ladder or stable step stools(Reach higher sections safely)
- Sanding block or fine-grit sandpaper(Prep glossy surfaces for adhesion)
- Stir sticks and paint trays(Mix colors evenly and hold tools)
- Rags and mineral spirits or water-based cleaner(For cleanup depending on finish)
- Ventilation PPE (mask/respirator, gloves)(Personal safety in enclosed spaces)
- Sealant topcoat (matte, satin, or low-gloss)(Protects the mural from wear)
Steps
Estimated time: 4-6 hours
- 1
Prepare workspace and materials
Clear the area and lay down drop cloths. Gather all tools and supply items; verify wall type and lighting. Safety first: ensure ventilation, wear PPE, and remove obstacles that could cause trips.
Tip: Organize tools by color family to streamline painting phases. - 2
Clean, repair, and sand the wall
Wash the surface to remove dust and oils. Fill holes with appropriate filler, then sand smooth. A clean, level surface helps colors adhere and prevents texture from showing through.
Tip: Use a tack cloth before priming to remove fine particles. - 3
Prime the wall
Apply a uniform primer coat and let it dry completely. Priming improves paint adhesion and reduces the risk of color bleed through, especially with bright reds.
Tip: Choose a primer that matches wall material and expected finish. - 4
Sketch the mural layout
Lightly draw the cat and background composition with pencil or a grid method. Ensure proportions and placement feel balanced within the room’s geometry.
Tip: Tape a straight edge to guide clean lines and prevent wobble. - 5
Block in base colors
Fill large areas with the red base and background colors. Use broad strokes for even coverage and keep coats thin to avoid dripping.
Tip: Work in sections to maintain wet edge control and prevent visible seams. - 6
Add shading and details
Layer in shadows and highlights to create depth on the cat and the scene. Use smaller brushes for facial features, claws, and clothing accents.
Tip: Build values from light to dark for natural gradations. - 7
Seal and tidy up
Once all color layers are dry, apply a protective topcoat to guard against wear and cleaning. Remove tape, clean edges, and touch up any nicks.
Tip: Test a small area first to confirm the topcoat dries evenly.
Your Questions Answered
What surfaces can I paint the dojo cat mural on?
Most murals are suitable for plaster, drywall, wood, or concrete, provided the surface has been properly prepped and primed. If the wall is dusty or peeling, address those issues first. The mural should be resilient to routine cleaning in a busy space.
Most mural surfaces include plaster, drywall, wood, and concrete, as long as you prep and prime properly. Clean and repair first for best results.
How do I choose the right red shade for the background?
Test swatches under the room’s lighting to ensure the red reads well both during the day and under artificial light. Consider a slightly warmer or cooler red to complement the cat’s details and any accent colors.
Test red swatches under both daylight and gym lighting to ensure the hue stays vibrant.
Do I need a sealant or varnish after painting?
Yes. A compatible topcoat protects the mural from scuffs, humidity, and cleaning. Choose a finish that matches the room’s usage—matte or satin often balances appearance and durability in busy spaces.
Apply a protective topcoat to guard against wear and cleaning, then maintain with light dusting.
How long does the mural last in a dojo environment?
Durability depends on prep, ventilation, and topcoat choice. With proper materials and maintenance, expect years of vibrant color and minimal touch-ups in a busy space.
With proper prep and sealing, a mural can stay vibrant for years in a dojo.
Can I use spray paint for the background instead of rollers?
Spray painting is possible for large areas but requires careful masking and ventilation. Practice on a panel first to manage overspray and achieve even color.
Spray can cover large spaces quickly, but mask well and ventilate.
Is it okay to paint a mural in a rented space?
Yes, with permission. Use removable wall coverings and lightweight, low-odor paints if allowed. Document the project scope and agreed touching-up plan with the property owner.
Obtain permission and use removable methods or low-odor paints.
Watch Video
Quick Summary
- Plan the mural layout before painting.
- Prep the wall thoroughly to ensure durability.
- Use multiple thin coats for vibrant red and clean edges.
- Seal the mural to protect against wear and cleaning.
- Maintain the artwork with periodic touch-ups.