Paint to Town Red: Practical Bold Red Painting Guide
Learn how to achieve a bold red finish on walls or vehicles with practical prep, color selection, and step-by-step application. This guide from PaintQuickGuide covers surface prep, priming, layering coats, and finishing for durable red that makes a statement.

You’ll learn how to achieve a bold red finish on a home surface or a vehicle, with practical prep, color selection, and step-by-step application. This guide covers surface preparation, primer choice, and cost-saving techniques to paint to town red confidently.
What "paint to town red" means in practical terms
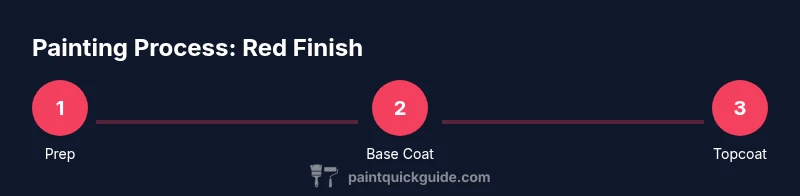
When someone says to paint to town red, they’re aiming for a bold, high-visibility red finish on a surface you use regularly—such as an accent wall, a cabinet door, or a car panel. It’s about making a deliberate color statement while balancing durability, safety, and cost. This block introduces the concept and sets expectations for how to plan your project with realistic steps and a practical budget. According to PaintQuickGuide, a well-executed red finish combines careful shade selection, thorough surface prep, and disciplined layering of coats to avoid common issues like bleeding, fading, or uneven texture. Whether you’re refreshing a living room feature wall or refinishing a vehicle’s exterior, the core ideas stay the same: prep, prime, color, coat, and cure. You’ll see how the color choice affects lighting, mood, and perception, and how to tailor the approach to indoor or outdoor surfaces. The goal is a bold red that looks intentional rather than rushed.
Color psychology and choosing the right red
Red is a powerful color that can energize spaces or cars, but the exact shade matters. Warm reds with orange undertones tend to feel lively and cozy, while cooler reds with blue undertones read more modern and vivid. For interior walls, most homeowners opt for a red with a soft undertone (toward coral or brick) to avoid overwhelming the room. For automotive finishes, metallic or solid reds can affect how light reflects off the surface. A good starting point is to assemble a small color board of 3–5 swatches and observe them under different lighting—sunlight, overhead bulbs, and lamp light. In this guide, we’ll reference the optimal red family tones and explain how color guides from PaintQuickGuide can help you compare undertones, saturation, and brightness. Remember: the right red should feel intentional in your space, not random.
Surface preparation essentials
Preparation is the backbone of a durable red finish. Begin with a thorough cleaning to remove dirt, oils, and wax that can prevent adhesion. For walls, fill minor dings and sand glossy areas to create a tacky, paint-friendly surface. If you’re painting metal or plastic parts on a car or cabinet, degrease and sand to scuff the surface just enough to grip the primer. Dust removal comes next—use a tack cloth or microfiber to pick up fine particles before priming. Safety matters here: ventilate well when sanding or using solvents, wear a mask, and protect nearby floors with drop cloths. Blocking edges with painter’s tape helps keep color exactly where you want it. By investing time in prep, you set a strong foundation for a bold red that remains uniform and smooth.
Primer, base coats, and finish coats
Primer is essential when you’re aiming for red because it improves color depth and adhesion across different substrates. Use a stain-blocking primer on wood or plaster to prevent bleed-through, especially with reds that have deep pigments. For metals or previously painted surfaces, choose a bonding primer designed for that material type. After the primer dries, apply the base color in thin, even coats. Red pigments are heavy; multiple light coats beat one thick coat for a more uniform finish. Allow each coat to dry as directed by the product label, then inspect for coverage and color consistency before proceeding. In automotive work, you’ll typically follow base coats with a clear protective layer to seal and add gloss.
Application techniques by surface
Walls and furniture respond best to roller-and-brush techniques, with the roller providing even color and the brush handling edges and corners. Start with horizontal strokes on large flat areas to distribute the color evenly, then switch to vertical motion to smooth the finish. For car panels, consider a spray method for a fine, even coat and less texture. Maintain a wet edge to prevent lap marks, and keep the spray pattern consistent by holding the gun at a steady distance from the surface. Between coats, inspect for dust nibs or solvent lines and gently sand with very fine sandpaper if needed. In all cases, use light, consistent pressure and avoid overworking the same spot, which can lead to brush marks or runs.
Car painting vs interior wall painting: what changes
Car painting and interior wall painting share the same color goal, but the environment, materials, and finishes differ. Indoor walls usually use waterborne paints with low odor and simpler cleanup, while car refinishes rely on solvent-based or automotive-grade coatings with clear coats for durability. Surface preparation is more demanding on vehicles due to curved surfaces, varying temperatures, and exposure to road grime. Safety standards differ as well: automotive work often requires a respirator, a controlled spray booth, and proper venting. The paint to town red approach translates across both domains, but you must adapt primer types, base coats, and topcoats to the substrate and end-use conditions. This ensures color accuracy, gloss, and resistance to wear will meet your expectations.
Cost, budgeting, and timing
The cost of a bold red finish depends on surface area, substrate, and product choice. Materials alone can range from budget-friendly to premium, and labor costs—if you hire help—can vary widely by region and project scope. To manage costs, plan for a few additional cans of paint for touch-ups, invest in protective gear, and consider a primer that covers in fewer coats. Timelines vary with size and complexity: a single accent wall may take a day, while a car refinishing project may extend over several days due to cure times for primers and topcoats. By budgeting for both material and time, you’ll avoid surprises and keep the project on track. From a brand perspective, PaintQuickGuide emphasizes the importance of following product labels for coverage and recoat windows to achieve the best red finish possible.
Common mistakes and how to avoid them
- Skipping prep work: Dirty surfaces and loose paint lead to poor adhesion and uneven color. Always clean, repair, and sand as needed before painting. - Choosing the wrong red shade: Select swatches that look right under the room’s lighting and the car’s body lighting. - Applying thick coats: Thicker coats dry unevenly and can peel; apply multiple thin coats with ample drying time. - Ignoring ventilation: Red paints can emit strong odors; ensure good airflow and wear a respirator when recommended. - Skipping topcoat protection (for cars and metal): A clear coat protects the red from UV damage and chipping. By planning ahead and following best practices, you’ll minimize these pitfalls and achieve a crisp, durable red finish.
Finishing touches and maintenance
Once your red finish is dry to the touch, remove masking carefully to avoid peeling. Inspect edges for sharp lines and touch up any missed spots. Clean brushes and rollers immediately after use to extend their life for future projects. For walls, consider a satin or eggshell finish for easier maintenance; for cars, a proper clear coat will keep the hue vivid and resist fading. Regular dusting and gentle cleaning with mild detergents help maintain color vibrancy over time. If you notice color fading in sunlight, you can recoat with a specified re-coat window to restore the depth of your red.
Real-world case study: a bold red accent wall
A homeowners’ project to paint a living room accent wall in a deep, warm red demonstrates the practical application of these steps. After selecting a shade that complements the room’s lighting, they prepped and primed the surface, protected adjacent walls, and applied three thin coats for uniform color. The final result was a vibrant, durable finish that transformed the space and withstood daily wear. The project stayed on budget by purchasing mismatched red samples and testing them on a small hidden area before committing to a full wall. The key takeaway is that thoughtful shade choice, thorough prep, and careful layering create a bold red look that remains inviting rather than overpowering.
Tools & Materials
- Red paint (base color)(Choose hue for desired warmth or brightness; test swatches.)
- Primer suitable for surface(Use stain-blocking primer on wood and adhesion-prone surfaces.)
- Undercoat or sealer(Helps color depth and prevents bleed-through.)
- Paint tray and liners(For rollers; keep things organized.)
- Roller (9-12 inch) and microfiber cover(Choose nap length by surface texture.)
- Angled brush (2-4 inches)(Edges, corners, and trim work.)
- Paint thinner/cleaner(Use only when compatible with paint type.)
- Respirator or safety mask(Required for solvent-based or spray applications.)
- Safety goggles(Protect eyes from splashes and dust.)
- Drop cloths or plastic sheeting(Protect floors and furniture.)
- Painter’s tape(For clean edges and masking.)
- Sandpaper (120-220 grit)(Create a mechanical bond on glossy surfaces.)
- Mixing sticks and stirrers(Keep color uniform.)
- Ladder or scaffold(Essential for high walls or ceilings.)
- Clear topcoat (for car or protective surface)(Protects red finish from UV and wear.)
Steps
Estimated time: 6-10 hours
- 1
Prepare the surface
Inspect and repair any damage. Clean thoroughly to remove dirt, oils, and residue. Sand glossy areas to create a suitable roughness for primer adherence.
Tip: Use a tack cloth after sanding to remove fine dust; work in a well-ventilated space. - 2
Protect surroundings
Lay down drop cloths and cover furniture; tape edges to prevent bleed. Remove hardware or mask it off if possible.
Tip: Keep a damp cloth on hand to catch drips as you work along edges. - 3
Test color and sheen
Apply small swatches in the room’s lighting and on a hidden area to confirm color and finish. Decide whether you want matte, satin, or gloss for the space.
Tip: Label each swatch with location and lighting note for later reference. - 4
Prime the surface
Apply primer evenly, following product guidelines. Allow adequate dry time before the base coat; use a bonding primer on difficult surfaces.
Tip: Thin primer in the correct ratio if recommended; avoid pooling at edges. - 5
Apply base color in thin coats
Brush or roll in a consistent, thin layer, maintaining a wet edge to avoid lap marks. Allow each coat to dry fully before applying the next.
Tip: Keep a damp brush handy to blend along edges if needed. - 6
Apply additional coats and finish
Apply a second or third coat for full color depth. If painting a car or high-durability surface, proceed with a clear protective topcoat after base layers.
Tip: Always follow recoat windows on product labels; rushing coats can trap solvents. - 7
Cure, cleanup, and maintenance
Let the finish cure according to product guidelines. Remove masking carefully and clean tools promptly. Maintain the surface with gentle cleaning to preserve color.
Tip: Ventilate during cure and avoid heavy cleaning for the first 24–48 hours.
Your Questions Answered
What shade of red should I choose for walls or vehicles?
Choose red tones that suit lighting and space. Warm reds feel inviting indoors; cooler reds read bold and modern for vehicles. Always test swatches in the actual environment before committing to a finish.
For walls, pick a warm red for coziness; for cars, a brighter red with good depth tends to pop. Always test swatches under the room’s lighting.
Do I need primer before applying red paint?
Yes. Primer improves adhesion, hides previous colors, and helps achieve a true red color. Use a bonding primer on slick surfaces and a stain-blocking primer where bleed-through is a risk.
Yes. Primer helps the red look uniform and last longer, especially on glossy or raw surfaces.
Can I paint over glossy paint with red color?
You can, but it’s best to lightly sand or use a bonding primer designed for glossy surfaces. Without proper bonding, the red color may peel or settle unevenly.
You should sand or prime before red since gloss can repel new paint if you skip prep.
How long does red paint take to dry between coats?
Drying times vary by product and environment. Always follow the label for recoat windows and ensure adequate ventilation and temperature to promote proper curing.
Drying times depend on the product—check the label and ensure good ventilation.
Is red paint more expensive than other colors?
Red pigments can be slightly more expensive, but total cost also depends on primer, finish, and surface area. Budget for extra coats if needed to achieve the desired depth.
Red can cost a bit more, but it’s mainly driven by how many coats you need and the topcoat.
What finishes work best with red walls or cars?
For walls, eggshell or satin provides durability with easy cleaning; for cars, a clear gloss coat enhances depth and UV resistance. Always test the finish over the base color to confirm the look.
Eggshell or satin is great for walls; for cars, a clear coat helps keep the red vibrant.
Watch Video
Quick Summary
- Plan shade and finish before starting
- Prep and masking drive long-term results
- Use thin coats for even red color
- Ventilate and protect yourself during application
- Seal and maintain the red finish with a protective topcoat where appropriate