Car Painting in a Paint Booth: A Step-by-Step Guide
Learn how to set up and use a car paint booth at home, covering space, ventilation, lighting, safety, and spraying techniques for a professional finish. Includes cost ranges, tool lists, step-by-step workflow, and maintenance tips from PaintQuickGuide.

This guide helps you set up a car paint booth at home, covering space planning, ventilation, lighting, safety, spraying technique, and post‑paint care. You’ll learn essential equipment, approximate cost ranges, and a practical workflow to minimize dust and achieve a professional finish.
Why a dedicated paint booth for car painting matters
For owners who want a showroom-quality finish, a dedicated paint booth is more than a convenience—it's a requirement. A properly designed booth minimizes dust, controls temperature and humidity, and safely manages fumes. It creates a clean, repeatable environment where base coats, clears, and metallics lay down evenly. According to PaintQuickGuide, the right booth setup dramatically improves finish quality and reduces contamination, making the investment worthwhile for serious DIYers and auto refinishing hobbyists. If you’re painting a car, a booth helps you control overspray, maintain filter integrity, and meet basic environmental and safety standards. A well‑designed booth also reduces volatile organic compound (VOC) exposure and makes cleanup faster and cleaner.
Key takeaway: start with a clearly defined space that can be sealed from dust sources and has a controllable air flow, filtration, and exhaust path.
- For home projects, you’ll want a space that can be physically separated from living areas and a well‑matched ventilation plan that avoids recirculating fumes.
- A booth should support steady, low‑dust air movement, not strong gusts that disturb wet coatings.
Space planning and ventilation basics
Space planning is about more than size. It’s about airflow path, filtration stages, and the ability to maintain a stable climate. A good paint booth will have an intake air filter, a powered exhaust or dedicated ventilation, and a way to manage humidity and temperature. You’ll need at least one intake source (preferably HEPA‑filtered) and a dedicated exhaust for spent air. The goal is to create a negative‑pressure environment to keep dust out and fumes away from you. Lighting should be bright and evenly distributed to reveal coverage defects and edge detail. Passive lighting from windows will usually not suffice; add a mix of daylight‑balanced LED fixtures.
Real-world setup requires a plan for sealing gaps around doors, fixtures, and joints. Use plastic sheeting or interlocking curtains to create a clean, contained zone. If you’re in a garage, consider a temporary or semi‑permanent booth with rigid walls and a dedicated filtration system. The most important factor is consistent air cleanliness: use cleanable surfaces, keep the floor dust‑free, and change filters as soon as you notice a loss of suction.
Booth types: temporary pop-up vs permanent install
There are multiple approaches to a home car paint booth. Temporary pop‑ups are inexpensive and quick to deploy but can leak dust if not properly sealed. Permanent installations offer stronger performance and better long‑term value but require more upfront planning and professional installation. When choosing, consider: space constraints, expected work frequency, and local regulations. A durable booth enables more consistent curing, reduces environmental impact, and improves spray‑gun performance by stabilizing temperature and humidity.
If you paint infrequently, a high‑quality pop‑up with a 2‑3 stage filtration system can be sufficient. For regular refinishing, a semi‑permanent or permanent booth with reinforced filtration, controlled airflow, and dedicated electrical supply is worth the investment. PaintQuickGuide suggests evaluating total cost of ownership, not just sticker price, since ongoing filter replacements and potential energy use add up over time.
Lighting, filtration, and environmental control
Good lighting is essential for color matching and detecting imperfections. A booth should have: bright, neutral lighting; minimal shadowing; and glare control at the spray distance. Filtration should include pre‑filters and high‑efficiency particulate air (HEPA) or equivalent filters to capture dust and overspray. Environmental control means maintaining a stable temperature (typically 65–75°F / 18–24°C) and humidity (roughly 40–60% relative humidity, depending on coating chemistry). Sudden temperature shifts can cause solvent evaporation rates to change, leading to solvent pop or orange peel. In practice, you’ll want a small heater or cooling option, plus a dehumidifier if humidity spikes are common in your area.
Lighting, filtration, and climate control work together to deliver consistent color and gloss. Plan for maintenance access and safety shutoffs so you can service fans, filters, and lights without disrupting the workflow.
Tools, materials, and safety gear you need
Working in a booth requires careful selection of tools and PPE. The right tools ensure consistent fan speed, even spray patterns, and clean finishes. PPE protects you from fumes and dust, and correct PPE helps prevent cross‑contamination between coatings. The list below is a starting point; adapt to your booth type and coatings.
- HVLP spray gun or turbine system
- Suitable reducers and top coats (as specified by your coating supplier)
- Paint mixing cups and scales
- Clean, lint-free rags and tack cloths
- Respirator with organic vapor cartridges and eye protection
- Nitrile gloves, coveralls, and shoe covers
- Grounding strap and anti‑static mats
- Plastic sheeting and painter’s tape for masking
- Filter papers and replacement filters for booth intakes and exhausts
- A reliable thermometer, hygrometer, and dew point meter
- Vacuum or air blower for routine cleaning
Safety and setup always come first. Make sure electrical connections are grounded, cords are out of the way, and solvents are stored in approved containers. Always work with proper ventilation and never spray in a closed room without a dedicated exhaust path.
Pre-paint workflow: masking, surface prep, and priming
A clean, well‑masked surface is a prerequisite to a flawless finish. Start with a thorough wash of the car, then use a dedicated prep solvent to remove wax, grease, and oils. Mask edges, trim, and areas that should not receive paint, using high‑quality masking tape and films. Sand surfaces in a controlled manner to create a uniform key for the base coat. After sanding, wipe the surface with a tack cloth to remove dust. If priming is required, apply a compatible primer and allow adequate flash time before base coat. In a booth, minimize dust by keeping doors closed and the floor covered with a drop cloth.
Base coats require precise color matching and consistent thinning. Store paint at the recommended temperature and mix thoroughly to avoid pigment settling. After spraying, allow the base coat to dry according to the manufacturer’s instructions before applying clear coats.
Spraying technique: coat strategy and spray patterns
Spraying technique is the heart of a good finish. Start with a consistent spray technique: hold the gun at a fixed distance (often 6-12 inches, depending on gun and coating), move with smooth, overlapping passes, and maintain steady trigger control to deliver even coats. Use vertical sweeps for base coats and horizontal sweeps for clear coats to minimize variations. Work in a well‑ventilated, dust‑free environment with adequate dew point control to avoid solvent pop or cloudiness. Apply thin coats, allow proper flash times, and evaluate color and gloss after each pass.
Practice on a test panel before painting the car body panels. If you notice runs or sags, adjust the spray pattern, thinning ratio, or distance. A well‑calibrated gun and properly mixed paint make a huge difference in the final finish.
Post-paint care: curing, ventilation, and cleanup
Once you’ve finished spraying, keep the booth sealed and continue controlled ventilation to cure the coating. Avoid touching or placing objects on the surface during cure to prevent finger marks or dust embedding. Cure times depend on the coating system and environmental conditions; do not rush the process. When curing is complete, clean the spray booth, replace filters, and store materials properly to prevent contamination of future projects.
Maintenance is essential for long‑term booth performance. Inspect seals and gaskets for leaks, test airflow, and replace worn filters promptly. Regularly inspect electrical safety features and ensure the booth remains properly grounded. A well‑maintained booth saves time and improves repeatability for future projects.
Budgeting and ROI considerations
Setting up a home paint booth involves upfront costs for space, filtration, lighting, and spray equipment. Budget for a robust exhaust system, sufficient filtration stages, and climate control devices. Ongoing costs include replacement filters, PPE, and consumables such as primers and topcoats. When evaluating ROI, consider the quality improvements to your finishes, the frequency of use, and the potential to undertake additional projects. PaintQuickGuide emphasizes calculating total cost of ownership rather than just the initial price to get a realistic sense of value.
Common mistakes and how to avoid them
- Skipping proper masking or surface prep can ruin a finish; take time to mask thoroughly and degrease surfaces.
- Inadequate ventilation or poor filtration leads to dust inclusions and solvent odors—invest in a reliable exhaust and filtration system.
- Inconsistent temperature and humidity cause finish defects like orange peel or fisheyes; monitor and stabilize climate conditions before spraying.
- Rushing cure times increases the risk of marring and solvent pop; plan for adequate cure windows and avoid handling the surface too soon.
Safety, disposal, and legal considerations
Always follow local regulations on ventilation, waste disposal, and spray operations. Use solvent‑safe containers and label waste properly. Keep a fire extinguisher nearby and store flammable liquids away from heat sources. Personal protective equipment is essential: wear respirators, eye protection, gloves, and appropriate clothing. If you live in an area with strict environmental rules, consult local guidelines or a PaintQuickGuide reference for compliant disposal and emissions practices.
Tools & Materials
- HVLP spray gun or turbine system(Choose a model compatible with your coatings (base coat and clear).)
- Ventilation system with intake and exhaust(Ensure proper ducting and filtration; consider HEPA filters.)
- Respirator with organic vapor cartridges(Fit-tested and used with eye protection.)
- Masks, gloves, coveralls(Nitrile gloves and disposable coveralls recommended.)
- Masking materials (tape, film, paper)**(Low‑lint masking tape and paintable films.)
- Drop cloths and surface protection(Lint-free, cleanable drop cloths for floor and nearby surfaces.)
- Booth filters and replacement kits(Have spare pre‑filters and final filters on hand.)
- Thermometer, hygrometer, dew point meter(Helpful for climate control.)
- Grounding strap and anti‑static mat(Prevent static buildup that attracts dust.)
- Cleaning supplies (degreaser, tack cloths)(Use dedicated booth cleaners and tack cloths.)
Steps
Estimated time: 6-8 hours total, plus cure time
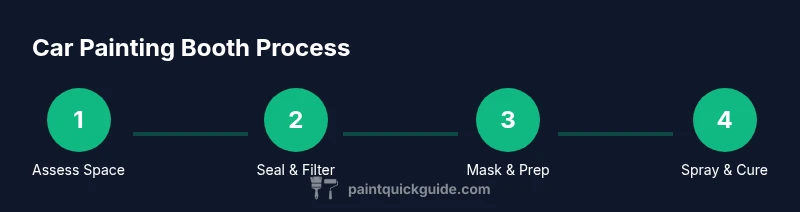
- 1
Assess the space and plan airflow
Measure the space, identify entry and exit points, and map a clean air path. Decide whether you’ll use a portable or fixed booth and plan duct routing to a safe exhaust location.
Tip: Create a simple airflow diagram before buying gear to avoid costly mistakes. - 2
Seal and prep the booth area
Seal gaps with plastic sheeting or curtains, demarcate the painting zone, and ensure floors are clean. Install or verify filters and fan speeds.
Tip: Avoid gaps under doors; use draft blockers or threshold seals. - 3
Mask, prep, and prime the car
Mask areas you don’t want painted, wash and degrease the surface, dry thoroughly, sand as needed, and apply primer where required.
Tip: Wipe surfaces with a tack cloth between prep steps to minimize dust. - 4
Mix paints and set gun
Follow manufacturer instructions for thinning, mixing, and pot life. Calibrate spray gun settings (nozzle size, air pressure, and fan pattern).
Tip: Always test spray on a panel to fine‑tune your technique. - 5
Base coat application
Apply multiple light coats with even, overlapping passes. Maintain consistent distance and speed to avoid runs and peel.
Tip: Let each coat flash off correctly before applying the next one. - 6
Clear coat and leveling
Apply clear coats in thin, even passes. Maintain temperature and humidity control to prevent solvent pop and ensure gloss uniformity.
Tip: Inspect with a bright light for dust nibs and adjust technique as needed. - 7
Cure, ventilate, and inspect
Keep the booth sealed during cure and provide controlled airflow. Inspect the finish for uniform color and gloss; address defects if needed.
Tip: Don’t rush curing; improper cure leads to micro‑cracking and soft finishes. - 8
Cleanup and maintenance
Remove masking, clean tools, replace filters, and store materials properly. Schedule regular maintenance for consistent performance.
Tip: Track filter life and schedule replacements before efficiency drops.
Your Questions Answered
What is a paint booth and why use one for car painting?
A paint booth is a controlled, dust‑free space designed for applying coatings. It reduces overspray, stabilizes humidity and temperature, and improves finish quality. Using a booth helps achieve uniform color and gloss while protecting you and the environment.
A paint booth is a controlled space that makes car painting cleaner and safer, giving you a better finish.
Can I build a DIY paint booth in a garage?
Yes, a garage can be converted into a booth with proper sealing, filtration, and exhaust. It requires planning, sufficient ventilation, and adherence to safety rules. For best results, use portable booths or temporary containment with reliable airflow.
Yes, you can, but you’ll need good sealing, filtration, and a safe exhaust setup.
What ventilation standards should I meet?
Ventilation should provide sufficient intake filtration and a dedicated exhaust path to remove fumes. Aim for negative pressure and clean air exchange without recirculation. Follow coating vendor guidance for specific airflow rates and filter specifications.
Keep fumes out with a proper exhaust and clean intake air.
How much does a home paint booth cost?
Costs vary widely based on booth type and features, from portable pop‑ups to permanent installations. Consider space, filtration stages, climate controls, and wiring when budgeting.
Costs range depending on setup; plan for filters, ventilation, and climate control.
How long does a typical car paint job take in a booth?
A full process, including prep, base coats, clear coats, and curing, can take one or more days depending on coatings and environmental conditions.
A full job usually spans a day or more, with curing times between coats.
Is a booth necessary for small touch‑ups?
For small spot repairs, a booth is not strictly necessary, but it still helps control dust and achieve a better blend. If you can reproduce a dust‑free environment, it’s beneficial.
Not strictly required for small touches, but it improves results if you have a clean space.
Watch Video
Quick Summary
- Plan a contained, draft‑free space for consistent finishes
- Invest in proper ventilation, filtration, and climate control
- Mask, prep, and test spray on panels before committing to the car
- Use thin coats and controlled cure to minimize defects
- Maintain booth and equipment for reliable results