Paint Before or After Refinishing Hardwood Floors: A Practical Comparison
A practical comparison of painting before vs after refinishing hardwood floors. Learn sequencing impacts on dust, edge quality, masking, timelines, and practical steps to choose the best order for homes and workshops.

This comparison explains whether you should paint before or after refinishing hardwood floors. It explains how sequencing affects dust, finish quality, masking, and timelines, and provides practical steps for common home renovation projects. Use this guide to decide the best order for your walls, trim, and floors, based on your priorities and project scope.
Why sequencing matters for painting and refinishing hardwood floors
Sequencing your painting and floor refinishing projects matters because the order determines dust management, edge quality, masking effort, and drying timelines. For homeowners and DIY enthusiasts asking paint before or after refinishing hardwood floors, the best choice depends on room use, traffic, and whether you are prioritizing wall updates or floor surface quality. According to PaintQuickGuide, starting with a well-defined sequence reduces rework and accidental damage. When you plan a project, you set expectations for contractors and yourself. In practice, prioritizing the order helps you control dust by isolating work zones, manage moisture, and plan masking strategies around baseboards, vents, and transitions. If you choose to refinish first, you can protect adjacent walls with plastic sheeting and minimize paint splatter; if you paint first, you need robust floor protection to avoid tracking paint onto the finished surface. Either approach can work with careful preparation and clear communication.
When to refinish the floors first
Choosing to refinishing hardwood floors first is often favored when the floor surface is visibly damaged, uneven, or when you plan a dramatic floor color or stain. Refinishing early minimizes the risk of sanding dust settling on fresh paint later and allows you to seal the surface before any wall work begins. This sequence also reduces the chance of accidental splatters on a new floor because most painting tasks occur after the protective finishes have cured or while using aggressive masking. Start with dust containment, remove sensitive hardware, and establish clean zones so the sanding dust does not migrate into live living spaces. Finally, inspect the floor for evenness and cure before moving on to wall preparation and painting. Paint patience and proper ventilation are essential for best results.
When to paint first (for walls/trim) and how to protect floors
Painting walls, trim, or ceilings before refinishing floors makes sense when you want a fresh wall palette that sets the room’s mood first. The risk here is that the sanding process later can create dust that lands on paint that isn’t fully cured. The key is robust floor protection: drop cloths, plastic sheeting, painter’s tape, and careful masking at the intersection with baseboards. If you choose this order, plan to seal or shield the floors during subsequent sanding, and use low-dust sanding equipment to minimize airborne particles. This approach also allows faster room refresh if the floor is already in good condition or scheduled for later refinishing in a different area.
Edge matching and trim considerations
Edge matching between wall paint and floor finish is a common touchpoint that dictates sequencing. When floors are refinished first, you can achieve crisper edge lines with a well-sealed finish and taped masking. If walls are painted first, you’ll want to protect the floor edge with high-quality painter’s tape, edge sealing products, and drop cloths, ensuring the final floor refinishing does not rub off on wet paint. Consider color choices, sheen levels, and the type of baseboard or casing when planning; contrasting tones can visually anchor space, while complementary tones can create a seamless look. In either case, a consistent plan and high-quality masking supplies will reduce the need for touch-ups later.
Masking and surface prep techniques that save time
Effective masking is the backbone of a clean, professional result, no matter which sequence you choose. Use painter’s tape appropriate for wood and painted surfaces, lay breathable drop cloths in high-traffic areas, and protect outlets, moldings, and vents. Pre-treat the wall with a stain blocker if you are painting over stained wood or if tannins risk bleed-through. Sanding dust control begins with window sealing, door barriers, and negative-air pressure containment. Clean, dry surfaces ensure better adhesion, reduce curing times, and minimize the risk of imperfections that would require rework later in the project.
Dust management and finish protection during sequencing
Dust management is central to achieving a flawless finish, especially when multiple trades operate in the same space. Install plastic barriers to create dust-free zones, use HEPA-filter vacuums for cleanup, and schedule sanding when doors to other rooms can be kept closed. If you refinish floors first, ensure the floor finish has cured before introducing paint fumes, and vice versa. Regular inspection during drying stages helps you catch issues early. Discuss containment strategies with your contractor to ensure the right equipment and procedures are in place to minimize disruption and maximize quality.
Scheduling and coordination: timelines and sequencing
Coordinating paint and floor work requires clear sequencing and realistic buffers. Build time for surface prep, primer, paint coats, sanding, floor finish application, and cure periods into a unified plan. Visualize the workflow: rooms prepped and masked, walls painted with attention to edge lines, then floors refinished or vice versa. If you have a tight schedule, prioritize tasks that unlock the most work area quickly, while protecting surfaces that are most vulnerable to damage. A well-structured schedule reduces downtime and helps keep the project on track.
Materials and costs considerations
Sequencing can impact material choices and overall project costs. If you refinish first, you may need fewer masking supplies for later painting, but you’ll invest in floor finish products and sanding equipment upfront. If you paint first, you’ll rely more on masking, protective films, and drying-time strategies for the floor, which can affect labor costs and planning. Choose primers and sealers that work well with wood and existing finishes, and consider low-dust sanding options to minimize cleanup. Focus on long-term value: a properly sequenced project reduces rework and preserves the integrity of both the paint and the floor finish.
Common mistakes and how to avoid them
Common mistakes include underestimating dust levels, skipping edge protection, and failing to coordinate with contractors. Avoid painting or sanding in poorly ventilated spaces, rushing edge masking, or neglecting cure times. Read product data sheets for recommended recoat windows and ensure every surface is clean and dry before moving to the next stage. Regularly communicate with your team, revisit the plan if room usage changes, and document decisions to prevent miscommunication and needless touch-ups.
Quick-start checklists for both scenarios
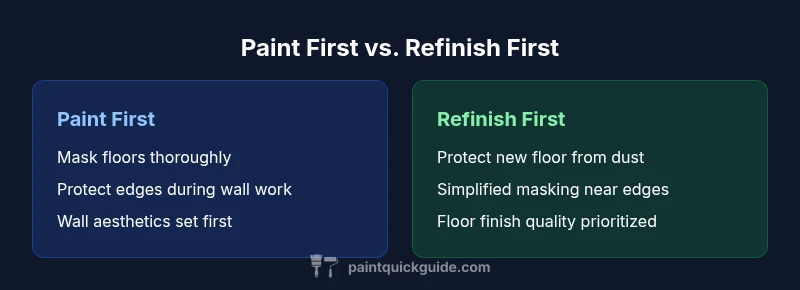
- If refinishing floors first: clear the room, protect adjacent surfaces, seal off dust zones, sand and finish floors, allow proper cure, then mask and paint walls.
- If painting first: mask floors thoroughly, protect outlets and trim, paint walls/trim, then sand and refinish floors with dust containment in place.
- Always verify containment, ventilation, and cure times before moving between stages.
- Maintain a shared project calendar to coordinate trades and minimize downtime.
- Contingency plans help you adapt if dust levels rise or delays occur.
How to decide: a practical decision framework
Start with room use and priorities: Are walls the primary update, or is the floor condition the defining factor? Consider dust sensitivity, furniture removal, and the availability of contractors. Use a simple decision framework: if floor finish quality is the priority, refinish floors first; if wall aesthetics or color matching drive the renovation, paint first with rigorous masking and containment. Finally, confirm with your contractor that the chosen sequence aligns with product cure times and workspace accessibility. A thoughtful plan minimizes rework and delivers a cleaner, more durable result.
Real-world tips and maintenance after completion
After project completion, inspect edges for consistency and any missing tactile cues between wall and floor color. Use a light hand when cleaning corners to avoid altering the new wood finish. Maintain the space with periodic dusting and use coasters, felt pads, and protective mats to reduce wear. A well-planned final walk-through with the contractor helps catch any overlooked touch-ups and ensures the room remains vibrant and protected for years to come.
Comparison
| Feature | Paint first (walls/trim) with floors protected | Refinish floors first with walls/trim later |
|---|---|---|
| Dust exposure | Lower dust risk on floors protected during painting | Higher dust exposure during sanding and floor finishing |
| Edge precision and masking effort | Easier masking along floor edges when floors are protected | Requires careful masking of walls/baseboards during floor work |
| Finish protection | Floor finish protected by masking during wall painting | Walls/trim protected later by masking during floor work |
| Project timeline impact | Potentially faster for wall updates if floors are ready | Potentially faster for overall floor-first completion |
| Best for | Dust-sensitive environments or quick wall updates | Rooms where floor finish quality is the priority |
Upsides
- Clear sequencing reduces rework and miscommunication
- Improved dust control with dedicated containment
- Better edge control with precise masking
- Flexibility to optimize room-wide renovations
What's Bad
- Requires thorough masking and planning in either order
- Potential delays if drying/cure times are not managed
- Less flexibility if only minor updates are needed in a room
Refinish floors first when floor finish quality and dust control matter most; paint first when walls or trim drive the renovation and masking can be tightly controlled
Choose floor-first for best finish and cleaner edge lines. Opt for wall-first if wall aesthetics or speed are the priority and you can shield the floor effectively.
Your Questions Answered
Should I always refinish floors before painting walls?
Not always. If the floor is worn or damaged, refinishing first can protect the new surface and simplify masking. If wall color and design are the priority, painting first with strong masking can work as long as you protect the floor adequately.
Refinish if floor condition dominates; otherwise paint first with good floor protection.
How does sequencing affect dust and finish quality?
Sequencing that isolates sanding and finishing steps from painting reduces the spread of dust onto wet finishes. Dust control tactics, like containment and filtration, are essential regardless of order.
Dust control is easier when you plan carefully and isolate dusty steps.
What if I already started painting and want to refinish later?
Continuing with masking and protecting painted surfaces is possible. Plan for sanding dust management, protect the painted areas with sealers, and monitor curing times to ensure the paint finishes stay intact.
If you’ve started painting, protect everything you’ve done and plan dust control for sanding later.
What masking supplies work best for this sequencing?
High-quality painter’s tape, drop cloths, plastic sheeting, and floor protection films are key. Choose low-adhesion tapes near finished surfaces to avoid peeling paint or finish.
Use painter’s tape and drop cloths to protect edges and floors.
How long do these steps take without exact times?
Drying and curing times depend on products used. Build in buffers between stages and confirm with product instructions. Plan for ventilation and workspace access to prevent work delays.
Expect stage transitions to hinge on product cure times and ventilation.
Quick Summary
- Prioritize project goals (floor quality vs wall aesthetics)
- Use robust masking to protect surfaces in either sequence
- Contain dust with barriers and HEPA-cleanups
- Coordinate schedules to minimize downtime
- Ask for a clear written plan before work begins