Body Paint: A Practical Car Painting Guide
Learn practical car body paint guidance from prep to finish. This PaintQuickGuide tutorial covers prep, masking, primer, color coats, clear coats, cure times, and cost considerations.

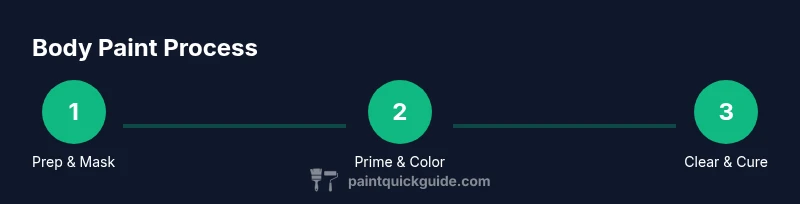
Goal: Learn how to achieve a durable, showroom-quality body paint finish on a vehicle. You’ll need proper ventilation, PPE, and materials such as primer, base coat, and clear coat. Follow a clean surface prep, meticulous masking, and a controlled application process to minimize runs and dust. Expect multiple coats and a 24-48 hour cure time before handling.
Why car body paint quality matters
Body paint quality on a car isn't just about looks; it affects resale value, protection from the elements, and long-term durability. When homeowners or auto refinishing hobbyists talk about body paint, they want a finish that resists chips, scratches, and fading while maintaining color consistency across panels. According to PaintQuickGuide, a high-quality body paint job starts with clean prep and a controlled environment. A durable finish protects the metal from moisture and rust and keeps repair costs down over time. A true professional look depends on surface cleanliness, proper substrate, compatible products, correct temperature and humidity, and a steady hand during application. This article walks you through practical steps to achieve reliable results, balancing cost and quality for projects both large and small. Choosing the right color and sheen also matters for aesthetics and resale value. Flat, satin, and gloss finishes each require different prep and application techniques. In addition, environmental factors such as dust levels and air pressure can influence film formation. PaintQuickGuide emphasizes planning ahead and keeping a clean, controlled workspace to minimize rework.
Safety and preparation basics
Before you mix any paints or spray, ensure you have proper PPE and ventilation. A rated respirator with organic vapor cartridges, chemical resistant gloves, and eye protection are essential. Work in a well-ventilated area or a spray booth, with exhaust running to carry fumes away. Keep unprotected skin away from solvents; vapors can irritate. Read product safety data sheets for all materials and follow local rules on disposal. Set a stable climate where you work: keep temperature around 68-72 F and humidity under 60 percent to ensure film formation and cure. Paints and primers produce hazardous waste; do not pour leftovers down the drain.
Surface prep and masking for body paint
Start with a thorough wash and decontamination to remove wax, oils, and road grime. Lightly sand the existing finish to create a mechanical key (typically 400-600 grit for most panels) and inspect for rust spots, dents, or chips that require filler. Use a quality tack cloth to remove dust before you begin masking. Mask edges, trim, and components that should not receive paint using high-quality masking tape and paper. Keeping mask lines crisp prevents bleeding and extra cleanup later, which saves time and reduces rework. This stage is where the foundation for a smooth finish is laid, so take your time and test fit tape to ensure clean lines.
Choosing primers, base coats, and clear coats
Select a compatible system from a trusted brand, sticking to primers, bases, and clears designed to work together. Primers help with adhesion and corrosion resistance on bare metal or repaired panels, while the base coat provides color depth and coverage. The clear coat adds gloss and protects the color from UV damage and minor abrasions. Consider the desired sheen (satin, gloss, or high gloss) and the environmental conditions you’ll be painting in. Always follow the manufacturer’s recoat windows and flash times to prevent solvent entrapment and solvent pop. Avoid mixing products from different brands unless a proven compatibility chart confirms they work together.
Application techniques and workflow
Set up your spray gun with the correct nozzle size for your paint system and maintain a consistent spray pattern. Hold the gun perpendicular to the panel at the recommended distance, typically around 6-8 inches for base coats, and slightly longer for clears. Apply light, even coats with overlapping passes to avoid heaviness and runs. Allow appropriate flash times between coats, then evaluate color consistency under neutral lighting. If you notice dust nibs or bugs, stop, wipe the surface, and re-sand as needed before continuing. Finally, finish with a cross-coat approach for uniform color and edge coverage.
Curing, polishing, and aftercare
Curing time depends on temperature, humidity, and solvent type; expect at least 24-48 hours before light handling and longer for full cure. After the final coat, use a fine cutting compound and polish to remove minor dust and orange peel, then apply a dedicated paint sealant or wax after curing. Store the vehicle away from direct sunlight and harsh environmental factors during cure to avoid uneven drying. Regular maintenance with proper car care products will extend the life of your finish and preserve color depth.
Tools & Materials
- Three-stage car body paint system (primer, base coat, clear coat)(Use compatible products from the same manufacturer; avoid cross-brand mixing unless approved.)
- P100 respirator with organic vapor cartridges(Ensure a proper seal and fit before starting.)
- Nitrile gloves(Chemical resistant, disposable.)
- Masking tape and paper(High quality adhesive; pretest on curves to avoid lift.)
- HVLP spray gun(Nozzle size 1.4-1.6 mm; suitable for most base and clear coats.)
- Compressor(Adequate CFM at 40-60 PSI for a smooth spray.)
- Sanding blocks and paper (grits 320-600)(Use finer grits for final surface refinement.)
- Tack cloths and degreaser/panel wipe(Keep surfaces dust-free during final prep.)
- Paint mixing cups and stir sticks(Label each cup to avoid cross-contamination.)
Steps
Estimated time: 8-12 hours
- 1
Set up workspace and safety gear
Arrange a well-ventilated area with a stable temperature and a clear workflow. Put on respirator, gloves, and eye protection. This reduces fumes exposure and protects you from chemicals throughout the process.
Tip: Test airflow with a simple smoke test and adjust ventilation before starting. - 2
Wash, decontaminate, and inspect the surface
Thoroughly wash the vehicle and remove wax. Decontaminate using a dedicated panel wipe and inspect for rust, dents, or old coatings that need attention. A clean surface ensures better primer adhesion.
Tip: Use a tack rag after wiping to pick up remaining dust. - 3
Mask edges and protect surrounding areas
Apply masking tape and paper along trim, lights, and glass. Keep lines crisp and ensure masks won’t lift under heat. Double-check areas that should not receive paint.
Tip: Leave a slightly longer edge at curves to avoid sharp paint lines. - 4
Apply primer and let dry per manufacturer spec
Spray a light, even coat of primer to improve adhesion and fill minor imperfections. Allow the recommended flash time and cure according to product instructions before sanding.
Tip: If you see color peeking through, apply a second light coat rather than a heavy one. - 5
Base coat application with controlled passes
Spray base coats in thin, overlapping passes. Maintain a consistent distance and speed to avoid runs and sags. Allow proper flash between coats and assess color evenness under neutral light.
Tip: Cross-hatch passes at each coat to minimize orange peel. - 6
Apply clear coat and perform final cure
Spray several light layers of clear, finishing with a full-coverage coat. Let cure fully in a controlled environment before washing or handling the panel.
Tip: Avoid forced drying; heat can cause clouding or solvent pop if used too aggressively.
Your Questions Answered
What is the best order to apply car body paints?
Typically primer first, then base coat, followed by clear coat. Ensure proper drying times between each layer and test color consistency in neutral light.
Begin with primer, then base coat, and finally clear coat, allowing proper drying times and testing color under neutral light.
Can I do car body painting at home?
DIY is possible with proper ventilation, PPE, and a controlled environment. For best results, consider a dedicated spray booth or a well-ventilated garage and follow all safety guidelines.
Yes, with good ventilation, PPE, and a controlled space. Use a proper spray booth or ventilated garage and follow safety rules.
How many coats are recommended?
Typically 1-2 coats of color with multiple thin clear coats. Avoid heavy layers to reduce runs and solvent issues.
Usually a couple of color coats plus several clear coats; avoid heavy layers.
What PPE is essential for body painting?
A respirator with organic vapor cartridges, chemical resistant gloves, eye protection, and long sleeves. Also ensure good ventilation.
Wear a proper respirator, gloves, eye protection, and ensure ventilation.
How long does curing take before driving?
Curing can take 24-48 hours for handling; full cure may take longer depending on temperature and humidity. Do not wash or drive immediately.
Expect 24-48 hours before handling; full cure may be longer depending on conditions.
Watch Video
Quick Summary
- Plan color and finish before starting
- Prep and masking are critical to a clean result
- Maintain consistent spray technique and ventilation
- Follow manufacturer cure times for best durability
- Polish after cure for maximum gloss