Pottery Paint Your Own: A Practical DIY Guide
Learn how to pottery paint your own at home with safe paints, proper prep, and step-by-step techniques. This PaintQuickGuide guide covers materials, finishing, and care for durable, beautiful pottery.

You’ll learn how pottery paint your own at home by prepping the ceramic surface, choosing kiln-safe or oven-bake paints, and applying a durable finish that withstands handling and washing. This guide covers materials, techniques, and step-by-step methods so hobbyists can create durable, decorative pottery at home without professional equipment.
The Joy and practicality of pottery paint your own
Painting pottery at home combines creativity with practical skills. According to PaintQuickGuide, this craft teaches surface prep, color theory, and finishing techniques that translate to other ceramics projects. Whether you’re revitalizing a thrifted mug or decorating a personal bowl, the process helps you build confidence and enjoy a repeatable workflow. The phrase pottery paint your own captures a broad range of methods—from underglazes to acrylics and specialty glazes. In this guide, we’ll reference PaintQuickGuide insights, and provide a step-by-step approach so beginners and DIY enthusiasts can achieve durable, professional-looking results.
surface prep for flawless results
The foundation of durable, vibrant pottery is a clean, prepared surface. Start with a thorough wash to remove dust, oils, and fingerprints. Lightly sand any glossy areas to create tooth for adhesion. If your piece is glazed and intended for glaze-based paints, ensure compatibility by testing a small area. For air-dry paints, wipe with a damp cloth and let dry completely before painting. Good prep reduces bleed-through and helps colors stay crisp.
Choosing paints and glazes for pottery
Your best bet for a home project is to select pottery-safe paints designed for ceramic surfaces. Underglazes, ceramic paints, and certain acrylics can work on unglazed surfaces, while glaze-based paints require firing or baking per manufacturer instructions. Decide between air-dry options (which dry quickly and don’t require firing) and heat-set options (which cure in a conventional oven or kiln). Always check the product’s label for heat tolerance, colorfastness, and lead-free status. PaintQuickGuide analysis shows that most DIY painters achieve best results when using layered base colors and a final seal.
Safety, workspace, and ventilation
Pottery painting should happen in a well-ventilated area with a stable, protected workspace. Wear a mask if you’re sanding or using powders, and guard surfaces with drop cloths or old newspaper. Keep paints away from children and pets, and store brushes upright to maintain their shape. Read manufacturer safety data sheets for each product, especially if you’re mixing paints or using sealants. These precautions help avoid fumes and skin irritation.
Basic techniques: brush, sponge, and stencil
Experiment with multiple techniques to achieve depth and texture. Use a fine brush for outlines and details, a flat brush for larger color blocks, and sponges for soft gradients. Layer colors once the previous layer is dry to prevent bleeding. Stenciling can create crisp shapes or repeating patterns. For beginners, practice on a test tile before applying to your final piece to build confidence and reduce mistakes.
Drying, curing, and sealing
Follow the paint manufacturer’s drying times, then cure the piece according to the selected method. Some paints air-dry in minutes, others require several hours. If you’re using glaze or a sealant, apply a thin, even coat and let it cure fully. When sealing, aim for a finish that suits the piece’s use—matte for a rustic look, or gloss for a smoother, easier-to-clean surface. Always finish with a clear, compatible sealant.
Design ideas and creative inspiration
Let your style shine with simple motifs like geometric patterns, botanical leaves, or hand-drawn lettering. Use masking tape to create clean lines, and consider color theory basics: pair warm tones with cool neutrals for balance. If you’re painting for gifts, personalize designs with initials or dates. Remember that practice yields better results, so test techniques on tiles or spare pieces first.
Troubleshooting common issues
Bleeding, uneven color, or smudges are common when you’re learning. If bleeding occurs, let layers dry fully, then repaint with thinner coats. For uneven color, apply a light glaze or sealer over a base color to even out sheen. If a brush leaves marks, switch to a finer brush or a smoother sponge and adjust pressure. Always seal surfaces after completed design to improve durability.
Care and maintenance of painted pottery
To extend the life of your pottery, hand-wash with mild detergent rather than aggressive scrubbing. Avoid soaking for long periods, which can cause paint or glaze to lift. Dry thoroughly after washing and store upright to prevent chipping. If the finish dulls with use, re-seal with an appropriate top coat designed for ceramic pieces.
Tools & Materials
- Ceramic pieces to paint(Choose pieces without cracks; unglazed or pre-fired ceramic works best)
- Pottery-safe paints/underglazes(Check for heat tolerance if you plan to bake)
- Clear glaze or sealant for pottery(Use compatible with chosen paints)
- Brush set (fine and flat brushes)(Include sizes 0, 2, and 4 for variety)
- Palette or waterproof tray(Disposable palettes are convenient)
- Water cup for rinsing brushes(Keep separate from food contact items)
- Paper towels or lint-free cloths(For blotting and cleanup)
- Masking tape or stencil tape(Helpful for clean edges)
- Pencil for sketching designs(Light graphite marks wipe away easily)
- Soft brush or sponge for texture(Adds shading or soft gradients)
- Oven or kiln access (optional)(Only if using heat-set or glaze-firing methods)
- Ventilated workspace or mask (optional)(Reduce inhalation of powders or fumes)
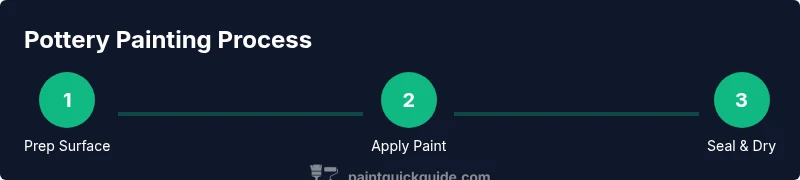
Steps
Estimated time: 90-120 minutes
- 1
Choose your piece
Select a ceramic item that suits your design and ensure it’s clean and dry before you start painting.
Tip: Inspect for cracks; damaged pieces may crack during painting or firing - 2
Prep the surface
Wipe with a damp cloth, lightly sand glossy areas, and let dry completely to improve paint adhesion.
Tip: Even a small amount of dust can cause specks in the finish - 3
Sketch your design
Lightly draw your design with a pencil on the surface to guide painting.
Tip: Keep lines faint; you’ll erase or cover them later - 4
Apply base colors
Paint broad areas with chosen base colors; work in thin, even coats and let each layer dry.
Tip: Thin layers prevent pooling and bleeding - 5
Layer and detail
Add details with fine brushes; use masking tape for sharp edges and stencils for shapes.
Tip: Patience pays off; let layers dry before attempting details - 6
Seal and protect
Apply a clear glaze or sealant compatible with paints; ensure an even finish.
Tip: Apply thin coats; thick layers crack or dull faster - 7
Dry and cure
Allow the piece to dry completely; follow product guidelines for curing time and temperature.
Tip: Avoid handling until fully cured to prevent smudges - 8
Bake or air-dry final finish
If using heat-set paints, bake as directed. If using air-dry, let cure according to manufacturer times.
Tip: Never mix air-dry with glaze-firing methods unless approved - 9
Final inspection and care
Inspect for missed spots and touch up as needed; wash brush and store properly.
Tip: Label pieces with design notes for future touch-ups
Your Questions Answered
Do I need a kiln to paint pottery at home?
Not necessarily. You can use air-dry paints or bakeable ceramic paints that cure in a regular oven or toaster oven. If you want dishwasher-safe or food-safe results, follow manufacturer instructions and consider appropriate glazing.
You can start with air-dry paints, but for the strongest, dishwasher-safe finish you’ll want a bakeable option per the product directions.
Are acrylic paints safe for pottery?
Acrylics can be used on pottery, especially for decorative pieces that won’t be exposed to heat or heavy use. For items that will touch food or be washed, choose ceramic-safe paints or clear glazes.
Acrylics work, but for food-contact pieces use ceramic-safe paints and proper sealing.
What tools are essential for beginners?
A basic kit with a palette, a few brushes, masking tape for edges, a pencil for sketches, and a couple of pottery-safe paints will cover most projects. Add a sealant when you’re ready to finish.
Grab a small brush set, a palette, and a sealant; you’ll be painting in no time.
How long does pottery paint take to dry and cure?
Drying times vary by product, typically 15 minutes to an hour for air-dry paints. Curing times follow instruction labels and can range from several hours to days depending on the finish and method.
Check the product label for exact times; plan for several hours to a day for full cure.
How should I seal a painted pottery piece?
Choose a glaze or sealant compatible with your paints. Apply thin, even coats and allow full curing between coats. Sealing improves durability and makes cleaning easier.
Seal with a compatible top coat, in thin layers, letting each dry fully.
Can I wash or dishwasher-safe painted pottery?
Only if you’ve used a glaze or sealant rated for dishwasher use and followed the firing or baking instructions. Regular paints usually require hand washing.
If you want dishwasher-safe durability, use the right glaze or sealant and bake as directed.
Watch Video
Quick Summary
- Plan your design before you start
- Choose paints compatible with your final finish
- Thin, even coats prevent bleeding
- Allow proper curing to maximize durability
- Seal for easy cleaning and lasting color