Paint Pickleball Court: A Complete DIY Guide to Durable Lines
Learn how to paint a pickleball court with durable lines—from surface prep and material choice to layout, application, and curing—for outdoor and indoor surfaces.

This guide shows you how to paint pickleball court surfaces with durable lines for outdoor and indoor use. You’ll learn surface prep, paint selection, line layout, application steps, and curing times, plus safety tips and long-lasting maintenance. Expect practical examples, equipment checklists, and budget considerations tailored to DIY homeowners and hobbyists.
Why Paint a Pickleball Court
Colorful, clearly defined lines improve play clarity when you paint pickleball court surfaces. They also help reduce disputes and speed up officiating during games. Painting a pickleball court also protects the surface from wear, moisture, and UV damage, extending its usable life. For homeowners and clubs using portable or permanently installed courts, a well-executed paint job reduces upkeep costs and invites more play. At its core, the project balances visibility, slip resistance, and durability. A quality finish makes center lines easy to see for players of all ages and helps officials enforce proper court boundaries during tournaments. According to PaintQuickGuide, selecting an air-dried, non-slip latex system suited for outdoor or indoor conditions yields the best long-term results. For outdoor courts, plan for sun exposure and rain cycles, which can soften colors and reduce adhesion over time. For indoor surfaces, consider humidity and warmth, which affect curing. The result should be a robust, color-true court that remains legible under varying lighting. Think of this as a small investment that boosts performance and enjoyment, while protecting the surface you’ve already maintained. If you’re painting a court that will see frequent use, prioritize fast-drying coatings with good abrasion resistance.
Surface Prep and Safety
Preparation is the foundation of a lasting paint job. Start by removing dirt, oils, moss, and loose material with a stiff broom and a degreasing cleaner suitable for concrete or asphalt. Rinse and let the surface dry completely; moisture is a common cause of coating failure, so outdoor projects should be scheduled during dry weather windows. Repair cracks or spalls with a concrete patch compound, feathering edges so they’re flush with the surrounding surface. Lightly etching glossy surfaces or applying a compatible primer improves adhesion. PPE is essential: gloves, eye protection, a respirator or good mask, and ventilation for enclosed spaces. If the court is in a garage or indoors, ensure adequate airflow to minimize fume exposure. After cleaning and repairs, perform a quick test patch to confirm the surface accepts paint evenly. This step reduces the chance of peeling after a few games. According to PaintQuickGuide, proper prep ensures color uniformity, line sharpness, and a longer-lasting finish.
Materials: Paint, Lines, and Tools
Choosing the right materials is half the job. Use exterior latex paint or acrylic coatings designed for concrete or asphalt, with a non-slip additive mixed in to improve traction. A durable clear topcoat or sealer can further protect lines from wear and UV exposure, especially on outdoor courts. For lines, select a contrasting color that maintains visibility under different lighting. Essential tools include masking tape, compatible primers, rollers, brushes, a paint sprayer (optional), measuring tools, chalk line or laser, and safety gear. Non-slip additives and proper mixing ratios are critical for safety and longevity. Organize your kit before you start to minimize trips to the shed or store and to keep curves and corners crisp. PaintQuickGuide recommends testing a small patch to confirm color fastness and adhesion before committing to the full court.
Layout and Masking: Getting Perfect Lines
Correct layout starts with accurate measurements and a clear baseline. Use a chalk line or laser to mark the baseline, center line, service lines, and non-volley zones. Mask off areas with painter’s tape, ensuring bends and corners stay sharp. Start with the outer boundary and work inward, keeping the masking tape aligned and pressed to the surface to prevent paint bleed. For line width, aim for consistent coverage that yields clean edges; if needed, apply a second pass after the first coat dries. Always check visibility from typical viewing angles—standing at the service lines and along the court’s length—to catch any unevenness before the paint cures. According to PaintQuickGuide, precise masking combined with measured spacing ensures professional-looking lines that endure.
Application Steps: Base Coat, Lines, and Sealant
Apply a base coat if needed to create a uniform field color and improve adhesion of the lines. Use a short-nap roller for the field and a thinner roller or brush for the lines. Apply in thin, even coats, allowing adequate drying time between passes as weather and surface texture dictate. Once the base is dry, remove masking carefully to reveal sharp edges, then re-mask the lines if necessary and apply the line color. For added durability, consider a clear sealant or topcoat designed for outdoor use after the lines are fully cured. Always follow product-specific instructions for mixing ratios and recoat windows. PaintQuickGuide emphasizes testing on a small area first and working in moderate temperatures to avoid roller marks and color shifting.
Curing, Maintenance, and Repainting Schedule
Curing times vary with temperature, humidity, and surface porosity. Plan for longer cure times in cool or damp conditions and avoid exposure to rain or heavy traffic while the paint is setting. Inspect lines after the first few games and touch up any scuffs with a small brush. For longevity, recoat every season or as needed based on wear. Clean the surface lightly before repainting and consider applying a protective sealant to extend color life and reduce maintenance. A well-timed maintenance cycle keeps the court looking fresh and legible for players of all skill levels.
Common Mistakes and Pro Tips
Avoid painting on a dirty or damp surface, which causes adhesion failure. Do not rush the masking or skip the testing step, as poor edge quality is hard to fix later. A common mistake is skipping the primer on glossy sealed concrete. Use primer to improve adhesion and color uniformity. Pro tip: use a two-coat approach for the field and a single, crisp pass for lines when using a sprayer. If you choose to spray, practice on cardboard first to minimize drift and ensure even coverage. Note: always vent the area when using solvent-based products and wear protective gear.
Cost and Timeline Considerations
Cost and timeline vary with court size, surface condition, and coating choices. Plan for weather windows and seasonal considerations, and factor in the time needed for surface prep, base coats, line work, and cure times. Expect a multi-step process that may stretch over a weekend or two, especially for larger courts or tricky surfaces. A careful estimate will help you avoid mid-project delays and ensure the finish lasts through many seasons.
Tools & Materials
- Exterior latex paint (high-durability, non-slip additive)(Choose color for field and ensure UV resistance; add non-slip additive per product instructions.)
- Non-slip additive(Mix into base coats or field color per manufacturer guidance for traction.)
- Primer/adhesion promoter(Use on dusty, glossy, or bare concrete surfaces to improve adhesion.)
- Masking tape (2-inch painter’s tape)(Apply firmly to prevent bleed; remove carefully after final coat is tack-free.)
- Concrete patch repair compound(Repair cracks or divots larger than 1/8 inch before painting.)
- Paint rollers (4-6 inch) with short nap(Use for field color; choose smooth coverage for flat areas.)
- Paint brushes (1-2 inch nylon/polyester)(Use for edges, corners, and line work along masking tape.)
- Paint sprayer (optional)(For large areas; practice to avoid drips and ensure even coats.)
- Measuring tape and chalk line or laser layout tool(Accurate placement of baselines and service lines is critical.)
- Safety gear: gloves, eye protection, respirator(Protect from fumes and splashes; ensure proper ventilation.)
- Sealant/clear topcoat (optional)(Apply after curing for added durability against wear and weather.)
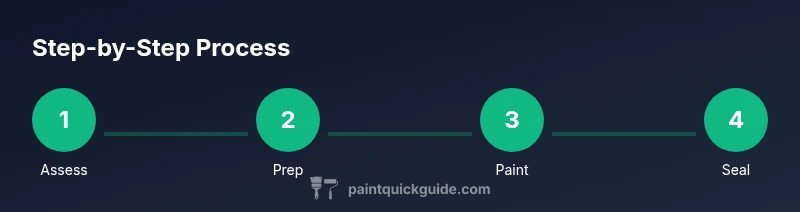
Steps
Estimated time: 8-12 hours total (excluding long cure times)
- 1
Assess layout and plan
Measure court dimensions, identify boundaries and service lines, and confirm line widths with official guidelines. Create a written plan for coats, colors, and curing windows. Mark key reference points with chalk lines to guide masking.
Tip: Double-check dimensions from both ends to avoid a skewed layout. - 2
Clean and prepare surface
Sweep thoroughly, degrease where necessary, and allow complete drying. Fill cracks and smooth edges with patch compound and sand flush once dry. A clean, dry surface ensures uniform color and strong adhesion.
Tip: Schedule prep for a dry day with mild temps for best results. - 3
Prime the surface if needed
Apply a compatible primer, especially on glossy or dusty substrates. Primer improves adhesion and reduces the risk of peeling in high-traffic areas. Allow adequate dry time before proceeding.
Tip: Test a small area first to confirm bonding before full application. - 4
Mask the court and mark lines
Carefully apply painter’s tape along the planned baselines and line edges. Use a chalk line or laser to keep lines straight and evenly spaced. Press tape firmly to prevent paint seepage.
Tip: Mask one section at a time to prevent tape curling and misalignment. - 5
Apply base coat (if using)
Roll on a thin, even base coat for the field color. Avoid puddling and ensure a uniform finish; allow to dry fully before masking or applying lines.
Tip: Roll in a consistent direction and maintain a wet edge between passes. - 6
Paint boundary and center lines
Paint lines using a precise technique with a steady hand or spray method. Remove masking carefully after the line coat reaches tack-free status. Touch up edges with a fine brush if needed.
Tip: Take a test run on scrap material to practice line speed and edge control. - 7
Cure and seal the surface
Allow full curing before heavy use; apply a sealant if weather and product guidance permit for added durability. Inspect lines for scuffs and touch up as required. Schedule routine maintenance to keep lines crisp.
Tip: Ventilate well when applying sealants and wear appropriate protection. - 8
Final inspection and cleanup
Walk the court to check edge sharpness and color uniformity. Remove any remaining tape and clean tools promptly. Document the process for future repaint scheduling.
Tip: Photograph the finished court for records and future reference.
Your Questions Answered
Do I need special paint for outdoor pickleball courts?
For outdoor courts, use exterior latex or acrylic paint formulated for concrete or asphalt and choose products with non-slip properties. These coatings resist UV exposure and weathering while maintaining color. Always follow the manufacturer’s guidelines for outdoor use.
Use exterior latex or acrylic paint with non-slip properties for outdoor pickleball courts. Follow the maker’s directions for outdoor use.
Can I paint over existing lines?
Yes, but assess surface condition first. If the old surface is flaking or peeling, remove loose material, clean, and prime before applying new lines. For best results, apply new lines after repairing any surface damage.
Yes, but prep the surface first—remove peeling areas and prime before new lines.
How long does it take for the paint to cure?
Cure times depend on temperature, humidity, and product. Plan for at least several hours of dry time between coats and longer curing before heavy use. Always follow the paint manufacturer’s cure recommendations.
Cure time varies; follow the product’s instructions and wait for the surface to be fully dry before use.
Is sealing necessary after painting?
Sealing is optional but recommended for outdoor courts to boost durability and wear resistance. If you seal, choose a compatible topcoat and follow its recoat window and curing directions.
Sealing helps durability for outdoor courts; use a compatible topcoat and follow cure times.
What line width should I use?
Most courts use consistent line widths that provide clear boundaries; check local league rules or governing body guidelines. Maintain uniform width throughout for a professional look and accurate play.
Stick to a consistent line width that matches league guidelines and maintains uniformity.
What should I do if the surface is old or cracked?
Repair cracks with a suitable patch compound and allow to cure before priming. If the surface is very old or damaged, consider a larger rehab or resurfacing plan before painting.
Repair cracks, then prime; if damage is severe, consider resurfacing first.
Watch Video
Quick Summary
- Prepare and test first to ensure adhesion.
- Mask precisely to achieve sharp lines.
- Allow proper cure time before use and maintenance.