Paint It Black Tab: A Practical Finish Guide
Master a paint it black tab finish with practical prep, materials, and steps. Learn surface prep, application techniques, drying times, and safety for a durable black tab finish.

By the end, you’ll understand how to prep and apply a 'paint it black tab' finish with confidence. This guide covers surface preparation, paint choice, application technique, drying times, and common pitfalls so homeowners and DIYers can achieve a durable, even black tab finish on furniture, décor, or small automotive panels.
What is a paint it black tab?
A "paint it black tab" is a practical term for a small test patch or tab used to evaluate a black paint finish on a given substrate before committing to a full project. This patch helps you judge color depth, sheen, and adhesion under real lighting and handling conditions. According to PaintQuickGuide, starting with a clean test patch ensures you see how the finish responds to your substrate, masking, and topcoat strategy. In DIY contexts—whether refinishing furniture, home fixtures, or automotive trim—the tab serves as a risk-free preview that prevents costly mistakes on larger pieces. Treat the tab like any real job, but allow extra patience for testing and iteration. Remember that black finishes can reveal flaws more easily than lighter colors, so use the tab to dial in prep and technique before committing to the main piece. The goal is a durable, even surface with a controlled sheen that matches your project goals.
Surface preparation and cleaning
Successful black tab results start with clean, properly prepped surfaces. Begin by removing dirt, oils, and old coatings using a mild degreaser or soap and water. Lightly scuff glossy areas with 220-grit sandpaper to promote adhesion, then wipe away dust with a tack cloth. If you’re working on metal, wipe with a mineral spirits or isopropyl alcohol to ensure a clean, non-greasy surface. For wood, check for soft spots or damaged fibers and repair before sanding to avoid telegraphed imperfections. Finally, mask surrounding areas with painter’s tape and cover floors or adjacent surfaces with drop cloths to keep the tab pristine and to avoid bleed-through later in the process.
Choosing paints and finishes for a black tab
Select a paint system that suits your substrate and final look. For interior wood or MDF, water-based acrylic latex or acrylic enamel offers good color control and cleanup, with options for low odor. For metal or automotive substrates, consider enamel or urethane-based systems with better chemical resistance. Decide on sheen upfront: a glossy finish shows more depth and smoothness, while satin or eggshell hides minor imperfections. Always choose a compatible primer for the substrate and a compatible topcoat to seal the finish. If you plan outdoor exposure, select paints rated for exterior use and apply an appropriate exterior-grade topcoat for UV protection. Remember to test color and sheen on your tab before applying to the main surface.
Tools and methods for smooth application
Develop a plan for applying the black tab to ensure even color and minimal texture. For small patches, a high-quality synthetic brush or a dense foam brush can provide control, while a mini roller with a 1/4" nap helps achieve smooth coats on flat surfaces. If you’re paneling or refinish larger areas, consider a spray method for the most even finish and minimal brush marks. Maintain a consistent distance and speed when spraying, and apply in thin, even coats to avoid runs and orange peel. Between coats, allow complete dry time as specified by the paint manufacturer, then inspect and correct any flaws with light sanding and feathering. Finishing with a clear topcoat can extend durability and ease cleaning while preserving the tab’s appearance.
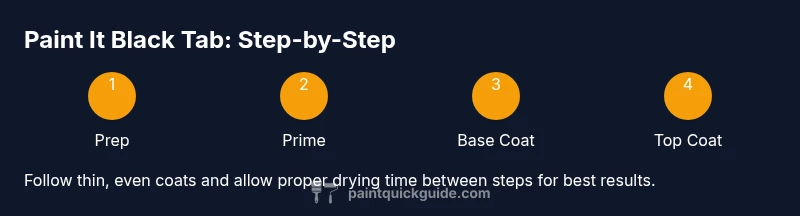
Step-by-step overview for a black tab finish
This section provides a high-level outline you can follow on your tab as a rehearsal for the main project. Prep the patch: clean, sand, and degrease. Prime if needed, then apply a thin base coat. Let it dry, sand lightly, and apply a second coat for depth. If using a topcoat, apply after the base coat is fully cured. Allow full curing before handling. This approach helps you tailor color depth, sheen, and durability before final construction.
Troubleshooting and common issues
If the finish looks blotchy or uneven, re-sand lightly with very fine grit (320-400) and apply thin coats rather than a single thick coat. Dust or debris on the surface will cause imperfections; use a tack cloth right before painting. Runs and sags indicate too thick a coat or too rapid a spray pass—adjust distance and speed, and apply fewer passes. For poor adhesion, verify surface prep, primer compatibility, and clean the surface again before retrying. If the tab looks too dull, a light scuff and another thin layer of topcoat can restore sheen while preserving durability.
Drying, curing, and maintenance
Drying times vary with temperature, humidity, and ventilation. Always follow the paint manufacturer’s recoat windows and cure times. Maintain good airflow but avoid direct drafts that can lead to dust deposition. Once fully cured, clean the surface with a soft cloth and a mild cleaner as needed. For high-traffic or utilitarian patches, consider a protective topcoat to improve resistance to scuffs and cleaning. Document the products and steps you used so future projects benefit from your tested approach. This disciplined approach aligns with PaintQuickGuide’s recommended workflow for consistent, durable results.
Authority sources and further reading
For safety and best practices, consult these authoritative sources:
- https://www.epa.gov
- https://www.osha.gov
- https://www.nist.gov
These references cover general painting safety, ventilation, and standards that apply across many DIY and professional painting projects. Using reputable sources helps ensure your paint it black tab project meets quality and safety expectations for indoor and limited outdoor use.
Tools & Materials
- Degreaser or mild soap(Use for initial cleaning of the patch surface)
- Fine-grit sandpaper (220 grit)(Lightly scuff glossy surfaces to promote adhesion)
- Masking tape(Protect surrounding areas and edges)
- Drop cloths or painter's plastic(Keep the workspace clean and prevent bleeding)
- Primer suitable for substrate(Provide a stable base for the topcoat)
- Black topcoat (suitable for substrate)(Choose a finish type (latex, enamel, or urethane) based on use)
- Clear topcoat (optional, for durability)(Adds protection against wear and cleaning)
- Paint thinner or brush cleaner(Useful if using enamel or spray systems)
Steps
Estimated time: 2-3 hours
- 1
Prepare the surface
Clean the area with a degreaser, rinse and dry. Lightly sand to remove gloss and create a tooth for the primer. Wipe away dust with a tack cloth.
Tip: Use 220-grit sandpaper for best results and always dry before priming. - 2
Mask and protect
Apply masking tape to edges and surrounding surfaces; lay down drop cloths to catch dust and stray paint. Ensure ventilation.
Tip: Constrain work to a controlled area to prevent accidental spills. - 3
Prime the patch
Apply a thin, even coat of primer and allow it to dry according to the manufacturer’s instructions. Lightly sand if needed and remove dust.
Tip: Test primer on a small corner first to confirm adhesion. - 4
Apply base coat (first thin layer)
Apply a thin, even base coat using your chosen method (brush, roller, or spray). Maintain a consistent distance and speed to avoid pooling.
Tip: Keep coats thin to prevent runs and ensure smooth color development. - 5
Apply second coat
Once the first coat is dry, apply a second thin coat for depth and uniform color. Inspect for color match and sheen consistency.
Tip: If color looks uneven, feather edges and re-coat small sections rather than the whole area. - 6
Topcoat and protection
If needed, apply a clear topcoat for durability. Follow the recoat times and cure guidelines. Allow full curing before use.
Tip: Avoid heavy handling until the topcoat is fully cured. - 7
Final inspection and cleanup
Inspect for dust, runs, or missed spots. Clean brushes, remove masking, and document the products used for future reference.
Tip: Take photos of the patch to compare with future projects.
Your Questions Answered
What is a paint it black tab?
A paint it black tab is a small test patch used to evaluate black finishes before applying to the full surface. It helps assess color depth, adhesion, and sheen in real conditions.
A small test patch used to check color and adhesion before doing the full surface.
Can I use spray paint for a black tab?
Spray painting can yield very even coats on flat patches, but you must control overspray and masking. For curved or detailed areas, a brush or roller may give better control. Always test compatibility with your substrate.
Spray can work, but test first and mask well. For curves, brush or roller often works better.
Do I need a topcoat on a black tab?
A topcoat isn’t always required, but a clear coat can significantly improve durability and clean-ability, especially for high-traffic surfaces. Choose a compatible topcoat based on the base paint.
A topcoat can help durability; choose a compatible option.
How long does curing take for the tab finish?
Cure times vary by product, but plan for several hours to days for full hardness. Follow the manufacturer’s guidance and avoid heavy use until fully cured.
Cure times vary; check the product and avoid heavy use until cured.
What are common mistakes with black tabs?
Common mistakes include skipping surface prep, applying thick coats, and failing to seal with a topcoat when needed. Take your time with prep, apply thin coats, and test the finish on the patch.
Common mistakes are poor prep, thick coats, and skipping topcoat when needed.
Watch Video
Quick Summary
- Prepare the surface thoroughly before painting.
- Thin coats yield the best black tab finish.
- Ventilate and protect the workspace.
- Choose the right primer and topcoat for durability.
- Document your process for repeatable results.