How to Remove Spray Paint: A Practical Guide
Learn proven methods to remove spray paint from walls, metal, wood, and fabric with safety tips, surface prep, and step-by-step techniques for clean results without damage.

How to remove spray paint effectively: this guide shows practical, surface-safe methods that work on walls, metal, wood, and fabric. It covers protection, prep, and the best removal techniques, plus tips to test a small area first and avoid staining. By following these steps, you can restore surfaces with confidence.
Safety and Prep
Before you begin removing spray paint, protect yourself and the workspace. Wear safety goggles, a respirator or mask, and chemical-resistant gloves to shield eyes, lungs, and skin from fumes and splashes. Ventilate the area well and lay down drop cloths or plastic sheeting to catch drips. Clear the vicinity of pets and children, and remove valuables from the area. According to PaintQuickGuide, safeguarding yourself isn’t optional—it directly affects both safety and success. Start with a calm plan: identify the surface, check for existing finishes that could be damaged by solvents, and prepare a simple test area. A good test spot will tell you whether a solvent or soap solution risks staining, bleaching, or softening the surface. With proper PPE and a clean workspace, you’ll minimize damage and create a safe, controllable removal process.
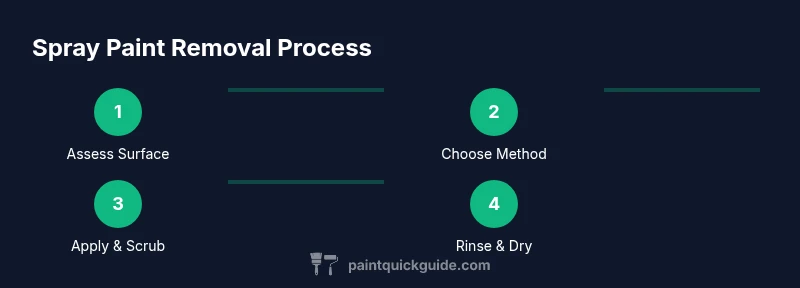
Surface Assessment and Product Selection
Not all surfaces react the same to spray paint and removal agents. Begin by assessing porosity, coating type, and underlying material. Non-porous surfaces like finished metal or sealed plastic respond quickly to milder cleaners, while porous materials such as bare wood or fabric may require gentler approaches and longer contact times. Choose products suited to the surface: mild dish soap for initial cleaning, a specialized graffiti remover for tougher spots, or isopropyl alcohol for light, sharp-edged paint marks. Do a small test patch to verify colorfastness and finish integrity. PaintQuickGuide analysis shows that starting with a conservative option minimizes risk and helps you gauge whether you’ll need stronger methods later.
Gentle Soap and Water Methods
For many spray paint scenarios, a simple soap-and-water wash is enough to loosen and lift the paint edges. Mix a few drops of mild dish soap in warm water and apply with a soft sponge or microfiber cloth. Gently blot and rub along the grain or edges rather than scrubbing hard, which can spread paint or damage finishes. For delicate surfaces like thin wood veneers or painted walls, avoid soaking; instead, work in small sections and dry the area frequently. If a stubborn edge remains, reapply soapy water and let it sit for a few minutes to soften the residue before continuing. This method preserves finishes and limits solvent exposure while still making progress.
Solvent-Based Removers: When and How
If soap and water are not enough, you can move to solvent-based removers—but use them with care. Choose a solvent appropriate for the surface: isopropyl alcohol works well on many non-porous surfaces, while isopropyl-based graffiti removers or a low-odor solvent may be gentler on coatings. Always test on a hidden spot first. Apply a small amount to a cloth and dab, don’t flood the area. Work from the outside of the painted patch toward the center to prevent spreading. Allow the solvent to sit briefly if the paint is stubborn, then gently wipe with a clean cloth. If you notice any whitening, discoloration, or softening, stop and reassess with a milder method.
Mechanical Removal Techniques
For layers that resist chemical methods, mechanical methods can be effective without excessive solvent use. Use a plastic scraper or a putty knife to lift edges, keeping the blade almost parallel to the surface to avoid gouging. A soft-bristled brush can help loosen paint from textured surfaces or corners after a gentle solvent has been applied. Always test a small area first to ensure you don’t scratch paint or wood. When using abrasive pads on metal or hard plastics, choose a fine grade and rub lightly, stopping immediately if you see dulling or surface damage. Mechanical work should be done in short sessions to avoid overheating and spreading paint remnants.
Special Surfaces: Wood, Fabric, Metal, Painted Surfaces
Wood surfaces require extra care to prevent staining the grain or removing finish. For painted wood, start with soap and water and progress to alcohol or graffiti remover only if needed. On fabric, avoid saturating; instead, blot with a mild detergent solution and rinse promptly to prevent wicking or setting stains. Metal surfaces can tolerate stronger solvents but test for finish compatibility first and monitor for corrosion. For already-painted or sealed surfaces, stick to mild cleaners first and use solvents only on stubborn spots after patch testing. In every case, maintain good ventilation and follow product directions. If finishes show signs of damage, stop and seek alternative approaches or professional help.
Clean-Up, Rinsing, and Stain Prevention
After paint removal, rinse the area with clean water to remove residual cleaners and solvents. Wipe with a dry microfiber cloth and allow the surface to air dry completely. Inspect for any remaining pigment and repeat the process on stubborn spots if necessary. To prevent future staining, consider sealing the area or applying a protective finish suitable for the surface, especially on wood or fabric. Keep solvents and cleaners away from direct sunlight and store them in labeled containers. Proper disposal of used cloths and solvent-soaked materials is essential—place contaminated items in a sealed bag before disposal.
Final Verification and Next Steps
Finish by a final, careful assessment to ensure all spray paint is removed and no new damage occurred. Touch up any areas with matching paint or finish as needed, and re-clean surrounding zones to ensure a uniform look. If the surface requires re-coating or sealing, plan the right product and dry times before resuming regular use. The goal is a clean, protected finish that preserves both aesthetics and structural integrity. The PaintQuickGuide team recommends documenting your method and results for future reference in similar projects.
Tools & Materials
- Safety goggles(ANSI Z87.1 compliant for splash protection)
- Nitrile gloves(Chemical resistant, for prolonged wear)
- Respirator or mask(At least N95 or equivalent for fumes)
- Soft-bristle brush(Sensitive scrubbing, avoids scratches)
- Microfiber cloths(Lint-free for residue pickup)
- Sponge and bucket(Mild cleaning solution prep)
- Plastic putty knife or scraper(Non-abrasive, to lift edges)
- Spray bottle(For applying cleaning solutions evenly)
- Mild dish soap(First-line cleaner for most surfaces)
- Isopropyl alcohol (70%)(Used for tougher spots on non-porous surfaces)
- Graffiti remover or solvent (low-odor)(Use only on compatible surfaces; test first)
- Rags or absorbent towels(For quick blotting and drying)
- Ventilation aids (fans, open windows)(Improve air flow when using solvents)
Steps
Estimated time: 1-3 hours
- 1
Wear safety gear and prep area
Put on safety goggles, gloves, and a mask. Clear the workspace of clutter and lay down drop cloths. Ensure good ventilation before you begin.
Tip: Ventilation reduces fume buildup and lowers inhalation risk. - 2
Identify surface and test area
Assess the surface type and finishes before choosing a method. Select a small, inconspicuous patch to test your chosen cleaner.
Tip: If the test patch changes color or finish, stop and switch to a milder approach. - 3
Mix mild cleaning solution
In a bucket, mix a few drops of mild dish soap with warm water. This solution is safe for many surfaces and can loosen fresh spray paint.
Tip: Start mild and escalate only if needed. - 4
Apply gentle cleaner to edges
Dampen a cloth with the soapy solution and dab along the paint edge, working from the outside inward.
Tip: Avoid soaking the area to prevent penetration into porous materials. - 5
Scrub with soft-bristle brush
Gently scrub the paint with a soft brush or sponge, using circular motions near the edges to lift without damage.
Tip: Let the cleaner work for a few minutes before scrubbing again. - 6
Introduce solvent for stubborn spots
If soap fails, apply a small amount of isopropyl alcohol or a low-odor graffiti remover to a cloth and test again.
Tip: Never pour solvent directly onto the surface; apply with a cloth. - 7
Rinse and blot dry
Rinse the area with clean water and blot dry with a microfiber cloth. Inspect for remaining pigment.
Tip: Repeat if necessary until no residue remains. - 8
Finalize and protect
If needed, apply a protective finish or sealant after the surface dries. Document results for future projects.
Tip: Note times and products used for next time.
Your Questions Answered
Can I remove spray paint from fabric without damaging it?
Yes, fabric can be cleaned with gentle detergents and careful blotting. Avoid soaking and test a small area first. If colorfastness is uncertain, consider professional fabric cleaners.
Yes. Use a gentle detergent and blot—test first to ensure the fabric won’t be damaged.
Is it safe to use acetone on painted walls or wood?
Acetone can damage some finishes, especially varnishes and painted surfaces. Test first, and use as a last resort on non-porous surfaces only.
Only use acetone after testing on a hidden area and when other methods fail.
Will heat speed up spray paint removal?
Heat can help soften paint but may warp plastics or damage finishes. Use heat cautiously on durable surfaces and avoid prolonged exposure.
Heat can help, but use it with caution on sensitive surfaces.
Should I dispose of used solvents and rags?
Yes. Store used rags and solvents in sealed containers and follow local hazardous waste guidelines. Do not stream solvents down the drain.
Yes—properly store and dispose of solvents and rags per local rules.
How long does it take to remove spray paint from metal surfaces?
Removal time varies with paint thickness and solvent choice. Plan for a thorough session and monitor progress, repeating steps as needed.
Usually requires a few rounds and patience; monitor progress as you go.
Watch Video
Quick Summary
- Wear protective gear before starting
- Test a hidden area first
- Begin with soap and water, escalate if needed
- Rinse thoroughly and dry
- Dispose of waste responsibly