How to Paint Already Glazed Ceramics
Learn step-by-step how to prep, prime, and paint glazed ceramics so the color sticks, with safe curing and maintenance tips from PaintQuickGuide.

Learn how to paint already glazed ceramics by properly prepping the glaze, applying a bonding primer, and using glaze-safe paints that cure correctly. Cover surface preparation, compatible paint choices, and baking or curing steps to seal the finish. Work in a well-ventilated space and follow safety guidelines. According to PaintQuickGuide, prep and bake-sealing are the keys to durable results.
Why painting already glazed ceramics requires prep
If you’re wondering how to paint already glazed ceramics, the most critical step is prep. Glaze creates a slick, non-porous surface that resists adhesion. Without roughening, degreasing, and priming, paint may peel or wear off quickly. This guide from PaintQuickGuide emphasizes a systematic approach: assess your glaze type, prepare the surface, and test adhesion on a small area before committing to the entire piece. By understanding the chemistry of glaze and paint, you can choose compatible products and achieve a durable, lasting finish. Throughout this article, we’ll use practical, home-friendly methods that yield professional-looking results while keeping safety in mind.
Surface prep: cleaning, scoring, and priming
Glazed ceramics require intentional surface preparation to ensure paint sticks and endures use. Start with a thorough cleaning using a degreasing agent or isopropyl alcohol to remove oils, fingerprints, and waxy residues. Next, lightly score the glaze with very fine sandpaper or a non-writt blasting pad to create micro-etching that improves bonding. Clean again, rinse if needed, and dry completely before priming. A bonding primer designed for ceramic or non-porous surfaces creates a porous base for paint to adhere to. PaintQuickGuide Analysis, 2026 notes that adhesion increases when prep is thorough and when primers are chosen for the glaze type. Always test adhesion on a small, inconspicuous area before proceeding to the full piece. Ventilate your workspace and wear a mask if you’re sanding.
Selecting paints and primers that bond to glaze
Not all paints are compatible with glazed surfaces. Look for products labeled for ceramic or glass adhesion, such as epoxy or ceramic enamel primers and compatible topcoats. For most hobby projects, a glaze-safe acrylic enamel or a porcelain-safe acrylic with a ceramic-bonding additive will work well, provided you follow cure times exactly. Avoid standard craft paints unless they explicitly state ceramic or glass adhesion. When in doubt, choose a primer first, then a compatible base color, followed by a sealer. Always confirm that the paint and primer you select can be baked or cured per the product’s directions. PaintQuickGuide Analysis, 2026 highlights that using properly matched primer and paint boosts long-term durability.
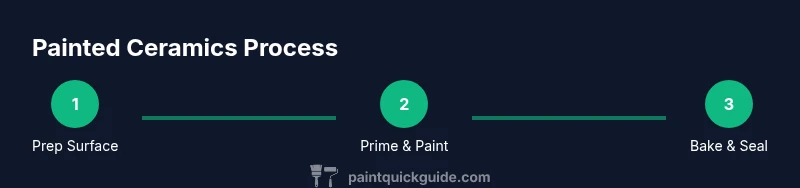
Step-by-step overview
Here’s a practical roadmap without overwhelming details. Step 1: prepare the glaze surface by cleaning and scoring. Step 2: apply a bonding primer in a thin, even coat and let it dry completely. Step 3: apply the base color in light, even layers, allowing each coat to dry before adding the next. Step 4: bake or cure the piece exactly as directed by the paint system. Step 5: seal with a clear topcoat if you want extra protection. Testing on a scrap piece first ensures your colors and finish behave as expected.
Baking, curing, and sealing the finish
Curing is a critical part of the process that determines the durability of your paint job. Some glaze-compatible paints require a specific baking temperature and time in a home oven, while others rely on air-drying and a separate curing period. Always follow the manufacturer’s directions for baking temperatures and ventilation. Do not bake food in the same oven after painting unless the paint’s instructions allow it; use a dedicated ceramic kiln if you have access, and never bypass safety gear. After curing, inspect the surface for even color and adhesion. If you notice any peeling or scuffing, address it with light sanding and another thin layer of primer and paint, then re-curing as directed.
Maintenance, care, and troubleshooting common issues
Once your glaze-painted ceramics are cured, gentle care extends their life. Hand wash with mild soap and avoid abrasive scrubbers that could raise the paint over time. If chips or peeling appear, sand lightly around the damaged area, re-prime, and repaint. Temperature changes can also stress coatings, so avoid extreme heat or rapid cooling. If a piece looks dull or appears flaking, consider applying another thin topcoat and baking again, following the product instructions to restore gloss and durability. Remember, preparation and correct curing are the biggest reasons people succeed with glazed ceramics.
Tools & Materials
- Fine-grit sandpaper (400-600 grit)(Used for micro-etching the glaze surface)
- Isopropyl alcohol or ceramic degreaser(For thorough cleaning and degreasing)
- Non-scratch scrub pad or microfiber cloth(To wipe and prep without scratching)
- Rubbing alcohol wipes or spray(Quick touch-ups and cleaning between coats)
- Painter’s tape(Mask edges and protect areas you don’t want painted)
- Bonding primer for ceramic or non-porous surfaces(Promotes adhesion to glaze)
- glaze-safe acrylic enamel or ceramic enamel paint(Base colors that cure properly on glaze)
- Clear topcoat (optional)(Adds durability and gloss; choose product compatible with base paint)
- Oven-safe baking tray or ceramic-safe curing surface(Used only if paint system requires baking)
- Ventilated workspace or mask/respirator(To protect from fumes during priming and baking)
- Disposable gloves(Keep hands clean and protect skin from chemicals)
- Scraper or toothpick for removing air bubbles(Helpful for smoothing air bubbles during painting)
Steps
Estimated time: Total active time: 2-4 hours; curing time varies by product and method
- 1
Prepare the glaze surface
Work in a well-ventilated area. Lightly sand the glazed area to create micro-etching, then wipe away dust with a damp cloth and let dry completely before priming. Degrease thoroughly to remove oils that can interfere with adhesion.
Tip: Test adhesion on a small spot first; if it peels, sand a bit more and re-clean. - 2
Apply bonding primer
Apply a thin, even coat of bonding primer designed for ceramic or glass. Let the primer dry completely according to the product’s instructions, then inspect for coverage. If needed, apply a second light coat.
Tip: Do not over-apply primer; too thick a coat can obscure texture and hinder cure. - 3
Base color application
Choose a glaze-safe acrylic enamel or ceramic enamel and apply in thin, even coats. Allow each coat to dry fully before adding the next one. Light coats reduce the risk of drips and uneven color.
Tip: Use light, steady strokes and protect the piece with masking tape on edges to keep lines sharp. - 4
Cure or bake as directed
Bake the piece in a manner recommended by the paint system, or allow to air-dry and cure if required. Maintain proper ventilation and avoid exposing your face to fumes. Do not rush the curing process.
Tip: Keep a thermometer handy if a precise bake is required; follow the exact temperature and time specified. - 5
Topcoat and final cure
If you want added durability, apply a clear topcoat that is compatible with the base color, then cure again as directed. Inspect for even gloss and adhesion after cooling. A two-coat approach often yields the best long-term wear.
Tip: Test a small area after final cure to confirm that the topcoat adheres properly.
Your Questions Answered
Do I need to sand the glaze before painting?
Yes. Light sanding creates micro-etching that helps paint bond to the glaze. Skipping this step can lead to poor adhesion and early chipping.
Lightly sand the glaze to help the paint stick, then clean the surface before priming.
Can I use regular acrylic paint on glazed ceramics?
Regular acrylics may not adhere well to glazed surfaces unless used with a bonding primer or a ceramic-safe enamel. Always check the product’s compatibility and follow curing directions.
Regular acrylics usually need a ceramic primer to stick to glaze.
How long does curing take before the piece is usable?
Curing time varies by product; follow the manufacturer’s guidance. Some systems require a bake, others air-cure for a defined period before handling.
Check the paint’s directions for exact bake or cure times before using the piece.
Is a clear topcoat necessary after painting glazed ceramics?
A clear topcoat is optional but recommended for extra protection, especially for pieces that will be washed or handled frequently. Ensure compatibility with the base paint.
A topcoat adds durability if you’ll wash the piece often.
Can I bake glazed ceramics in a household oven?
Only if the paint system explicitly allows it. Some ceramic paints require a kiln, while others specify household oven temperatures. Never bake food in the same oven after painting unless approved.
Only bake if the product directions say it’s safe to do so; otherwise avoid cooking in the oven.
Watch Video
Quick Summary
- Prepare thoroughly for durable adhesion
- Choose glaze-compatible primers and paints
- Follow curing directions exactly
- Test on scraps before committing to the finished piece
- Finish with a protective topcoat if desired