Sherwin Williams Cabinets Paint: A Complete How-To Guide
Learn step-by-step how to paint kitchen and bath cabinets with Sherwin Williams cabinet paints. Prep, priming, application, drying, and maintenance tips for durable, showroom-worthy results.

Transform your cabinets using sherwin williams cabinets paint with a clean prep, even coats, and proper drying. This guide outlines finish options, priming needs, and application techniques for durable, showroom-ready cabinets. It covers supplies, a step-by-step process, and realistic time frames to help homeowners and DIYers achieve a professional look.
Why sherwin williams cabinets paint matters for cabinet projects
Choosing the right paint for cabinets is a decision that affects the look, durability, and maintenance of your spaces. When you select sherwin williams cabinets paint, you align color integrity with advanced enamel performance designed for high-use surfaces. The term sherwin williams cabinets paint is widely used by homeowners and DIYers who want a professional finish without excessive risk. In this guide, we discuss why this brand and product line is a popular starting point for kitchen cabinets, bathroom vanities, and built-ins. Cabinet surfaces endure frequent contact, heat from cooking, and cleaning solvents. With the right sherwin williams cabinets paint, you can achieve a hard-wearing surface that resists nicks and gouges while maintaining color depth through daily use. The PaintQuickGuide team found that most successful cabinet projects start with clear expectations on sheen, durability, and cleanup—factors that sherwin williams cabinets paint helps balance.
The PaintQuickGuide approach emphasizes practicality: pick a durable enamel, choose a manageable sheen, and plan for proper ventilation during application. By keeping these priorities front and center, you’ll reduce touch-up work and achieve long-lasting results that look professional.
Finish options for sherwin williams cabinets paint
Cabinet finishes come in a range of sheens and durability. For kitchen and bath cabinets, most homeowners favor semi-gloss or satin sheens because they balance sweepable cleanliness with subtle reflections that help hide minor imperfections. When you choose sherwin williams cabinets paint, you’re typically selecting an enamel-based finish designed to withstand frequent cleaning. A satin finish offers easier touch-ups and a softer look, while a semi-gloss finish provides a higher level of wipeability for kitchens and bathrooms. For high-traffic cabinets, consider a gloss finish only if you want maximum glare resistance and a modern edge; otherwise, satin or semi-gloss is usually sufficient. Your choice should align with the room’s lighting, design style, and maintenance expectations. The goal is color retention, durability, and ease of cleaning over time. PaintQuickGuide recommends testing a small swatch on a hidden panel to confirm color accuracy and sheen under your room’s lighting conditions.
Pro tip: If you’re working with lighter colors, a tinted primer can reduce the number of coats and help even out color depth. This is especially helpful when switching from a darker base to a pale shade in sherwin williams cabinets paint.
Prep and cleaning for lasting results with sherwin williams cabinets paint
Preparation is where most cabinet projects succeed or fail. Begin by removing doors, drawers, and hardware to create a clean, flat painting surface. Degrease all surfaces with a cleaner designed for kitchen grease and food residues, then rinse with clean water and allow to dry completely. Sanding lightly with 220-grit paper followed by a tack cloth removes gloss and creates a key for the new coat. When you’re ready, wipe down all surfaces again to remove dust. For doors, frames, and panels, this prep ensures sherwin williams cabinets paint adheres evenly and resists peeling over time. The preparation step also minimizes the risk of revealing brush marks and helps your final finish stay uniform across all cabinet components.
As you plan, consider the room’s airflow. Good ventilation reduces solvent odor and speeds up drying. The PaintQuickGuide team notes that proper surface prep correlates with fewer re-coats and better color consistency when using sherwin williams cabinets paint.
Primers and primers selection when using sherwin williams cabinets paint
Primers are often the ace up your sleeve for a durable cabinet finish. If you’re painting over bare wood, previously stained surfaces, or dark colors, a bonding primer designed for cabinetry is crucial. A high-quality primer improves adhesion, blocks stains, and enhances color uniformity, especially when using sherwin williams cabinets paint. For existing painted surfaces in good condition, a bonding primer can be sufficient, but for problematic substrates (water stains, smoke residues, or heavy wood grain), a stain-blocking primer helps prevent bleed-through and ensures even color. If you anticipate a dramatic color change, a tinted primer reduces the number of coats and speeds up the project. Always follow the manufacturer’s recommended dry times before applying sherwin williams cabinets paint, and ensure the primer is fully cured to avoid lifting when you apply the topcoat.
Safety note: work in a well-ventilated area and wear a respirator when sanding or applying primers. The combination of primers and sherwin williams cabinets paint creates a robust base that resists peeling and wear in high-use environments.
Application techniques: brushing, rolling, spraying with sherwin williams cabinets paint
There are several valid techniques for applying sherwin williams cabinets paint, depending on the cabinet geometry and your equipment. For traditional frame-and-panel cabinet doors, a high-quality angled sash brush (1.5-2 inches) delivers crisp edges and minimal spray setup. Conversely, mini foam rollers are excellent for flat surfaces and cabinet faces, providing a smooth, even coat with less brush stroke visibility. If you’re working with large, flat panels or high-traffic kitchens, a spray system can offer the most uniform finish and fastest coverage, but it requires proper masking and ventilation. When using sherwin williams cabinets paint, apply thin coats and maintain a wet edge to avoid lap marks. Work in small sections, and overlap slightly to ensure a uniform color.
For most hobbyists and DIYers, a combination approach works well: cut in around edges with a brush, then roll larger flat surfaces with a light, even stroke. Allow each coat to dry per the manufacturer’s instructions before applying the next one. A final topcoat can add durability and cleanability, depending on the product line chosen within sherwin williams cabinets paint.
Drying times, curing, and environmental controls
Drying time depends on temperature, humidity, and ventilation. Cabinet paints typically require several hours between coats and longer for a full cure. Ensure the space is ventilated, but avoid direct drafts that may cause dust to settle on wet paint. For a rock-solid cure, plan for at least 24 hours before reattaching doors and hardware in dry conditions. If you’re painting in a kitchen or bathroom with high humidity, consider using a dehumidifier during the painting window to reduce the risk of moisture entrapment, which can affect adhesion and gloss. Sherwin Williams cabinet paints often offer stated recoat windows; following these guidelines helps prevent issues such as brush marks or uneven sheens over time.
The PaintQuickGuide team emphasizes temperature stability and consistent humidity to maximize the performance of sherwin williams cabinets paint, especially on cabinetry that sees daily use. A well-prepared environment translates into fewer touch-ups and a more uniform finish across all surfaces.
Maintenance, costs, and time management
Budgeting for a cabinet painting project involves more than the paint itself. Plan for finishing supplies, hardware removal and reinstallation, and safe disposal of used materials. Costs vary by color, sheen, and the size of your cabinet run, but you can expect general ranges depending on the Sherwin Williams cabinet paint system you choose. A well-executed project with sherwin williams cabinets paint can extend the life of your cabinetry and revitalize the room without full replacement. Time management is critical: expect several hours of active work, plus drying times between steps. If you’re balancing a busy schedule, spread the project over a weekend and set up a temporary workspace to keep dust and debris away from fresh coats. A thorough prep and measured approach reduces the need for rework and ensures your final result meets expectations.
PaintQuickGuide’s recommendations focus on realistic timelines and practical tips that help you stay on track while achieving durable, visually appealing results with sherwin williams cabinets paint.
mainTopicQuery1-3word noun phrase for Wikidata lookup? null
Tools & Materials
- sherwin williams cabinets paint (enamel-based cabinet paint)(Choose a durable enamel with suitable sheen (typically satin or semi-gloss))
- painter's tape(Use to mask edges and hardware mounting areas)
- sandpaper 220-grit(For light scuffing to aid adhesion)
- tack cloth(Dust removal after sanding)
- degreasing cleaner(Kitchen-safe cleaner to remove oils and grease)
- bonding/primer for cabinets(Select compatible primer for best adhesion)
- angled sash brush 1.5-2 inches(Edges and profiles)
- mini foam rollers(For flat surfaces and even coats)
- paint tray(For roller use, keep paint evenly distributed)
- drop cloths or plastic sheeting(Protect surrounding areas)
- screwdriver or bit set(Remove and reattach hardware safely)
- respirator or proper mask(Protect from fumes and dust)
- clean water and rags(Cleanup after painting)
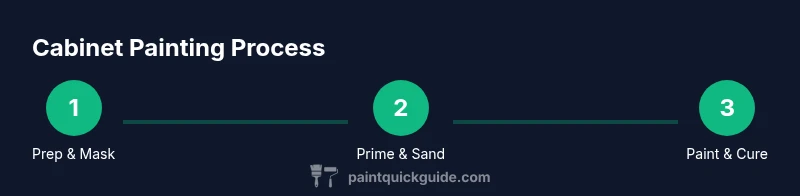
Steps
Estimated time: 3-6 hours total active work (plus drying time)
- 1
Prepare the workspace
Clear the area, remove cabinet doors and drawers, and lay down drop cloths. Label doors and cabinetry pieces to ensure correct reassembly. This initial step reduces mistakes and protects surfaces from dust and moisture.
Tip: Label hardware and doors with painter’s tape to avoid reassembly mix-ups. - 2
Remove hardware and clean surfaces
Take off handles, knobs, and hinges. Wipe all cabinet surfaces with a degreaser to remove oils and cooking residue. Let dry completely before proceeding to sanding.
Tip: Work in small sections to maintain efficiency and keep track of parts. - 3
Scuff-sand for adhesion
Lightly sand all surfaces with 220-grit sandpaper to create a bonding key. Wipe away dust with a tack cloth before applying primer. This helps sherwin williams cabinets paint adhere evenly.
Tip: Avoid heavy sanding that could gouge wood; aim for uniform dulling of the surface. - 4
Apply primer if needed
Apply a bonding primer on non-porous areas or before color change to improve adhesion and reduce staining bleed-through. Allow primer to dry fully per product instructions.
Tip: Use a tinted primer when changing to a lighter color to minimize coats. - 5
Cut-in and base-coat
Paint cabinet edges and inset areas with a brush for sharp lines. Use a roller on flat surfaces with long, even strokes. Keep coats thin to prevent drips.
Tip: Work wet-on-wet to maintain a consistent finish and avoid lap marks. - 6
Apply additional coats
Apply a second coat once the first is dry to enhance depth and uniformity. Let each coat cure according to the product label.
Tip: Thin coats dry faster and reduce the risk of runs. - 7
Reassemble and inspect
Reattach doors, drawers, and hardware after the final coat dries. Check for missed spots and touch up if needed. Ensure hinges operate smoothly and hardware aligns.
Tip: Test doors in their original positions to catch alignment issues early. - 8
Cure and maintain
Allow full cure time in a ventilated area before heavy use. Clean cabinet surfaces with a non-abrasive cleaner to preserve finish.
Tip: Avoid harsh solvents during initial cure period.
Your Questions Answered
Is sherwin williams cabinets paint suitable for all cabinet surfaces?
Sherwin Williams cabinet paints are designed for a range of cabinetry surfaces, but always check the product data sheet for compatibility with your material. For bare wood, stained surfaces, or previously painted surfaces, some prep steps and primers may be required. Always test a small area first to confirm adhesion and finish.
Sherwin Williams cabinet paints work on many cabinet surfaces, but check compatibility and test a small area first.
Do I need a primer when using sherwin williams cabinets paint?
Primers are often recommended when changing color dramatically or when painting over bare wood or stained surfaces. A bonding primer helps improve adhesion and block stains, ensuring a smooth finish with sherwin williams cabinets paint.
A bonding primer is usually a good idea before applying sherwin williams cabinets paint, especially for new or stained surfaces.
How many coats should I apply for a durable finish?
Most cabinet projects benefit from two thin coats plus a possible third for high-contrast colors or problematic surfaces. Allow adequate dry time between coats and follow the product’s directions for best results with sherwin williams cabinets paint.
Two coats are typical, with a possible third for tough color changes; don’t rush the drying between coats.
What about drying and curing times?
Drying times depend on temperature, humidity, and ventilation. Plan for several hours between coats and a full cure of 24 hours or more in a dry, ventilated space when using sherwin williams cabinets paint.
Expect a multi-hour drying window between coats and at least a day for full curing in a ventilated area.
Can I paint cabinets without removing doors?
Painting with doors on can be done, but it’s easier and results in cleaner edges if you remove doors and drawers. Removing hardware helps achieve full coverage and reduces the risk of drips on other surfaces.
You can, but removing doors makes for a neater, faster project with fewer mistakes.
What safety precautions should I take?
Work in a well-ventilated area, wear protective gear, and follow all product safety data. Use masking tape to protect adjacent surfaces and clean up spills promptly to prevent slips.
Ventilate the space and wear a mask; masking off nearby surfaces helps keep the finish clean.
Watch Video
Quick Summary
- Plan prep and drying time before you start
- Use thin coats for durability and even color
- Prime problematic surfaces for best adhesion
- Maintain ventilation to speed drying and reduce fumes
- Reassemble carefully after final coat for alignment