Paint Like Wood: Master Faux Wood Finishes
Learn how to paint like wood with realistic faux wood finishes. Step-by-step techniques, materials, and pro tips for cabinets, furniture, and walls. Includes color layering, grain tools, glazing, and finish sealing.

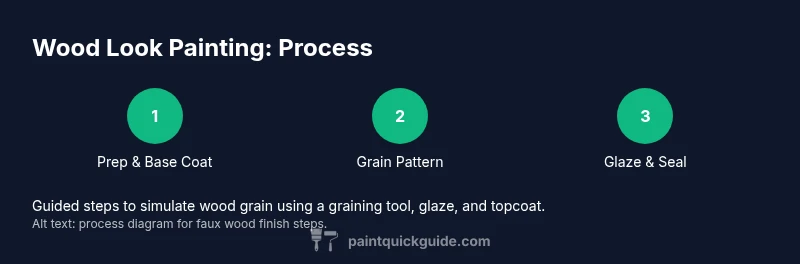
You can convincingly paint like wood by applying faux wood finishes that mimic grain, color, and texture. Start with a strong base coat, then use a wood-graining tool or comb to create grain patterns, followed by glazes and a protective topcoat. Practice on scrap pieces to refine your technique before tackling furniture or cabinets.
Understanding Faux Wood Finishes
According to PaintQuickGuide, painting like wood—faux wood finishes—aim to imitate grain, color, and texture without cutting real wood. The goal is a convincing grain pattern, depth, and a protective coating that stands up to daily use. The process combines color layering, strategic glazing, and careful drying times. By mastering the basics, you can transform plywood, MDF, or existing painted surfaces into furniture-grade wood-look pieces. In practice, most projects hinge on choosing a base color, building the grain with a tool or brush, and applying glazes in the right order to control depth and brightness. This foundation helps you decide whether you want a pale ash, a warm oak, or a rich mahogany look and sets expectations for drying times, texture, and finish durability. A great faux wood finish balances realism with practicality, so plan around your project’s location, lighting, and use case.
Color Theory for Realistic Wood Grains
Realistic wood grain starts with color selection. Wood tones vary from warm amber to cool gray, and the grain appears differently under various lights. For a believable wood look, artists often mix two or three hues: a base hue, a midtone, and a glaze shade that highlights grain lines. The PaintQuickGuide analysis shows that depth comes from layering, not from a single color, and that glazing can simulate translucent sapwood or darker knots. When choosing colors, pair a lighter base with a slightly darker glaze to mimic natural wood’s subtle variations. Keep undertones aligned with the species you imitate—orange-gold for oak, cooler browns for maple, or deep reddish browns for cherry. Test swatches under your room’s lighting before committing to the project to prevent surprises once you apply the glaze.
Tools and Materials for Painting Like Wood
A successful faux wood finish relies on the right tools and materials. Essential items include a bonding primer for your surface, a base coat in the wood shade you’re emulating, a wood-graining tool or comb, angled brushes for fine lines, glazing mediums or gel-based glazes, drop cloths, painter’s tape, a clean tack cloth, and a clear topcoat (preferably water-based polyurethane for interiors). Optional tools include a natural sponge for texture, a spray bottle to mist glaze for smoother transitions, and a fine sanding block to refine grain edges between steps. Proper brushes save time by delivering consistent pressure, while a good glaze with open time helps you manipulate the grain without rushing. Always match your topcoat to your base paint and surface; oil-based products require ventilation and proper disposal.
Surface Preparation for a Durable Wood-Look Finish
Preparation determines realism and durability. Start by cleaning the surface to remove dust, oils, and residues. If the surface is glossy, sand lightly to create a mechanical key for bonding. For MDF or existing painted surfaces, apply a bonding primer to improve adhesion, then let it dry completely before base-coating. If the project is outdoors or exposed to moisture, choose a primer and topcoat designed for high wear areas. Finally, wipe away any dust with a tack cloth before applying the base color. Skipping prep leads to grain inconsistencies or flaking later, so invest time here.
Wood Grain Techniques: Tools, Strokes, and Glazes
There isn’t a single method for wood grain; most pros blend several techniques to achieve realism. Use a wood-graining tool or comb to drag grain lines while the base coat is still tacky. Dragging direction, pressure, and angle define grain width and texture. You can also lift color with a dry brush or light rag to create subtle variations. Glazing adds depth; apply glaze over the grain while it’s damp, then wick away excess to reveal highlights and shadows. For knots or grain knots, interrupt the flow with darker strokes and tiny irregularities. Practice on scrap panels to tune your technique before committing to furniture, cabinetry, or wall surfaces.
Layering, Texture, and Realism: Glaze, Wet-on-Wet, and Dry Brushing
Realistic wood effects rely on controlled layering and texture. Start with a base coat, then apply glaze in thin layers to simulate translucency. Work while the glaze remains tacky—this allows you to blend edges and create micro-variations similar to natural wood. A light dry-brush pass with a slightly lighter or darker hue can mimic highlight rays and sunlit grain. Always step back to view the piece from different angles; grain looks different under varying light, so consistency across surfaces matters for a believable interior or cabinet finish.
Common Mistakes and How to Fix Them
Common issues include grain lines that appear too uniform, glaze that is too thick, and finish layers that peel. If grain looks flat, rework with a fresh glaze layer and re-drag the grain tool to re-establish depth. If glaze edges blur, wipe toward dry sections with a clean rag and reapply with lighter pressure. If you overshoot color, blend with a micro-sponge or add a touch of base coat to reestablish tone. Patience is key; allow adequate drying times between stages, especially when you’re working with glaze and topcoat to avoid muddyness or blotching.
Maintenance and Care of Wood-Look Surfaces
Wood-look finishes require regular care to maintain depth and luster. Dust with a microfiber cloth and avoid abrasive cleaners that can dull the glaze. Use a damp cloth for routine cleaning and dry immediately to prevent moisture from creeping into the grain. If scratches or wear appear, you can touch up limited areas with small strokes of the base color, reapply glaze to the affected region, and reseal. With proper cleaning and monthly checks, wood-look finishes can last for years, especially on cabinets and trim.
Final Considerations and Pro Tips from PaintQuickGuide
As you wrap up, plan on testing your technique on scrap pieces that resemble your final substrate. The right combination of base color, grain tool, glaze, and topcoat will determine how convincing the grain looks in real life. The PaintQuickGuide team emphasizes patience, consistent lighting checks during the project, and using water-based products for easier cleanup and safer odor levels. Always ventilate the workspace and wear appropriate PPE when using finishes.
Tools & Materials
- Primer suitable for your surface(Bonding primer for slick surfaces or MDF)
- Base coat paint (color of the wood you imitate)(Choose a lighter shade as the ground color)
- Wood graining tool or comb(Width 1–2 inches works well for most projects)
- Angled brushes (1/2 inch and 1 inch)(Use synthetic bristles for acrylics)
- Faux finishing glaze or glaze medium(Gel-based glaze provides longer open time)
- Topcoat (water-based polyurethane)(Choose satin or matte for a wood-like finish)
- Drop cloths and painter's tape(Protect edges and floors during the project)
- Tack cloth and lint-free rags(Dust-free surfaces before glazing)
- Solvent or water for brush cleaning(Follow product directions for disposal)
Steps
Estimated time: 3-6 hours total, plus drying time between layers
- 1
Prepare the surface
Clean the surface, sand to a smooth finish, and remove dust. A properly prepped surface ensures the base color adheres evenly and grain lines appear crisp.
Tip: Wipe with a tack cloth between sanding passes to capture fine dust. - 2
Apply base coat
Stir and apply the base color evenly, using long, smooth strokes. Allow to dry fully as recommended by the paint manufacturer.
Tip: Keep a small damp brush clean to feather edges if needed. - 3
Lay down grain pattern
Mientras the base is tacky, use the wood-graining tool or comb to pull grain lines. vary pressure and direction to mimic natural grain flow.
Tip: Practice on scrap first to dial in line width and rhythm. - 4
Apply glaze for depth
Brush glaze over the grain while it’s still workable; wipe excess to reveal highlights and shadows. Repeat with additional glaze layers as needed.
Tip: Work in small sections to maintain open time. - 5
Add highlights and color variation
Dip a dry brush into a lighter hue and softly drag it across grain edges to simulate sunlit streaks. Add subtle knots or darker grain pockets for realism.
Tip: Keep strokes random—wood grain isn’t perfectly uniform. - 6
Seal the finish
Apply a clear topcoat once the glaze has dried completely. A light mist between coats can help reduce brush marks, and a final thorough topcoat protects the look.
Tip: Use thin, even coats and allow ample drying time.
Your Questions Answered
Which surfaces can be made to look like wood with paint?
Most smooth surfaces like wood, plywood, MDF, and previously painted panels can be transformed with faux wood finishes. The key is proper prep, compatible primer, and compatible topcoat. Some plastics or metals may require specialized primers.
Most smooth surfaces can be made to look like wood with the right primer and topcoat; prep matters.
Do I need a wood-graining tool to achieve realistic grain?
A wood-graining tool or comb is highly recommended for authentic grain lines, but you can simulate grain with a stiff-bristle brush or feathering technique in a pinch. Consistent pressure and direction are crucial for realism.
A grain tool helps, but you can improvise with brushes while keeping the strokes regular.
How long does a wood-look project take to dry between steps?
Drying times vary by product and environment. Always follow the label; plan for longer waits in cooler, humid spaces to prevent smudging or uneven glaze.
Dry times depend on the product and air conditions; follow the label.
Can I paint over existing paint to create a wood look?
Yes, with proper surface prep and a bonding primer. Scuff-sand glossy finishes first to create a bonding surface, then apply your base and glaze as described.
You can, with prep and primer to help the new finish adhere.
How durable is a wood-look finish on high-traffic surfaces?
Durability depends on primer choice and the topcoat. For cabinets and trim, a high-quality water-based polyurethane offers good wear resistance with proper curing.
Durability hinges on primer and topcoat—choose a strong polyurethane and cure fully.
What are common fixes for a grain that looks off?
If grain looks odd, you can lightly re-wet and re-drag the grain tool, then reapply glaze in small sections. Practice makes the grain patterns more natural over time.
If grain looks off, rework the area with careful glazing and re-drag the grain.
Watch Video
Quick Summary
- Choose the base color that matches your target wood species.
- Use glazing to create depth and subtle translucency.
- Practice grain patterns on scrap before final application.
- Seal with a compatible topcoat to protect the finish.