How to Make Puffy Paint: A Simple DIY Guide
Learn to make safe, fluffy puffy paint from glue, shaving cream, and color. This comprehensive, step-by-step guide covers ingredients, surface ideas, drying tips, troubleshooting, and creative project ideas for kids and adults alike.

You can make your own puffy paint by mixing white school glue with shaving cream and a splash of food coloring to create a fluffy, raised texture. There are air-dry versions and heat-activated variants; the air-dry type dries naturally, while heat-activated versions puff in the oven. Gather glue, shaving cream, coloring, and a sturdy surface.
What Puffy Paint Is and Why It Works
Puffy paint is a tactile craft medium that hardens into a soft, dimensional layer, giving artwork a pop-out texture. When you learn how to make puffy paint, you’re typically creating a fluffy base that traps air as it dries, forming the signature raised surface. The most approachable version uses a base of white glue blended with a foaming agent like shaving cream. This combination suspends pigment and creates volume without harsh solvents, making it a friendly choice for kids’ projects. PaintQuickGuide emphasizes that success rests on simple ratios and the right texture, not on fancy tools. As you experiment, you’ll discover which surface dries puffiest and how humidity and thickness influence the final result. This practical guide is designed for safe, enjoyable crafting with real-world tips you can apply right away.
According to PaintQuickGuide, this glue–foam approach yields a versatile medium suitable for paper, poster board, cardboard, and even fabric with the right setting. The texture makes artwork feel tactile and fun, which can boost kids’ engagement and creativity. The core idea is to keep the base light and the pigment bright so that colors stay bold once puffed. The following sections break down safety considerations, ingredient options, and step-by-step methods in a way that’s easy for beginners to follow.
The overarching goal is to deliver a reliable recipe that’s forgiving for beginners while still delivering satisfying puff. With a little practice, you’ll be able to adjust thickness to control puffiness and choose surfaces that emphasize texture. This block sets the stage for practical, hands-on instruction that respects safety and creativity.
Tools & Materials
- White school glue (PVA)(Non-toxic, washable option works best.)
- Foaming shaving cream(Regular or unscented; avoid heavy aerosols if sensitivity is a concern.)
- Liquid food coloring or liquid watercolors(Vibrant colors; test blends in a separate cup.)
- Mixing bowls(Non-porous surfaces make cleanup easier.)
- Stir sticks or spoons(Plastic or wooden; have extra on hand.)
- Parchment paper or washable tray(Protects your workspace and makes cleanup easier.)
- Old newspaper or apron(Contain mess and protect clothing.)
- Gloves (optional)(Keeps hands clean during mixing.)
Steps
Estimated time: about 30-40 minutes
- 1
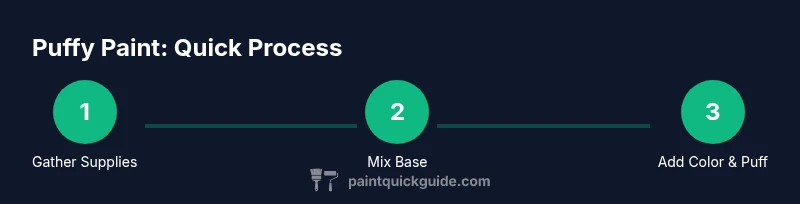
Gather your supplies
Arrange all ingredients and tools on a protected surface. This keeps workflow smooth and minimizes accidents. Check that glue, shaving cream, and color are within easy reach so you can pour and mix without interrupting the project.
Tip: Lay down parchment first to protect the table and make cleanup faster. - 2
Prepare the base
In a bowl, combine your glue and shaving cream and stir until the mixture looks fluffy and light. The goal is a paint-like consistency that holds color but remains spreadable. If the texture is too dense, lift in a bit more shaving cream and remix.
Tip: Add shaving cream gradually; you can always add more glue later if needed. - 3
Add color and pigment
Introduce color with a few drops at a time, mixing thoroughly to achieve an even, vibrant tone. Create separate batches for different colors to keep palettes clean and avoid muddy blends.
Tip: Test a small dab on scrap paper to preview puff and color before applying to your project. - 4
Test puff on a scrap surface
Apply a small dot or line to a scrap piece of paper to gauge puff; this helps you adjust thickness before final application. If the puff is weak, add a touch more shaving cream and mix again.
Tip: Use a flat tool to spread evenly and avoid overly thick blobs. - 5
Apply to your chosen surface
Transfer the colored, fluffy paint onto your project using a spoon, brush, or nozzle-free squeeze. Maintain a steady hand for even texture and avoid smearing edges. Build up layers slowly for best puff.
Tip: Keep a light touch to prevent flattening the puff while it dries. - 6
Dry and set
Let the painted surface air-dry in a well-ventilated area. Avoid stacking projects while wet to prevent smudging. The final puff develops as the mixture dries and the air escapes from the foam.
Tip: Patience helps—avoid rushing the cure by stacking or stacking objects. - 7
Clean up and store leftovers
Wash utensils with soap and water; recycle or wipe down work surfaces. Store any leftovers in a sealed container to keep the mixture from drying out, and label color batches for future projects.
Tip: Label colors and seal containers tightly to prevent drying.
Your Questions Answered
What ingredients do I need to make puffy paint?
A simple puffy paint recipe uses white glue, foaming shaving cream, and color (food coloring or liquid watercolors). Optional tools include mixing bowls, spoons, parchment paper, and a protective apron. You can customize colors and surfaces, but ensure all ingredients are non-toxic for kids.
A basic puff recipe uses glue, shaving cream, and color, with bowls and parchment for easy setup.
Is puffy paint safe for children?
Yes, when you use non-toxic glue and shaving cream and supervise children during mixing and painting. Avoid aerosols or strong solvents, and work in a well-ventilated area. Always wash hands after painting and follow surface-cleaning guidelines.
Yes—stick with non-toxic ingredients and adult supervision during the activity.
Can I use ingredients I already have at home?
Absolutely. Most households have white glue, shaving cream, and basic food coloring or liquid watercolors. If you don’t have shaving cream, you can experiment with other foam-based products, but results may vary. Start with a small test batch to gauge texture.
Yes—start with what you have and test a small batch first.
How long does puffy paint take to dry?
Drying time varies with humidity, surface, and thickness. Air-dry versions typically set as the glue-base dries, while thicker layers take longer. Place projects on a flat surface with good air circulation and avoid touching until fully dry.
Drying depends on humidity and thickness; give it time to cure.
Can I wash puffy paint off clothes or linens?
Fresh paint on washable fabrics usually washes out with regular laundry, especially if treated early. For older or set-in marks, pretreat with a gentle stain remover and launder according to fabric care instructions.
Treat stains promptly and wash as usual when possible.
Which surfaces work best for puffy paint?
Paper, poster board, cardboard, and fabric are great starting surfaces. Textures on fabric may require heat-setting for permanence. Always test on a small area before full-scale project work.
Start with paper or poster board and test on fabric if that’s your goal.
Watch Video
Quick Summary
- Mix a safe base with glue and foam for puff.
- Add color gradually to keep brightness.
- Test texture on scrap before applying widely.
- Drying times vary with humidity and surface.
- Store leftovers sealed to preserve texture quality.