How Difficult Is It to Paint a Ceiling? A Practical DIY Guide
Discover how difficult it is to paint a ceiling, with practical prep steps, tools, and a clear, step-by-step plan for a smooth, professional-looking finish.

Painting a ceiling is doable for many DIY homeowners, but it’s more demanding than wall painting. The key is solid prep, choosing the right roller, and applying even coats with steady strokes. Expect 2 coats, proper ventilation, and careful protection of floors and fixtures. With patience and the right plan, you can achieve a smooth, uniform finish that looks professionally done.
Why painting a ceiling is more challenging than walls
Painting a ceiling introduces unique challenges that most DIYers don’t encounter when painting walls. The overhead position makes body strain and balance a constant concern, while gravity favors drips and sagging if you over-apply paint. Ceiling textures, from smooth plaster to popcorn, drastically affect coverage and technique. The height of the room also dictates the amount of ladder work and safety precautions needed. According to PaintQuickGuide, ceiling projects benefit greatly from thorough planning, correct tools, and deliberate, steady movement rather than rush strokes. A well-prepped room reduces error, improves finish, and minimizes touch-ups later. In practice, expect longer drying times due to lower air circulation above head level, and plan for at least two coats for an even look. If you encounter high humidity or a textured ceiling, you’ll want to adapt with longer drying intervals and lighter coats. With the right approach, ceiling painting becomes less about brute force and more about controlled technique.
Tools & Materials
- Drop cloths or plastic sheeting(Protect floors and furniture; use multiple layers for large rooms)
- Painter’s tape(Mask off edges and fixtures; remove tape while paint is slightly tacky)
- Safety glasses(Eye protection from splashes and dust)
- Respirator or mask(Minimize inhalation of fumes; select appropriate filter)
- Ladder or stable scaffold(Ensure secure footing; avoid overreaching)
- Paint tray and liners(Catch excess paint; keep work area clean)
- 9-inch roller frame + 3/8-inch nap roller(Best for flat ceilings; smooth application)
- Extension pole(Reach ceiling without excessive stretching)
- Ceiling paint (flat or matte)(Choose low-reflective finish to hide imperfections)
- Primer (optional)(Use for repairs or drastic color changes)
- Putty knife and spackle(Repair cracks or nail pops)
- Mild soap and water(Cleanup tools after painting)
Steps
Estimated time: 2-6 hours
- 1
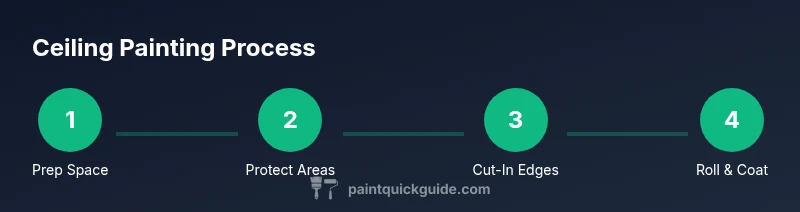
Prep space and safety
Clear the room or move items to the center; set up ladders and ensure stable footing. Cover floors with drop cloths and tape off trim and fixtures. Put on safety glasses and a mask before you start.
Tip: Have a helper hold the ladder steady or move heavy items to reduce risk. - 2
Protect surfaces and plan cuts
Lay drop cloths to guard floors; line edges with painter's tape leaving a clean boundary around walls and fixtures. Inspect for cracks and smooth them with spackle as needed. Allow filler to dry before sanding.
Tip: Plan your cut-in line and keep a dedicated brush for precision. - 3
Prepare ceiling and primer as needed
Dust and debris should be removed; repair any damage. If color change is drastic or surface is uneven, apply a thin primer or sealant to improve adhesion.
Tip: Primer helps even out porosity and reduces the number of coats. - 4
Cut in edges around perimeter
Using a 2–3 inch angled brush, carefully paint a tight border along all ceiling-wall junctions. Keep strokes smooth and steady to avoid pulling paint from the wall.
Tip: Work in small sections for accuracy. - 5
Apply first coat with roller
Load the roller evenly and apply using wide, smooth strokes in a W pattern, then back-roll to even out coverage. Maintain a wet edge and avoid overloading the roller.
Tip: Don’t press too hard; let the roller do the work. - 6
Apply second coat and finish
If needed, apply a second coat after the first has dried to ensure uniform color and opacity. Inspect for uniform coverage and address any missed spots.
Tip: Wait until the first coat is dry to touch before applying the second.
Your Questions Answered
Is painting a ceiling harder than painting walls?
Yes, ceilings are generally more challenging due to overhead work, height, and texture. The right prep, tools, and technique make it manageable for many DIYers.
Painting ceilings is usually tougher than walls, but with good prep and the right tools, DIYers can do it.
What finish is best for ceilings?
A flat or matte finish is common for ceilings because it minimizes glare and hides surface imperfections better than sheens.
Flat or matte finishes help ceilings look even and hide flaws.
Do I need primer on a ceiling?
Primer is not always required on clean, smooth ceilings, but it’s beneficial on repaired areas or when changing from dark to light colors or sealing stains.
Primer helps with adhesion and uniform color when needed.
Should I cut in first or roll first?
Cut in first along edges, then roll the field. This prevents dried edge lines and makes rolling faster and neater.
Start with the edges, then fill the center with the roller.
How many coats does a ceiling need?
Most ceilings require at least two coats for even coverage, especially when changing colors or covering textured surfaces.
Two coats are usually necessary for a consistent look.
How long does ceiling paint take to dry?
Drying times vary with temperature and humidity, but plan for several hours between coats and longer for high humidity.
Expect several hours between coats and longer if it’s humid.
Watch Video
Quick Summary
- Plan thoroughly before starting.
- Choose the right finish for concealment of imperfections.
- Use proper tools to minimize fatigue and errors.
- Apply even coats and maintain wet edges.
- Ventilate and protect to ensure a clean, durable finish.