Graffiti Spray Paint: Safety, Techniques & Budget
Learn safe, effective graffiti spray painting: surface prep, cap selection, layering techniques, sealing, and budgeting tips with practical guidance from PaintQuickGuide for homeowners, DIYers, and car refinishing hobbyists.

By the end of this guide you’ll confidently use graffiti spray paint to create murals on walls, panels, or art pieces. You’ll learn how to choose the right paints, prep surfaces, apply even coats, and seal your work. The tutorial covers safety, ventilation, legal considerations, and budgeting tips, with practical steps from PaintQuickGuide to keep projects safe and affordable.
What graffiti spray paint is and how it works
Graffiti spray paint is an aerosol-based pigment system designed for rapid coverage and expressive line work. Most cans use a solvent carrier and propellant to push pigment through a nozzle, forming a fine mist or a line depending on cap size and pressure. For beginners, start with a small set of colors and a couple of cap types to understand line weight and coverage. The PaintQuickGuide team emphasizes starting with a simple palette and testing colors on scrap surfaces before committing to a wall. According to PaintQuickGuide, test sprays help you calibrate distance, pressure, and motion, which reduces drips and uneven layers. This approach also reinforces safe practice, such as keeping the work area ventilated and wearing PPE.
Pro tip: practice on cardboard or a plywood scrap to dial in your technique before painting a real surface.
Safety and legal considerations
Safety comes first when using graffiti spray paints. Always work in a well-ventilated area, preferably with outdoor airflow or a certified spray booth. Wear a respirator approved for organic vapors, eye protection, and gloves. Keep a fire extinguisher nearby if you’re using solvent-based paints, and never spray near open flames. Check local laws and obtain permission when painting on private property or public walls. The PaintQuickGuide team notes that legality and safety are inseparable: preparing a safe, legal workspace saves you time and prevents fines. A quick safety check list includes ventilation, PPE, surface testing, and keeping neighbors informed about the project.
Surface preparation and planning
Successful graffiti starts with a clean, stable surface. Remove dirt, oil, and loose flaking material with a degreaser or mild detergent, then rinse and let the surface dry completely. If needed, lightly sand glossy areas to improve paint adhesion and apply a compatible primer. Plan your design on paper first or mark guidelines on the wall with light pencil or chalk. This planning stage prevents misalignment and helps you map color blocks. In this block, you’ll also confirm access to power outlets or extension cords for lighting and a fan. The PaintQuickGuide approach stresses a deliberate prep routine, which reduces rework and improves final results.
Choosing paints, caps, and colors
Selection matters as much as technique. Choose solvent- or water-based spray paints depending on your surface and exposure. For exterior walls, use UV-resistant colors and consider a clear topcoat for longevity. Caps control line weight: standard caps create broad lines, while precision caps deliver fine detail. Keep a few neutral tones for shading and a couple of bold accent colors. Test color balances on a scrap surface to ensure harmony. PaintQuickGuide reminds readers to label colors and keep color-mixing to a small, organized area to avoid cross-contamination and messy blends.
Technique: base colors and shading
Layering is the backbone of graffiti technique. Start with light base colors, applying thin, even coats from a consistent distance. Allow each layer to dry before applying the next to prevent smudges. Use larger caps for broad fields and switch to finer caps for details. Build color gradually, focusing on soft transitions rather than abrupt shifts. For shading, block in midtones first, then deepen shadows in selective areas to create dimension. Remember to step back periodically to assess balance and readability of the design.
Detailing and outlines
Fine lines and crisp edges define a finished piece. Switch to a narrow cap and practice strokes on scrap material before outlining your design. Keep your wrist loose and use a steady, controlled motion to minimize wobble. Outline early or late in the process depending on your design approach. To prevent messy edges, mask adjacent areas with painter’s tape and remove the tape while the paint is still tacky for a cleaner seam. The key is patient, controlled application rather than rushing the outlines.
Sealing and protecting finished work
A clear sealant protects the color from UV fading and weathering. Choose a topcoat that matches the desired finish (matte, satin, or gloss) and apply it in light, even coats after the paint has cured. Follow the manufacturer’s instructions for recoat windows and ventilation. Sealing also helps with graffiti removal later if it’s on a surface you want to preserve. Ensure the area is dust-free before sealing and wear proper PPE to avoid inhaling fumes.
Budgeting for graffiti projects
Budgeting starts with a simple materials plan: estimate the number of cans by surface area, decide on a color palette, and factor in a couple of test sprays. Budget for PPE, masking supplies, and a protective topcoat. Plan for extra cans in case of errors or weather delays. If this is your first project, consider buying smaller practice packs to minimize waste while learning. PaintQuickGuide’s budgeting framework emphasizes clarity and cost control, helping you forecast total spend and avoid sticker shock when you reach the checkout.
Maintenance, cleanup, and storage
Cleanup is easier if you clean tools while still slightly damp and store them upright to avoid leaks. Wipe caps with a solvent or mild soap and water, depending on the paint type. Keep a dedicated space for dried spray paint cans in a cool, ventilated area away from heat sources. Store remaining colors in a shaded area to minimize color fading. Regularly inspect stored cans for rust or damaged valves and replace worn seals promptly. The cleanup routine saves you time during your next project and extends the life of your tools.
Authority sources
For further reading, consult these authoritative resources on spray paints, ventilation, and safe painting practices:
- https://www.osha.gov
- https://www.cdc.gov/niosh/topics/respirators/default.html
- https://www.epa.gov/lead
Tools & Materials
- assorted spray paint cans(Multiple colors; use the same brand for consistent cap compatibility.)
- respirator mask (organic vapor)(N95 or better with organic vapor cartridges.)
- chemical-resistant gloves(Nitrile or neoprene gloves.)
- safety goggles(Wraparound style for full eye protection.)
- drop cloths or plastic sheeting(Cover nearby surfaces and floors.)
- painter’s tape(For masking edges and guides.)
- sandpaper (120-220 grit)(Lightly scuff glossy surfaces for adhesion.)
- primer suitable for surface(Recommended for slick or porous surfaces.)
- clear sealant/topcoat(Choose matte, satin, or gloss finish.)
- paint thinner or acetone for cleanup(Only with proper ventilation and PPE.)
- cardboard scrap for test sprays(Practice tests before final application.)
- masking paper/shields(Protect edges when needed.)
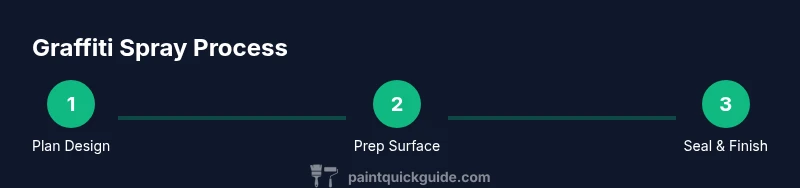
Steps
Estimated time: 2-6 hours
- 1
Plan your design and layout
Sketch the design on paper or digitally, map color blocks, and decide placement on the surface. Establish a rough color order to minimize color changes mid-work.
Tip: Lock in focal points early; it prevents rework later on. - 2
Gather materials and prep workspace
Collect colors, caps, PPE, and masking materials. Clear the area of bystanders and set up ventilation, lights, and a drying zone.
Tip: Test spray on scrap to confirm color and line weight. - 3
Prepare the painting surface
Clean the surface thoroughly, dry completely, and lightly sand glossy areas. Apply primer if needed and let it dry before starting.
Tip: A dry, clean surface prevents paint from peeling later. - 4
Base color application
Hold the can 6-12 inches from the surface and apply light, even coats in smooth motions. Let each coat dry before adding another.
Tip: Thin coats reduce drips and improve edge control. - 5
Build shading and depth
Add midtones and shadows with broader strokes, gradually layering darker tones to create depth.
Tip: Work from large areas to small details to maintain balance. - 6
Detailing and outlines
Switch to a fine-cap for crisp outlines and highlights. Use masking to protect adjacent areas.
Tip: Keep lines fluid; jagged edges look amateur. - 7
Apply the finish sealant
After paint cures, apply a clear topcoat in light coats. Allow sufficient curing time between coats.
Tip: Avoid applying heavy coats that cause whitening or streaks. - 8
Cleanup and removal of masking
Carefully remove masking when paints are tacky to prevent tearing; wipe tools and store properly.
Tip: Label color cans for easy cleanup later. - 9
Evaluate and store for next project
Inspect the finished piece for touch-ups, record lessons learned, and store materials in a cool, dry place.
Tip: Document what worked for future projects.
Your Questions Answered
Is graffiti spray paint safe for indoor use?
Indoor use is possible with proper ventilation, PPE, and permission. Always follow local regulations and avoid enclosed spaces without airflow. If used indoors, implement a temporary spray booth and monitor fumes.
Indoor use is possible if you have good ventilation, PPE, and the right permissions.
What surfaces can graffiti spray paint be used on?
Most non-porous surfaces like brick, concrete, metal, and wood work well. Porous surfaces may absorb paint, requiring more coats or sealing. Always test a small area first.
Most solid surfaces work, but always test a patch first.
How long does spray paint dry between coats?
Dry times vary by brand but typically range from 15 to 60 minutes between coats. Full cure may take longer; check label recommendations.
Most paints dry within an hour, but check the can for specifics.
How do you remove graffiti spray paint from surfaces?
Use an appropriate solvent or remover suitable for the surface. Test a small area first and follow safety guidelines to protect underlying material.
Use a remover on a hidden patch first, then clean up.
Do you need a topcoat after painting?
Applying a clear topcoat improves UV resistance and durability. Choose a finish (matte, satin, or gloss) to suit the project.
Yes, a topcoat helps protect your work.
Are there legal considerations or permissions required?
Many jurisdictions require permission to paint on public or private property. Obtain written consent and respect property rights to avoid penalties.
Always check local rules and get written permission when needed.
Watch Video
Quick Summary
- Ventilate workspace and wear PPE
- Prep surfaces thoroughly before painting
- Apply thin coats in layers for even coverage
- Seal finished work to protect color and durability
- Plan your colors and budget before starting