Face Paint Easy: Quick Guide for Beginners
Learn how to do face painting the easy way with safe, kid-friendly paints. This step-by-step guide covers materials, techniques, safety, and removal tips for confident, mess-free designs.

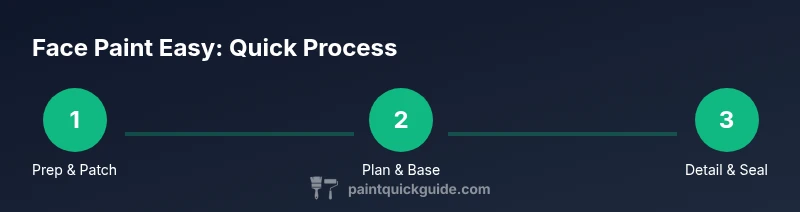
In this guide you will achieve simple, eye-catching face paint easy designs using water-based paints. You’ll learn safe materials, skin prep, planning designs, a clear step-by-step method, and tips to remove safely afterward. The goal is approachable, durable designs that kids love and parents trust.
Why face paint easy design matters
Face painting should be fun, quick, and safe for every child. When you prioritize simplicity, you reduce set-up time, skin irritation risk, and design errors. A face paint easy approach focuses on clean lines, bold color blocks, and recognizable shapes (stars, animals, simple masks) that read clearly from a distance. For DIY events at home or school, this mindset helps you create multiple faces with minimal fatigue. PaintQuickGuide analyses show that beginner-friendly designs reduce the rate of smudging and increase kid enjoyment, making your next event smoother and more memorable. Remember: practice small, repeatable patterns and build confidence before attempting complex characters. This keeps the painting experience joyful for both you and the young artist.
Safe materials set the foundation
Choosing skin-safe, water-based paints is the cornerstone of a face paint easy project. Read ingredient lists for skin allergy warnings and avoid products that list irritants like fragrance or heavy binders. Always perform a patch test on the forearm or behind the ear 24 hours before the event. Use clean brushes and fresh sponges to minimize contamination, and keep a separate set of tools for face painting only. This reduces cross-contact with everyday cosmetics and helps you maintain a professional, hygienic workspace. A calm, well-lit station also helps you apply paint evenly and reduces the chance of mistakes.
Design planning and color choices
Before you touch the skin, sketch a quick plan for each design. For beginners, choose 2–3 bold colors that contrast well and match the event theme. Planning ensures face paint easy outcomes: readable from a distance, quick to apply, and easy to remove. Use stencils sparingly for symmetry and precision, especially on younger kids who may twitch during application. If you opt for freehand, start with a simple silhouette (a butterfly, a rainbow arc, a tiger stripe) and layer color so edges stay crisp. Remember to leave eyes and mouth area clear unless you’re confident with delicate lines.
Base layers and color blending techniques
Starting with a thin base layer helps all subsequent colors pop and reduces caking. Apply a light primer or a very pale skin-tone base to even out the canvas, then block in the main color fields. For smooth blending, use a damp sponge in a rolling motion and avoid over-wetting the skin. Clean edges are easiest when you work from the center outward and define shapes with a fine brush once the base dries. Patience matters: allow 30–60 seconds for small sections to dry before adding secondary colors. This keeps the paint layer thin and the design durable for several hours.
Detailing: eyes, cheeks, and mouth
Details give character but are also where the design can lose clarity. Use fine brushes to outline features with black or a darker shade and add white highlights for brightness. Cheek accents should be bold and symmetrical, while eye shapes can be simplified so they read well from a distance. If a child blinks or moves, let the paint dry slightly and then finish edges with a steady hand. Practice steady strokes on a curved surface and use short, confident motions to avoid wobbly lines. This is where the face paint easy approach pays off: clean lines that still feel playful.
Finishing, sealing, and removal
A light setting spray or translucent powder can help designs last longer, especially in warm environments. The key is to avoid heavy sealants that feel sticky or irritate the skin. At the end of the session, remove makeup with gentle wipes or mild cleanser, guided by the product’s instructions. Always moisturize after removal to avoid dryness. Proper removal also preserves the child’s skin for future designs. With good practices, your face paint easy method will be safe, efficient, and repeatable for every event.
Common mistakes and how to fix them
Mistakes happen: color bleed, smudging, or uneven edges. If a line looks too thick, clean the edge with a tiny brush and re-outline; avoiding overloading brushes prevents this. If colors blend undesirably, go back to the base layer and re-block the shapes. Work in stages, not all at once, to maintain control. Always wait for a color to dry before applying a second layer to prevent cracking or mixing. By anticipating these issues, you keep your designs crisp and kid-friendly.
Creative, kid-friendly design ideas
Think shapes and characters kids recognize: a butterfly, superhero mask, panda face, or rainbow cheeks. Use bold, high-contrast palettes and keep designs within defined areas like cheeks, foreheads, or the nose bridge. For group events, create a simple “design passport” with 3-4 options and let kids pick their favorite. Keep designs scalable: large blocks for younger kids, smaller, denser patterns for older kids. The goal of face paint easy concepts is to maximize smile-per-minute while maintaining safety and comfort.
Maintenance, storage, and cleanup
Store paints in a cool, dry place away from direct sunlight and water exposure to extend shelf life. Clean brushes and sponges between sessions to prevent color transfer and bacteria buildup. Keep makeup remover wipes handy for quick cleanup and have a spare batch of towels for accidental spills. Regularly inspect products for expiration dates and discard any that have separated or smell odd. Proper maintenance ensures your face paint easy setup remains reliable for future events.
Tools & Materials
- Water-based face paints (kid-friendly)(Choose hypoallergenic formulas; avoid professional-grade paints for skin safety)
- Assorted brushes (fine liner, flat shader)(Sizes 0, 2, and 4 recommended)
- CBD cosmetic brush cleaner or mild soap(Clean after each color to avoid cross-contamination)
- Sponges (diamond shape, round mini)(Use a fresh sponge per person or color group)
- Water cups (for rinsing)(Label with colors to avoid mixing)
- Stencils (stars, hearts, animals)(Helpful for symmetry and quick designs)
- Baby wipes or skin-friendly wipes(For quick cleanups and safety checks)
- Setting powder or light spray(Helps pigments stay through playtime)
- Makeup remover or mild cleanser(For easy removal after the event)
- Glitter (cosmetic-grade, optional)(Only if skin-safe and age-appropriate)
Steps
Estimated time: 60-90 minutes
- 1
Prepare skin and workspace
Cleanse the face with a gentle wipe. Set up a calm, well-lit station with towels, water, and tools within easy reach. Sanitize hands and keep the area free of food residues to prevent accidental contamination. Waiting time is not required here, but organize your materials to speed future steps.
Tip: Do a quick patch test on the inner wrist to ensure no irritation. - 2
Plan the design and color palette
Choose a simple design and 2–3 bold colors that contrast well. Sketch a rough outline on paper or directly on a wipeable surface to guide your first pass. Decide where to place the design (forehead, cheeks, nose) to maximize readability and minimize touching during application.
Tip: Use stencils for symmetry if you’re new to freehand drawing. - 3
Apply a light base layer
Start with a thin base to even the canvas. Use a flat brush or sponge to cover large areas in smooth, even strokes. Allow 30–60 seconds for the base to set before adding colors to prevent smudging.
Tip: Keep the brush or sponge almost dry – too much paint can bleed and blur edges. - 4
Block in main color shapes
Fill in the primary shapes with bold colors. Use quick, confident strokes and avoid overloading the brush. If a shape needs refinement, wait for it to dry slightly and re-clean the edge with a fine brush.
Tip: Work from the center outward to keep edges crisp. - 5
Add details and outlines
Outline with a fine brush in a darker shade for definition. Add white highlights to bring brightness and depth. Keep lines parallel and symmetrical for a polished look. Allow a brief dry time between layers to prevent color bleeding.
Tip: Practice steady hand positioning and relax your wrist for smoother lines. - 6
Seal lightly and finish cleanup
Optionally apply a light setting powder or spray to increase longevity. Clean brushes and wipes immediately after use to prevent dried paint. Provide a gentle removal plan with kid-friendly remover wipes or soap and water.
Tip: Test a tiny area of skin before full removal in case of sensitivities.
Your Questions Answered
Is face paint easy safe for kids?
Yes, with water-based, skin-tested paints and patch tests. Avoid harmful ingredients and use gentle removers. Always supervise children during application.
Yes—use skin-safe, water-based paints and patch tests. Supervise kids during application.
What is the best order to apply designs?
Begin with a base color, block large shapes, then add details. Let layers dry briefly to prevent bleeding and keep lines crisp.
Start with base color, then large shapes, followed by details while letting layers dry briefly.
How long does a typical face paint design last?
Most designs hold for 2–6 hours depending on skin type, activity, and products used. A light setting can extend wear without irritants.
Typically 2 to 6 hours, depending on activity and products used.
How should I remove face paint safely?
Use mild removers or soap and water. Gently wipe; avoid scrubbing. Moisturize skin after removal.
Gently remove with mild makeup remover or soap, then moisturize.
Can I use regular craft paints for face painting?
No. Regular acrylic or craft paints can irritate skin and cause allergic reactions. Use cosmetics-grade, skin-safe paints intended for the face.
Avoid craft paints; choose cosmetics-grade face paints only.
What designs work well for beginners?
Simple shapes like hearts, stars, moons, or masks with bold colors work best. They read well from a distance and are quick to apply.
Try hearts, stars, moons, or simple masks for quick, readable designs.
Watch Video
Quick Summary
- Start with a simple, bold design for face paint easy outcomes.
- Use skin-safe, water-based paints and patch tests for safety.
- Plan, block, and then detail for crisp lines and faster results.
- Finish with gentle removal and skin care post-design.