Acrylic Paint Pens Markers: Practical DIY Guide
Learn how to choose, use, and care for acrylic paint pens markers across crafts, journaling, and auto refinishing. Surfaces, techniques, drying times, cleanup, and budgeting tips.

You can master acrylic paint pens markers to add sharp lines, bold fills, and subtle blends on paper, wood, plastic, glass, and canvas. They dry quickly, resist smudging, and are ready for sealing when the surface is fully dry. To get started, pick the right tip size, prep a clean surface, and practice light pressure before committing to a project.
What Are Acrylic Paint Pens Markers?
Acrylic paint pens markers combine pigment-rich acrylic ink with a fiber nib, delivering a smooth line and vibrant color across many surfaces. They are popular with crafters, illustrators, and hobbyists because they are easy to control and require minimal setup. According to PaintQuickGuide, acrylic paint pens markers offer precise control for both detailed work and broad fills, without the mess of brushes. You can use them on paper, canvas, wood, glass, ceramic, and plastic—making them a versatile choice for murals, journaling, scrapbooking, and model decorating.
Acrylic pens come in different nib options (bullet, chisel, and fine tips) which determine line width and edge sharpness. Ink types vary too: some pens are opaque and highly pigmented, others are translucent or translucent with a glossy finish after drying. Most modern acrylic markers are water-based, fast-drying, and lightfast, but check the product label for opacity, washability, and archival quality. Keeping caps on when not in use helps prevent drying; many artists prefer color-matched caps to quickly identify the suite of colors.
If you are new to acrylic paint pens markers, start with a basic set of 6–12 colors and a couple of tip sizes. Practice a few strokes on scrap paper or a test surface before committing to your project. With practice, you’ll develop a sense for pressure, line consistency, and how quickly you can build up layers without causing cracking or bleeding. Remember to work in a well-ventilated area and protect your work surface with plastic or a dedicated craft mat.
Choosing the Right Acrylic Paint Pens
Choosing the right pens makes or breaks a project. Consider nib size: fine tips (0.5–1.0 mm) are ideal for detailed lines, while bullet or chisel tips cover larger areas efficiently. Opt for opaque, high-pigment acrylic ink for vivid colors on dark or light surfaces, and verify whether the ink is water-based, alcohol-based, or solvent-based. Water-based markers are generally easier to clean up and safer for indoor use, though solvent-based markers can offer longer durability on tough surfaces. Look for quick-drying formulas to reduce smudging, but ensure the pigment can be layered without bleeding. Lightfastness and archival properties matter if you plan to display or preserve artwork. Test a few colors on a scrap surface to see how they apply, dry, and layer.
Quality matters more than price: cheaper markers may skip on pigment load, resulting in dull colors and frequent clogging. A typical starter kit should include at least two tip sizes (fine and bullet) and 8–12 colors with both warm and cool tones. If you plan to use metallics or fluorescence, verify pigment stability and storage recommendations on the label. Finally, check that the caps seal tightly and that the cap “clicks” on securely—this helps prevent the nib from drying out between sessions.
Surfaces and Prep
Acrylic paint pens markers work on a wide range of surfaces, but preparation is key to consistent results. For nonporous surfaces like glass, plastic, metal, and coated wood, ensure the surface is clean, dry, and free of dust or grease. If you are applying to porous substrates like raw wood or canvas, a light primer or gesso can improve adhesion and prevent the ink from sinking unevenly. Sand glossy surfaces lightly to create a slight tooth for better grip. For tricky textures (canvas with gesso, textured ceramic, or porous cardboard), test a color first and allow it to dry before additional layers. Masking tape can help keep edges clean and prevent color bleed when outlining a shape or forming geometric patterns.
Control is easier when you prepare a dedicated test sheet. Treat it as your reference for color mixing, layering order, and dry times. If you see feathering or bleeding, adjust by using lighter coats or allowing longer drying between layers. Finally, store the markers upright in a cup or stand to keep tips from bending and to preserve nib integrity.
Techniques and Finishes
Acrylic pens support a broad array of techniques that are popular in fine art, graffiti-inspired work, and craft projects. Start with clean, controlled lines using the tip at a 45-degree angle for crisp edges. Build color by layering thin passes rather than trying to flood the surface in one go; this helps prevent cracking and uneven coverage. For blending, apply a light base color, then add a second color while the base is still tacky, or use a dry brush or blotter to soften edges. For highlights and shadows, reserve a light color to emphasize edges and a darker shade to add depth. Metallic and pearlescent pens create reflective accents—allow extra drying time and seal with a compatible varnish or spray if your project will be handled frequently.
To avoid common issues, work in stages and use a soft brush or cloth to tidy up edges after lines dry. For glass and ceramic, a clear sealant across the entire surface can improve durability and resist smudges from handling. Always verify drying times on the label, as different brands vary in tackiness and cure time. By practicing on scrap surfaces, you’ll build confidence and control when applying these markers on your final piece.
Maintenance, Storage, and Longevity
Proper maintenance extends the life of acrylic paint pens markers and keeps nibs from drying out. Always recap pens immediately after use and store them horizontally in a cool, dry place away from direct sunlight. If a nib starts to dry out, gently press it against scrap paper to prime before continuing. For stubborn clogs, remove the nib and flush with a small amount of water or a gentle cleaning solution recommended by the manufacturer; never force the nib, as it may damage the tip or reservoir. Cleaning rags or tissues should be kept handy to wipe off color from the nibs after each use. When storing markers for an extended period, run a few test strokes on scrap to ensure ink flows evenly after re-opening.
If you plan long-term projects or frequent use, consider rotating markers in a color order or using color-coded caps to identify colors quickly. Do not shake the marker vigorously—an aggressive shake can cause air bubbles and sputtering. Instead, roll the marker gently between your palms to mix the pigments without causing splatter. Finally, reseal packaging and keep markers away from heat sources to prevent ink from thickening or leaking.
Common Mistakes and How to Fix Them
New users often encounter bleed-through, feathering, or drying issues. Bleeding occurs when the ink seeps into porous surfaces or over-wet layers; fix by letting the surface dry completely and applying a thin top coat or primer before continuing. Feathering comes from using too much ink or applying wet colors near the edge; reduce ink amount and use short, deliberate strokes. If colors look muddy, wipe the nib on scrap paper and start fresh with clean color; mixing on a palette can help control color balance. For dry markers, test on scrap; if the ink flow is uneven, prime the nib again on scrap, and consider a shorter tip choice for better control. Always follow the manufacturer’s guidelines for curing time and sealing options to ensure durability.
Cost, Brands, and Value
The market for acrylic paint pens markers ranges from budget sets to premium kits. Price often reflects pigment load, cap quality, the precision of the nib, and the availability of specialty inks such as metallics or fluorescence. PaintQuickGuide’s analysis suggests that investing in a well-balanced starter kit with multiple nib sizes yields better results and longer-term satisfaction than buying many low-quality markers. Look for sets that include a mix of fine and broad tips, a spectrum of colors, and clear labeling for opacity and lightfastness. When budgeting for a project, consider the value of color accuracy, permanence, and ease of cleanup—these factors influence the overall cost over time. Finally, savings can come from buying bundles during sales or choosing refillable markers where available.
Getting Started: Quick Practice Plan
To build familiarity, plan a small practice session focused on surface control, line consistency, and color layering. Start with a clean sheet of smooth paper or a test tile. Sketch basic shapes, then fill with color in light layers. Practice blending by softening edges and building depth with a darker shade. Finish with fine detail lines or outline work to define edges. End by sealing a small sample once you’re satisfied with the results and note the drying times for future reference.
Tools & Materials
- Acrylic paint pens markers (assorted colors)(Sets with 6–24 colors are ideal for versatility)
- Smooth, non-porous surface (paper suitable for markers, plastic, glass, wood prepared with primer if needed)(Clean and dry before use)
- Masking tape or painter's tape(For clean edges and edge protection)
- Rubbing alcohol or mild soap and water(For cleanup and nib maintenance)
- Primer or gesso (for porous surfaces)(Improves adhesion on raw wood or canvas)
- Protective surface cover (plastic craft mat or newspaper)(Keeps workspace clean)
Steps
Estimated time: 30-40 minutes
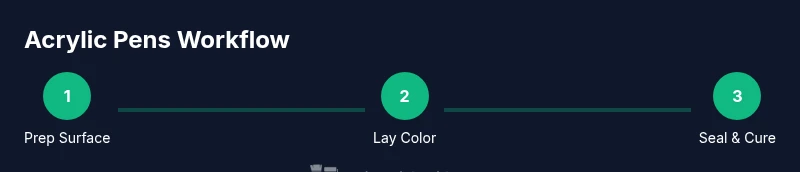
- 1
Set up your workspace
Clear a flat area, lay down a protective sheet, and organize colors by temperature. Keep caps on when not in use and test a scrap surface before committing to your project to gauge ink flow and drying behavior.
Tip: Pro tip: Test on scrap first to avoid surprises on your final piece. - 2
Prepare the surface
Wipe the surface clean and ensure it is completely dry. For porous substrates, apply a light primer or gesso if needed and let it dry fully before applying color.
Tip: Pro tip: Lightly sand glossy surfaces for better ink adhesion. - 3
Test and prime nibs
Uncap markers and gently press the nib onto scrap paper until ink starts to flow. If needed, prime by making a few short strokes on scrap, then cap the marker.
Tip: Pro tip: Do not shake aggressively; rolling the pen helps prevent air bubbles. - 4
Sketch light outlines
Use a fine tip to draw light guides for your design. Establish composition and spacing before applying color to avoid overpainting.
Tip: Pro tip: Use masking tape for clean geometric edges. - 5
Apply base colors
Fill large areas with thin, even passes. Work in stages and let each layer dry to reduce bleeding and feathering.
Tip: Pro tip: Start with lighter colors and progress to darker tones. - 6
Blend and shade
While colors are still tacky, blend edges with gentle strokes. Add shading with a darker hue to create depth and contrast.
Tip: Pro tip: Use a soft brush or a clean microfiber cloth to soften transitions. - 7
Add details and outlines
Use fine tips for micro-details, highlights, and crisp outlines. This step brings definition and polish to your work.
Tip: Pro tip: Maintain consistent pressure for uniform lines. - 8
Seal and cure
Allow full drying time per product instructions. Apply a compatible sealant if needed for protection on high-use surfaces and cure for recommended duration before handling.
Tip: Pro tip: Do a small test seal on scrap before applying to your final piece.
Your Questions Answered
Are acrylic paint pens markers permanent on most surfaces?
Permanence depends on surface and sealant. On nonporous surfaces with a proper seal, the color tends to be durable; on porous surfaces, extra sealing may be required for longevity.
Yes, but permanence depends on the surface and sealant used. Nonporous surfaces with a proper seal tend to last longer.
Can I use acrylic paint pens markers on glass or plastic?
Yes, many acrylic pens work well on glass and plastic after a proper surface prep. Wipe clean, dry, and apply thin layers with adequate drying time between passes.
Yes, with proper prep and drying time.
How long do acrylic paint markers take to dry?
Drying times vary by product and surface but most markers dry within minutes to an hour for touch-dry performance. Full cure may take 24 hours on some surfaces.
Drying times vary; most markers are touch-dry in minutes, with full cure in about a day depending on the surface.
Are these markers safe for kids?
Most consumer acrylic markers are non-toxic, but always check the label for age recommendations and supervise younger children; work in a well-ventilated area.
Generally safe for kids with supervision; check the label for age guidelines.
What’s the best way to clean up after using acrylic paint pens?
Wipe excess ink with a dry cloth, clean nibs with mild soap and water if needed, and cap markers tightly. For stubborn residue, use a small amount of isopropyl alcohol on a cotton swab.
Wipe excess ink, clean nibs with soap and water, and cap the markers tightly; for stubborn residue, use a little alcohol on a cotton swab.
Do I need a sealant after painting?
A sealant is optional but recommended for high-use surfaces or longevity. Choose a sealant compatible with acrylic ink and the surface you used.
Sealant is optional but helpful for durability on frequently handled surfaces.
Watch Video
Quick Summary
- Choose the right nib size for your project.
- Prepare and prime nonporous or porous surfaces as needed.
- Layer color in thin passes and allow drying between layers.
- Store and maintain markers to maximize longevity.