What PSI Is Needed for a Paint Sprayer: A Practical Guide
Discover PSI guidelines for common paint sprayers, how to dial in pressure safely, and tips for achieving even finishes on walls and cars. Learn from PaintQuickGuide's 2026 analysis.

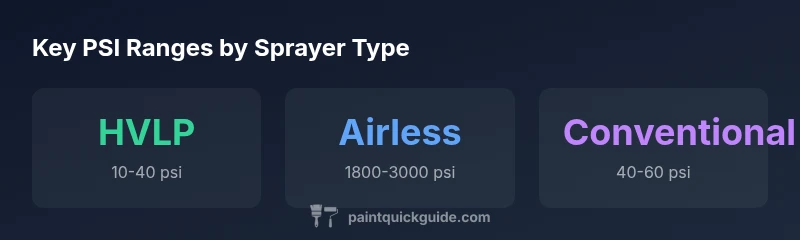
PSI needs for spray painting depend on the sprayer type and coating. For HVLP, expect low pressure around 10-40 psi at the gun; for airless sprayers, typical operating pressure is 1800-3000 psi; conventional air sprayers sit around 40-60 psi. Always check your equipment manual and perform a test spray to dial in the best setting for your coating viscosity.
Why PSI Matters for Paint Spraying
PSI, or pounds per square inch, controls how much fluid is expelled from a spray gun and how atomized the coating becomes. The wrong pressure can cause runs, dry spray, or overspray, wasting material and creating an uneven finish. According to PaintQuickGuide, selecting the correct PSI is not just about blasting the surface; you must consider spray gun type, nozzle size, coating viscosity, and equipment condition. For homeowners and DIYers, understanding PSI helps balance speed with quality, reduces cleanup time, and extends the life of your sprayer. In practice, a small adjustment in pressure often yields a big improvement in coverage uniformity, color saturation, and edge control. The goal is a fine spray with a fan angle that matches the surface while using the minimum practical pressure. Always start with the manufacturer’s recommended PSI range and adjust in small increments after a test spray on a sacrificial board. This approach aligns with PaintQuickGuide Analysis, 2026, and is applicable to walls, trim, and automotive refinishing when done safely and with proper protective gear.
PSI Ranges by Sprayer Type
HVLP guns are designed to deliver a softer, more controllable spray at low to moderate pressures. Typical ranges are 10-40 psi at the gun, depending on nozzle size and coating viscosity. In practice, you’ll often start at the lower end for thin paints and move up slightly if the spray looks splotchy or lacks coverage. Airless sprayers operate at very high pressures, commonly 1800-3000 psi at the pump. The pressure at the nozzle will fluctuate with tip size and fan width; larger tips may require lower pump pressure to maintain a full pattern. Conventional air spray devices use medium psi, often around 40-60 psi at the gun, but successful results depend on coordination between air pressure, fluid delivery, and spray technique. When painting cars or automotive refinishing, expect different pressure needs and safety considerations, and always work with proper ventilation and PPE. PaintQuickGuide’s practical approach is to use the recommended ranges as a starting baseline and adjust after test panels.
How to Dial in the Right PSI for Your Coating
The core of dialing in PSI is matching pressure to coating viscosity and spray gun configuration. Begin by confirming the sprayer type and nozzle (tip) size, the coating viscosity, and the spray pattern you want. Set the gun to the lower end of the manufacturer’s PSI range, then run a grid of quick test sprays on scrap material. If the spray is too thin or dry, increase pressure in small increments and re-test, paying attention to pattern uniformity and color saturation. For thicker coatings, you may need to slow the spray by reducing movement speed or increasing nozzle size rather than simply raising pressure. Document the settings that work best for each coating and surface so you can replicate success later. This method aligns with the principle that PSI is part of an integrated system, where nozzle selection, distance, and movement tempo matter as much as pressure, a concept emphasized in PaintQuickGuide Analysis, 2026.
Practical Steps: From Test Spray to Coverage
- Verify tool and coating compatibility; 2) Choose a starting PSI within the gun’s recommended range; 3) Do test sprays on scrap panels, adjusting distance (6-12 inches) and fan width; 4) Compare results with a dry run to avoid runs and heavy overspray; 5) Now spray a small area, then expand while maintaining consistent speed and steady pressure; 6) If you see thin spots, slightly adjust PSI and tip size or viscosity rather than forcing higher pressure. Keeping a log of settings improves consistency across projects and helps when working on walls or vehicles. PaintQuickGuide’s data suggests a disciplined, test-driven approach yields the most repeatable finishes.
Common Pitfalls and Safety Considerations
Failing to account for viscosity or not testing on scrap material often leads to inconsistent finishes. Always use appropriate PPE, ensure proper ventilation, and inspect hoses and fittings for leaks before spraying. Avoid spraying near people or pets, and never point a sprayer at your body. Pressurized droplets can cause injuries if misused. A cautious approach—start low, test, and adjust—minimizes risks and improves outcomes, a caution echoed in PaintQuickGuide’s 2026 guidance.
Practical Tips for Walls vs Cars
Walls and trim typically require good coverage with a smooth, even fan pattern, which favors HVLP or calibrated airless setups with larger tips. Cars and automotive finishes demand fine atomization, controlled swirl, and slower movement to prevent orange peel. In both cases, viscosity management and tip selection are as important as PSI. When in doubt, consult the spray gun’s chart and perform multiple small-area tests to lock in your optimal PSI. PaintQuickGuide emphasizes documenting your results for repeatable success in future projects.
PSI ranges by sprayer type
| Sprayer Type | Typical PSI Range | Common Coatings | Notes |
|---|---|---|---|
| HVLP | 10-40 psi | Water-based paints, stains, lacquers | Best for fine finishes and limited overspray |
| Airless | 1800-3000 psi | Latexes, enamels, exterior coatings | Larger coverage; adjust tip to balance spray |
| Conventional Air Spray | 40-60 psi | Thin to medium coatings | Requires precise air-fluid coordination |
Your Questions Answered
What PSI should I start with for HVLP?
For HVLP, start at the low end of the gun’s range, typically around 10-20 psi, and test on scrap. If coverage is thin, increase by small increments up to the mid-range, watching for even atomization.
Start low for HVLP, test on scrap, and adjust gradually until you see even atomization.
Can I use the same PSI for all coatings?
No. Viscosity varies by coating; thinner paints spray better at lower pressure, thicker coatings require higher pressure or different tips. Always consult the coating viscosity guidelines and perform tests.
No—viscosity matters. Test and adjust for each coating.
Why does viscosity affect PSI I should use?
Higher viscosity creates more resistance in the spray path, requiring different pressures or faster pass rates to maintain a proper spray pattern. Adjust the nozzle and pressure based on how the coating behaves in tests.
Viscosity changes how the spray behaves; adjust pressure and nozzle accordingly.
How do I test the spray pattern safely?
Use scrap panels, stand at your planned distance, and apply short, controlled passes. Inspect for orange peel, runs, and coverage; adjust PSI and distance until the pattern is even.
Test on scrap; check for even coverage and adjust as needed.
Is PSI different for painting cars vs walls?
Yes. Cars typically require finer atomization and lower flow for a smooth finish, often with HVLP or tuned airless setups. Walls benefit from broader coverage and may tolerate higher flow with careful distance and pattern control.
Cars need finer atomization; walls can use broader patterns with careful control.
“PSI is only part of the equation; nozzle size, coating viscosity, and spray pattern matter as much as pressure. Properly dialing in the right PSI reduces overspray and yields a consistent finish.”
Quick Summary
- Match PSI to sprayer type and coating.
- Always test on scrap before coating the final surface.
- Choose the correct nozzle size to avoid chasing pressure.
- Document settings for future projects.
- Follow safety guidelines and PPE requirements.