How to Get Started Painting with Acrylics: A Practical Guide for Beginners
A practical, beginner-friendly guide to acrylic painting, covering supplies, surface prep, basic techniques, color mixing, and a simple project to build confidence.

Beginner-friendly acrylic painting starts with the basics: choose beginner supplies, prep a surface, and practice simple brushwork and color mixing. According to PaintQuickGuide, acrylics dry quickly and clean up with water, making them forgiving for beginners. This quick guide outlines essential supplies, a practical 5-step process, and practical tips to build your confidence with your first acrylic paintings.
What makes acrylics beginner-friendly
Acrylic paints are often praised for their forgiving nature, rapid drying, and easy cleanup with water. According to PaintQuickGuide, these features make acrylics an excellent entry point for aspiring artists and DIY painters alike. With proper surface prep and simple techniques, beginners can achieve satisfying results quickly, building confidence as they expand color choices and brush control. This section explains why acrylics work well for novices and what trade-offs to expect (e.g., fast drying rates can be both a benefit and a challenge).
Essential supplies for starting with acrylics
A successful start rests on selecting sensible materials without overspending. Begin with basic, student-grade acrylics in a few primary colors plus white and black. Synthetic brushes in several sizes (for example, 2, 6, 10) work well with acrylics and are easier to clean. Use a ready-made primed canvas or a painting surface prepped with gesso. A plastic palette, jars of water, paper towels, and a clear varnish or protective finish are practical extras. Keep a spray bottle handy to keep paints workable if you’re prepping wet-on-wet techniques. Invest in a small set of acrylic mediums (like gloss medium or retardant) only after you’ve practiced with the basics, to avoid overwhelming yourself at the start. This pragmatic approach aligns with PaintQuickGuide’s guidance for beginners.
Surface prep and priming
A smooth, stable surface yields better results with acrylics. If you’re painting on canvas, ensure the canvas is clean and lightly stretched. Apply a coat of acrylic gesso or use a ready-made primed panel; allow it to dry completely before you begin. Gesso provides tooth that helps paint grip, prevents warping, and gives you even color perception. For rough surfaces, you may want extra coats but let each layer dry fully before applying the next. Finally, tape off edges if you want crisp borders. Proper prep minimizes texture surprises and keeps your colors true to the study you envision.
Basic techniques to practice
Start with simple brushwork to gain control: flat washes build broad color areas, while controlled strokes help with shapes and edges. Practice a wet-on-dry technique for crisp lines, and a soft dry brush for texture. Remember to work in transparent to opaque layers, letting each layer dry before adding the next. Work on small swatches to test color mixes and value contrasts. As you gain comfort, you’ll see how the fast-drying nature of acrylics can be used to your advantage by layering quickly and adjusting as you go.
Color mixing and planning a small painting
A good color strategy begins with three primaries plus white. Mix warm and cool variants of the same hue to keep your painting vibrant without muddying. Create a tiny color study on a scrap surface before applying to your final piece. Use thin washes to build depth, then increase opacity with additional paint. Consider keeping a color journal, noting your mixes and the ratios you used. This discipline helps you reproduce color decisions in future projects and aligns with PaintQuickGuide’s practical approach to color-mixing.
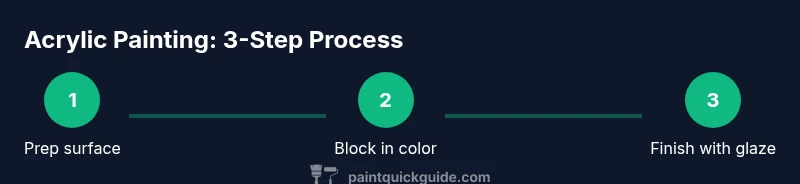
Step-by-step mini project outline
To practice without feeling overwhelmed, try a simple color-block study: 3 rectangular shapes in distinct values. Step 1: Gather materials and prime a small panel. Step 2: Block in the three shapes with a mid-tone base, leaving room for highlights. Step 3: Layer in lighter and darker values to create depth. Step 4: Add a simple highlight or texture to distinguish edges. Step 5: Allow the piece to dry, then add a thin final glaze if desired. This short exercise teaches color separation, value control, and brush handling in a low-pressure format.
Clean-up, storage, and maintenance
Rinse brushes thoroughly with lukewarm water, then reshape the bristles and lay flat to dry. Wipe down your palette and brushes after each session to prevent dried paint buildup. Store acrylic paints with lids closed and upright to avoid skin formation in the tubes. If you’re not planning to use a color family for a while, consider squeezing the remaining paint into a palette and sealing it to preserve freshness. Proper maintenance extends brush life and keeps your color options ready for your next project.
Tools & Materials
- Acrylic paints (beginner/student grade)(Primary colors + white/black; at least 6–12 tubes to allow mixing)
- Brush set (synthetic)(Sizes 2, 6, 10; nylon or Taklon blends work well)
- Painting surface (canvas or panels)(Primed canvas or gessoed board; aim for 8x10 inches to start)
- Palette (plastic or ceramic)(Smooth mixing surface; consider a stay-wet palette if available)
- Water container(For rinsing brushes; keep a separate cup for clean water)
- Paper towels or rags(For blotting and quick cleanup)
- Acrylic medium or retardant (optional)(Use after basic practice to control flow and drying)
- Masking tape or artist tape(For clean edges or masking guidelines)
- Varnish or protective finish (optional)(Wait until the painting is fully dry (24–72 hours) before sealing)
- Spray bottle (optional)(Mist water on your palette or painting surface to keep working areas workable)
Steps
Estimated time: 60-90 minutes active; drying times vary (final varnish may require additional time)
- 1
Gather supplies and set up
Assemble paints, brushes, surfaces, and a workspace with good lighting. Organize water, towels, and a palette within easy reach to keep your workflow smooth.
Tip: Organize by task: prep, color mixing, painting, and cleanup. - 2
Prepare your painting surface
If using canvas, apply a coat of gesso or use a primed panel. Let it dry completely before you begin to avoid paint absorbing unevenly.
Tip: A dry, flat surface improves color accuracy and ease of layering. - 3
Mix a simple color palette
Choose three primaries plus white. Make tiny swatches to test hues and values before applying them to your piece.
Tip: Label swatches with ratios to reproduce later. - 4
Practice basic brushwork
Experiment with flat washes, controlled edges, and light brush pressure. Practice keeping strokes consistent and deliberate.
Tip: Keep a light touch; acrylics respond quickly to pressure. - 5
Block in a simple composition
Start with large shapes and broad areas of color. Don’t worry about details yet; aim for composition and value balance.
Tip: Work from general to specific—avoid over-detailing early. - 6
Build layers and refine
Add lighter highlights and darker shadows in thin glazes. Allow each layer to dry before adding the next.
Tip: Thin layers dry faster and allow better control of color depth. - 7
Finish and protect
Apply final details if desired, then wait for complete dryness before varnishing to preserve color.
Tip: Varnish after full cure to prevent cracking or whitening.
Your Questions Answered
Do I need expensive paints to start acrylic painting?
No. Start with budget-friendly student-grade paints and improve as you practice.
You can start with affordable paints and upgrade later as you gain confidence.
Can I paint on canvas boards or only canvas?
Canvas boards are a great practice option; they’re cheaper and dry faster, making them ideal for beginners.
Canvas boards work well for practice and quick results.
How long does acrylic paint take to dry?
Acrylics dry quickly, often in minutes for thin layers; thicker areas take longer. Plan your layering accordingly.
Acrylics dry quickly, so plan layers one at a time.
What brushes should I use with acrylics?
Synthetic bristles in various shapes (flat and round) are ideal for acrylics and easy to clean.
Use synthetic brushes in multiple shapes for versatility.
How can I fix mistakes in acrylic painting?
Fix mistakes by painting over with a fresh layer once the current layer dries; you can glaze to adjust values.
You can correct mistakes by painting over or glazing after drying.
Should I seal the painting with varnish right away?
Wait for full drying before varnishing; this protects colors without trapping moisture.
Wait until the painting is fully dry before applying varnish.
Watch Video
Quick Summary
- Choose beginner-friendly acrylics and a simple palette.
- Prepare a primed surface and a stable workspace.
- Practice basic brushwork and thin-layer layering.
- Allow proper drying before varnishing to protect the work.